Chilkey Slice75 HE – Hall-effect Mechanical Keyboard Reviewed
The Slice 75 is, in spirit, a hall-effect version of the ND75 I’ve just tested. While you could – at a glance – confuse one for the other, the devil is in the details. The most prominent of those details being the Slice75’s hall-effect switches and the customisable responsiveness and breadth of features they bring with them.
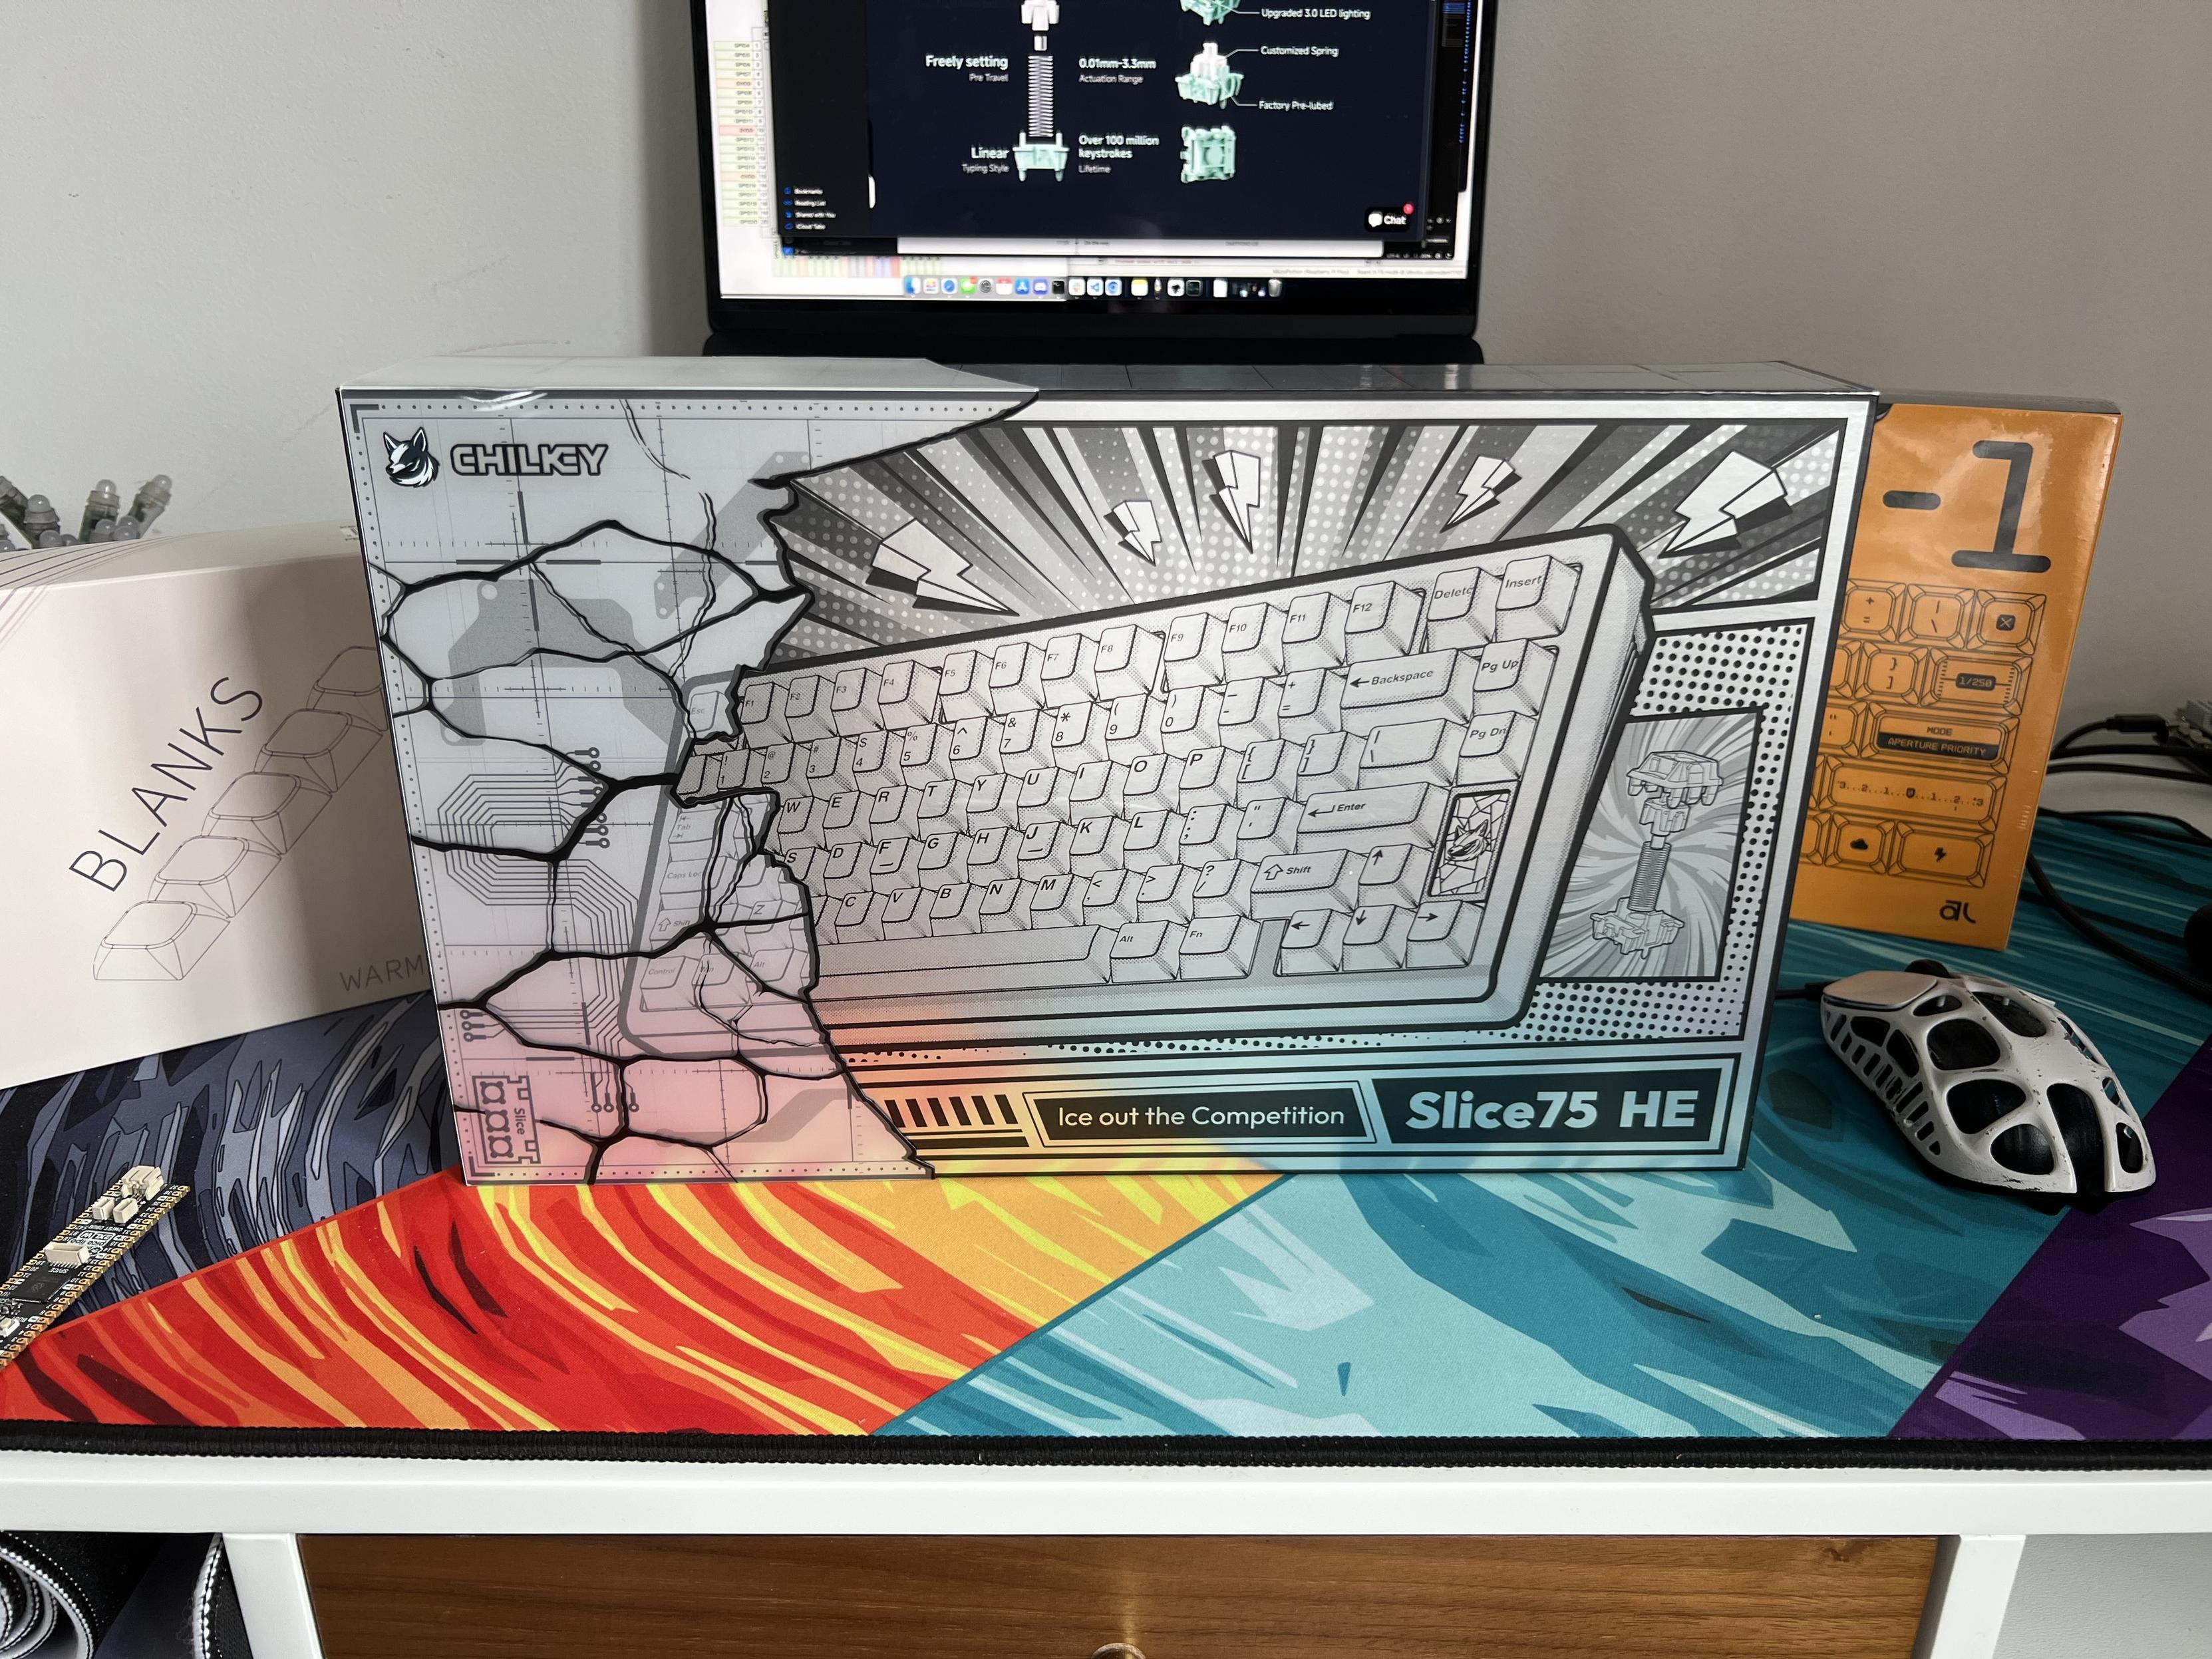
Spectacular box for the Slice75 HE, all silver and shiny!
Slice 75 HE is a wired-only, hefty hunk of aluminium in a 75% (81-key), ANSI layout with a beautifully understated geometric pattern on the bottom (what would be the weight in traditional parlance), clean white-on-black Cherry style keycaps and a little front badge detail for personality.
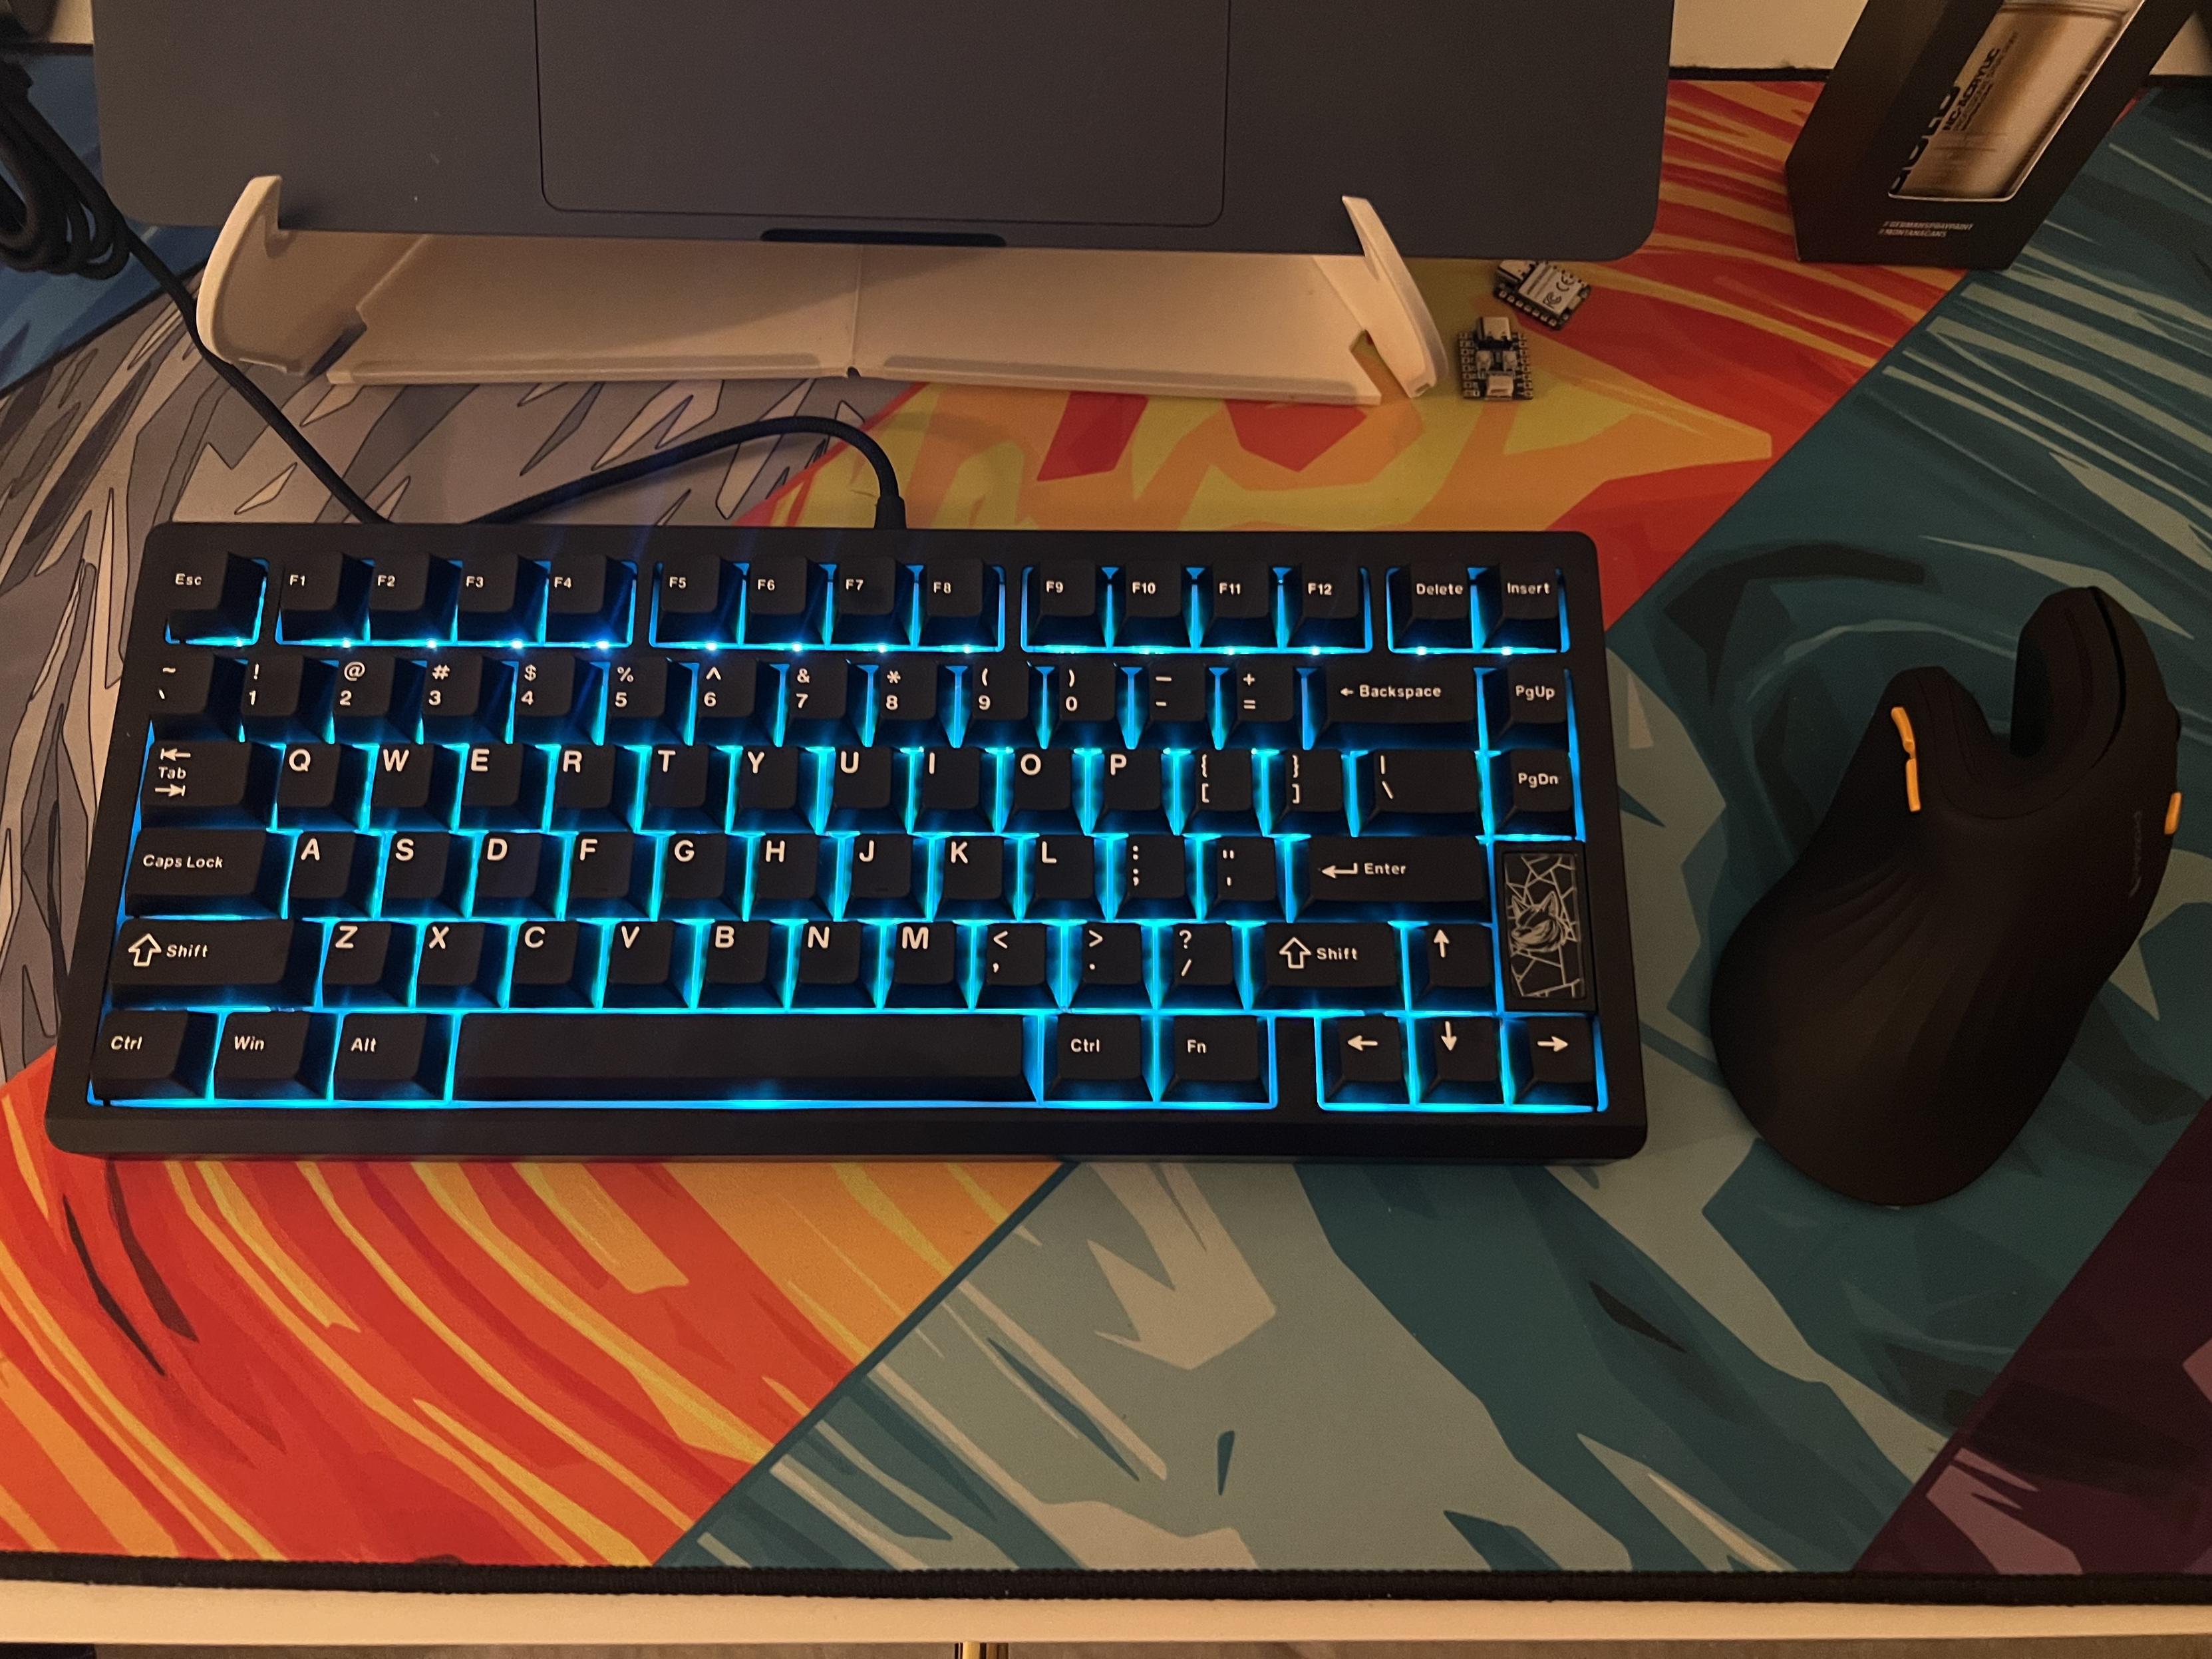
Stock Chilkey Slice 75. Getting some real mileage out of this deskmat too 🤣
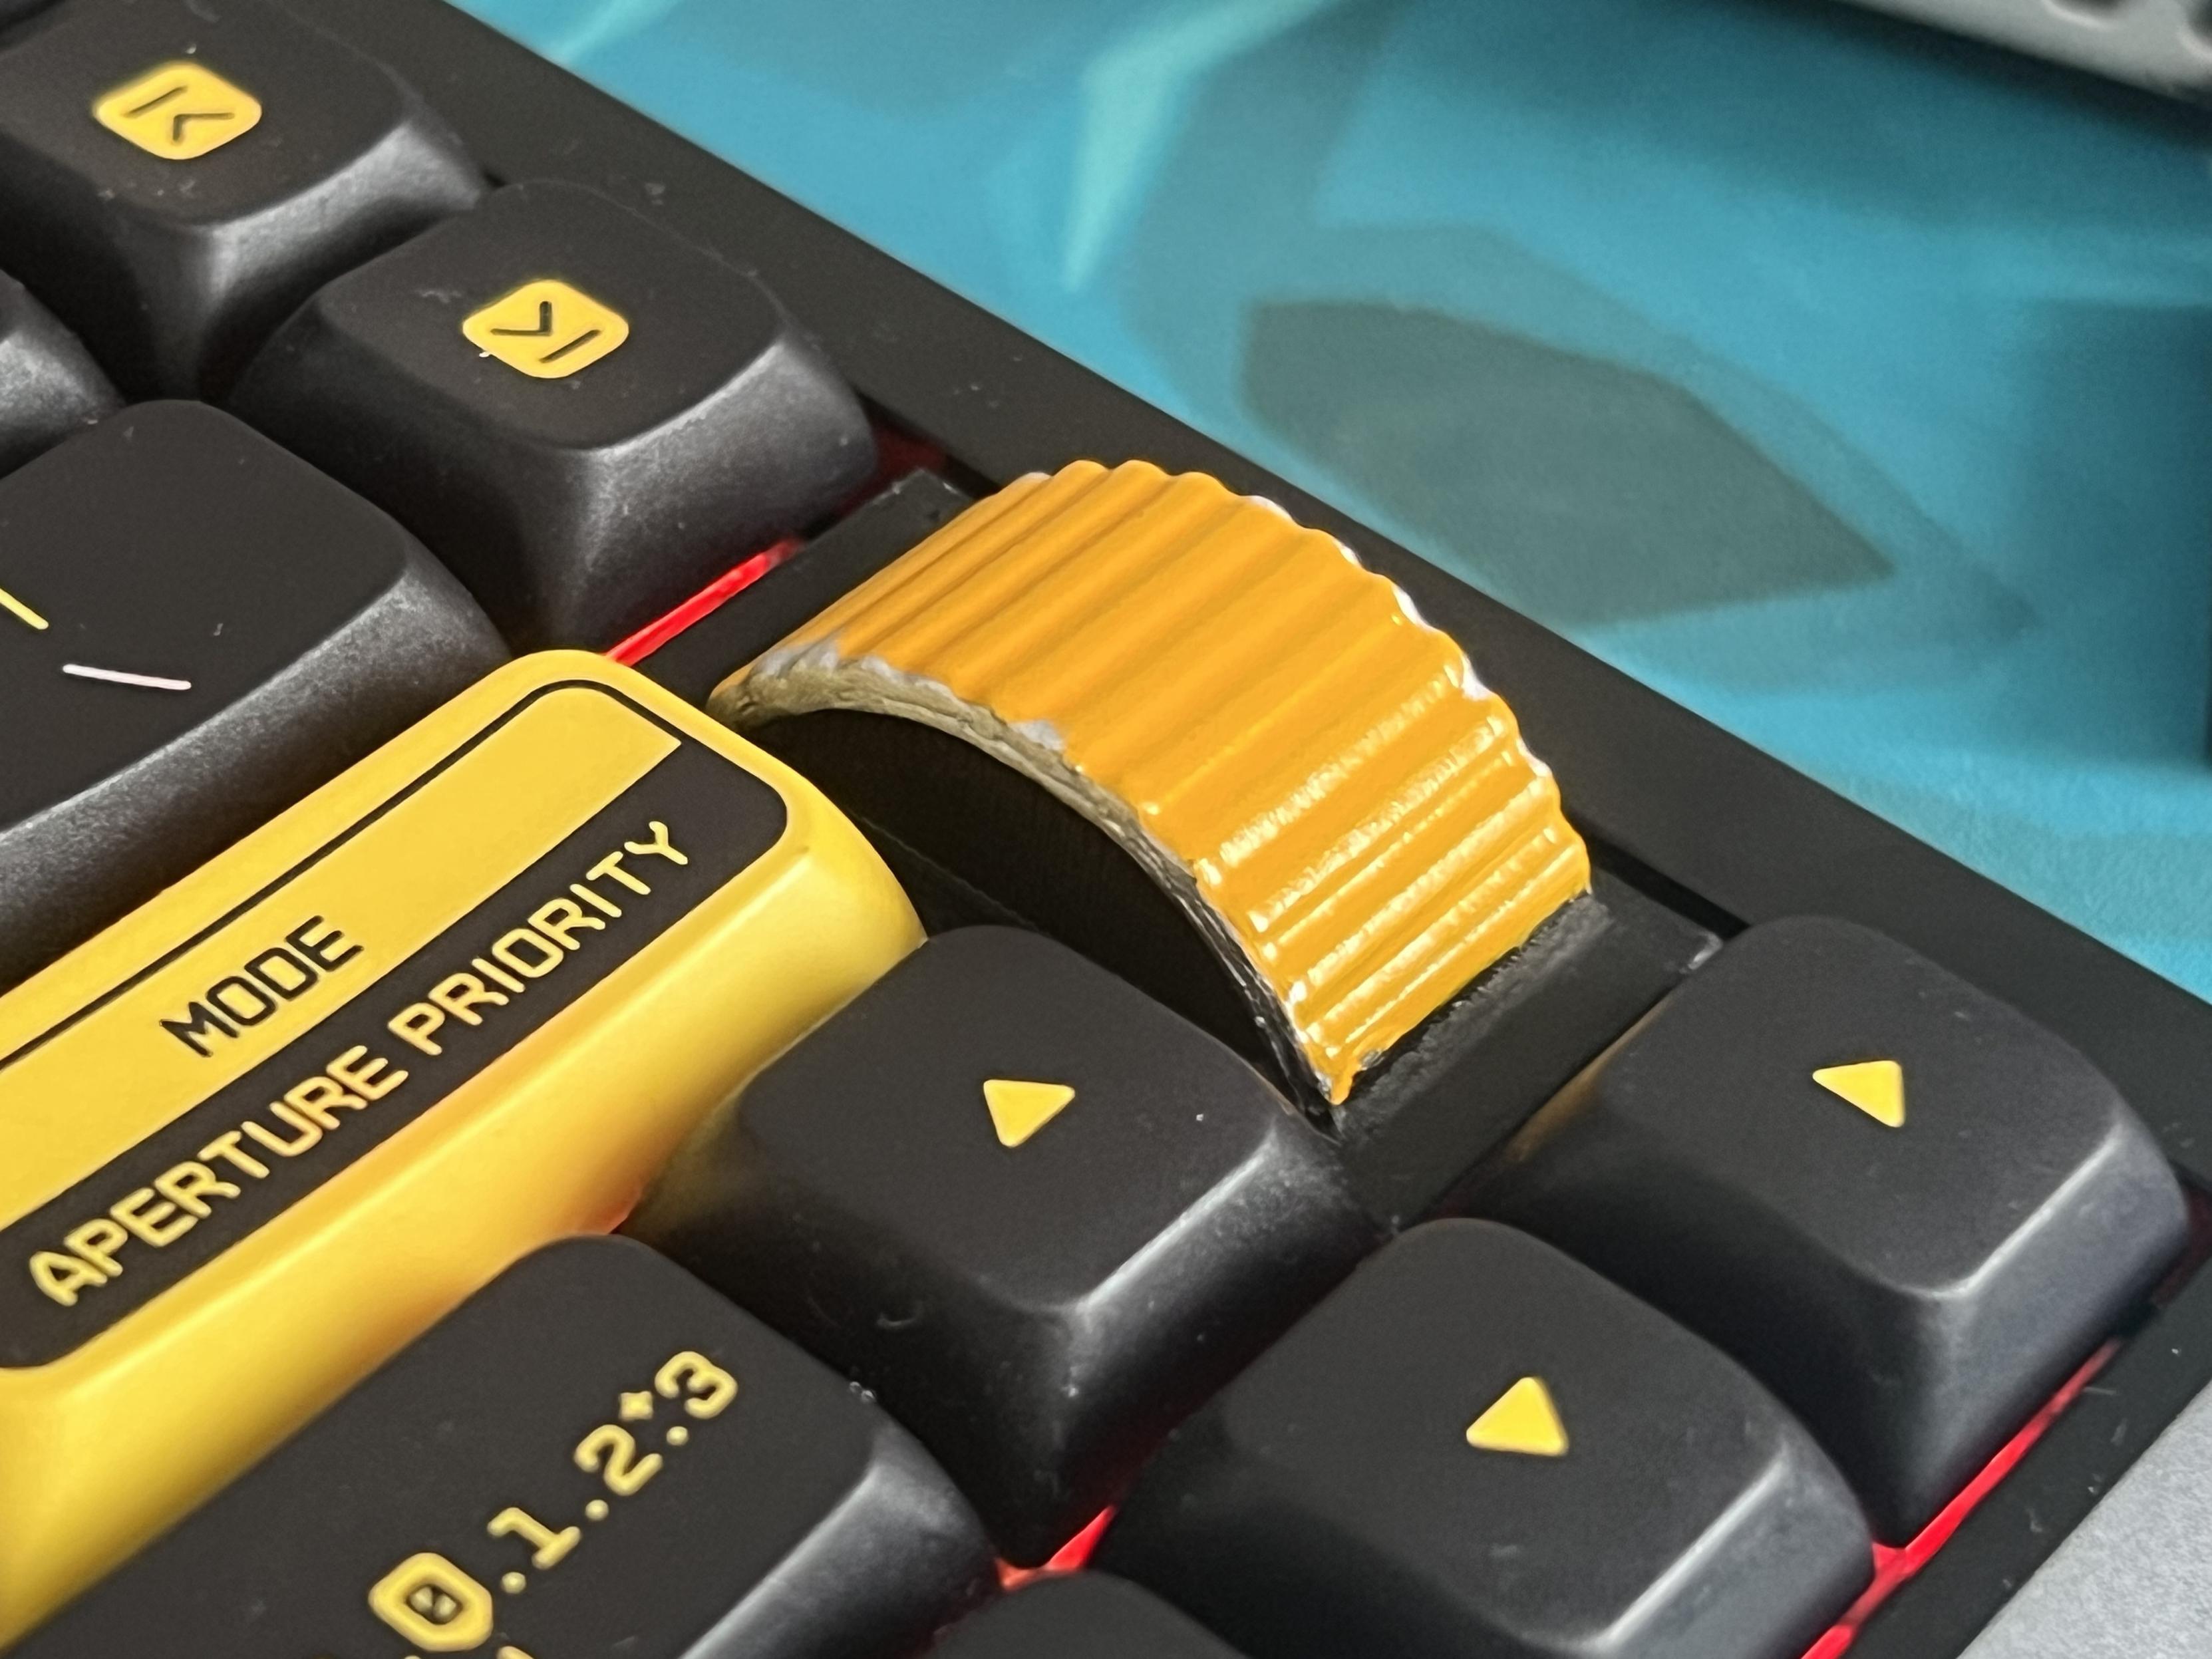
While it’s aimed at gamers, the delicate clacky crackle of the keys should delight any typist, offering acoustic feedback that balances the silent, linear nature of hall-effect switches. It is, without a doubt, a joy to use. With the help of some PBS Aperture Priority keycaps (By no means a requirement, but I find the Cherry profile a little harsh and angular) it has become my daily driver and easily places in my top five keyboards (lack of ISO layout being its biggest weakness!).
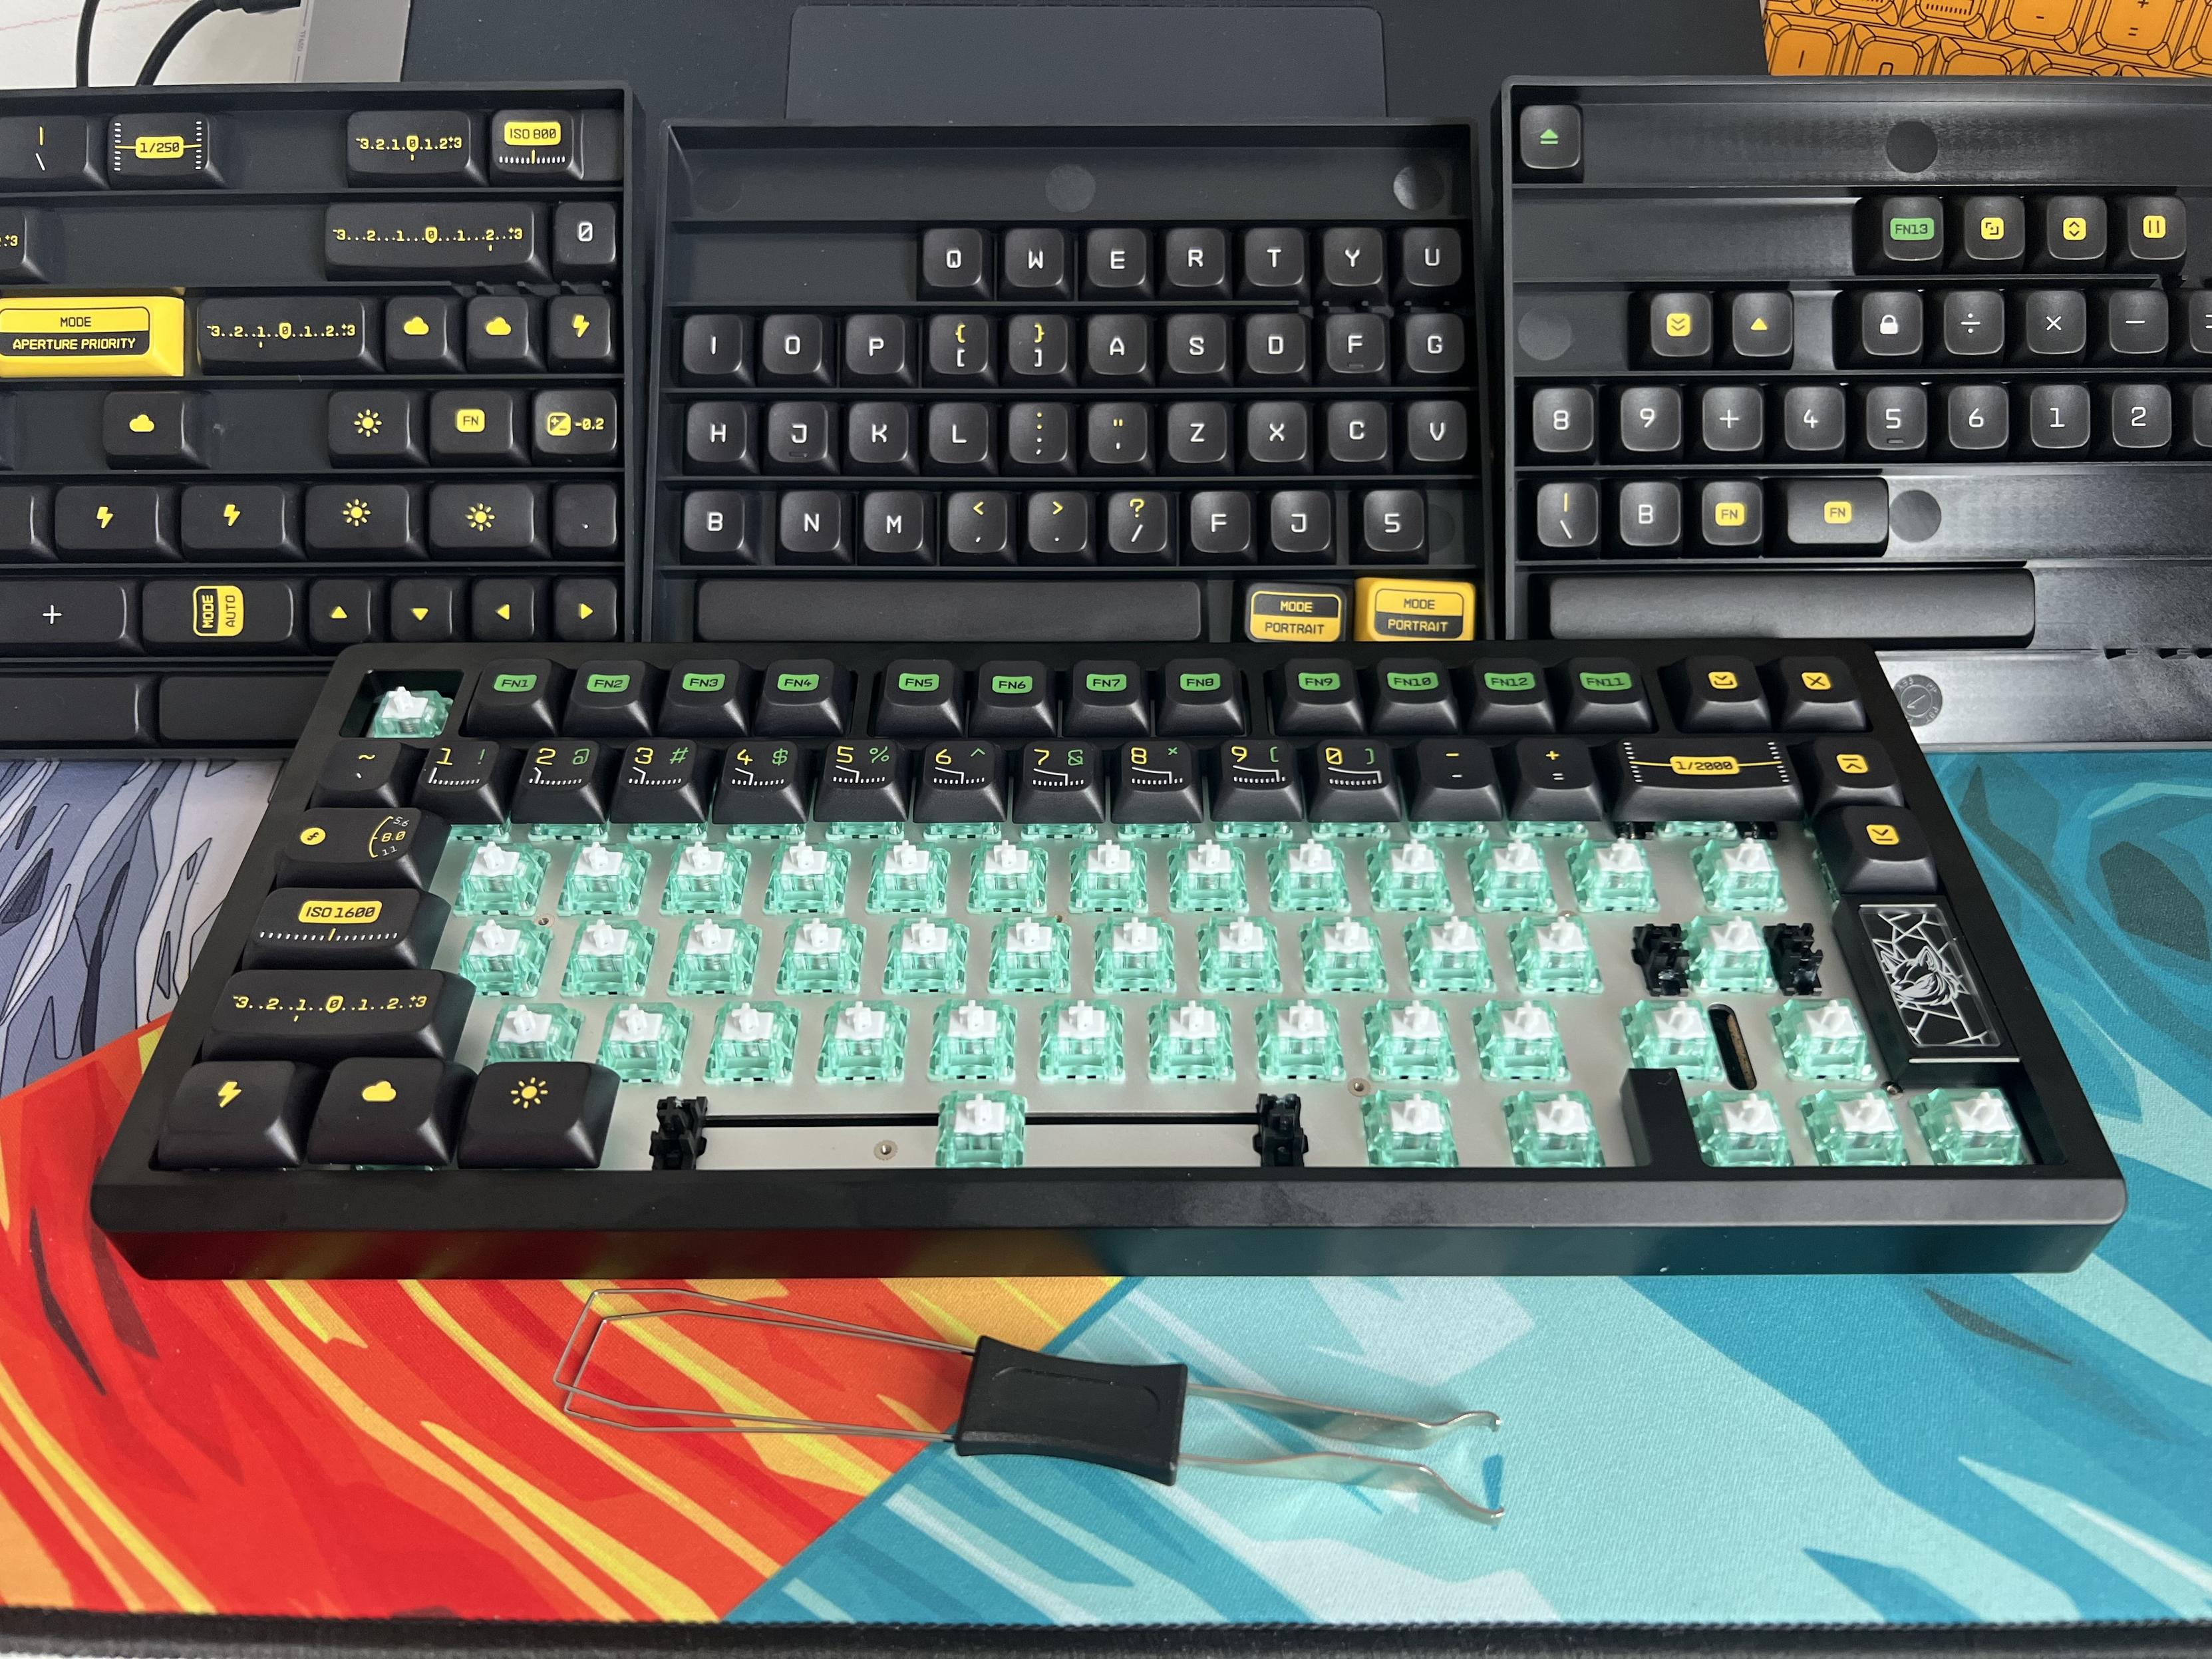
This absolutely cracking set is going on the Chilkey Slice75 HE!
Build
Like the ND75 – with which the Slice 75 shares more than a passing familiarity – the Slice 75 offers a tool-free opening mechanism, using cabinet catches to secure the top half of the case to the bottom. This time, however, they’re silver – a subtle change that blends them better with the rest of the board. They’re also secured with torx bolts, a much more visually appealing alternative to crosshead screws which – let’s be honest – tend to look cheap. Torx might be maligned among those who don’t have an extensive screwdriver collection (I have this one Torx driver I keep handy that seems to fit 99% of cases) but they’re much less prone to stripping. The catches still require a deliberate push on the keybed to get the right leverage to open them up, but this is probably a good thing- picking up the keyboard from the edge does not cause the hefty base to drop out. It’s a hefty board, so those are some solid catches!
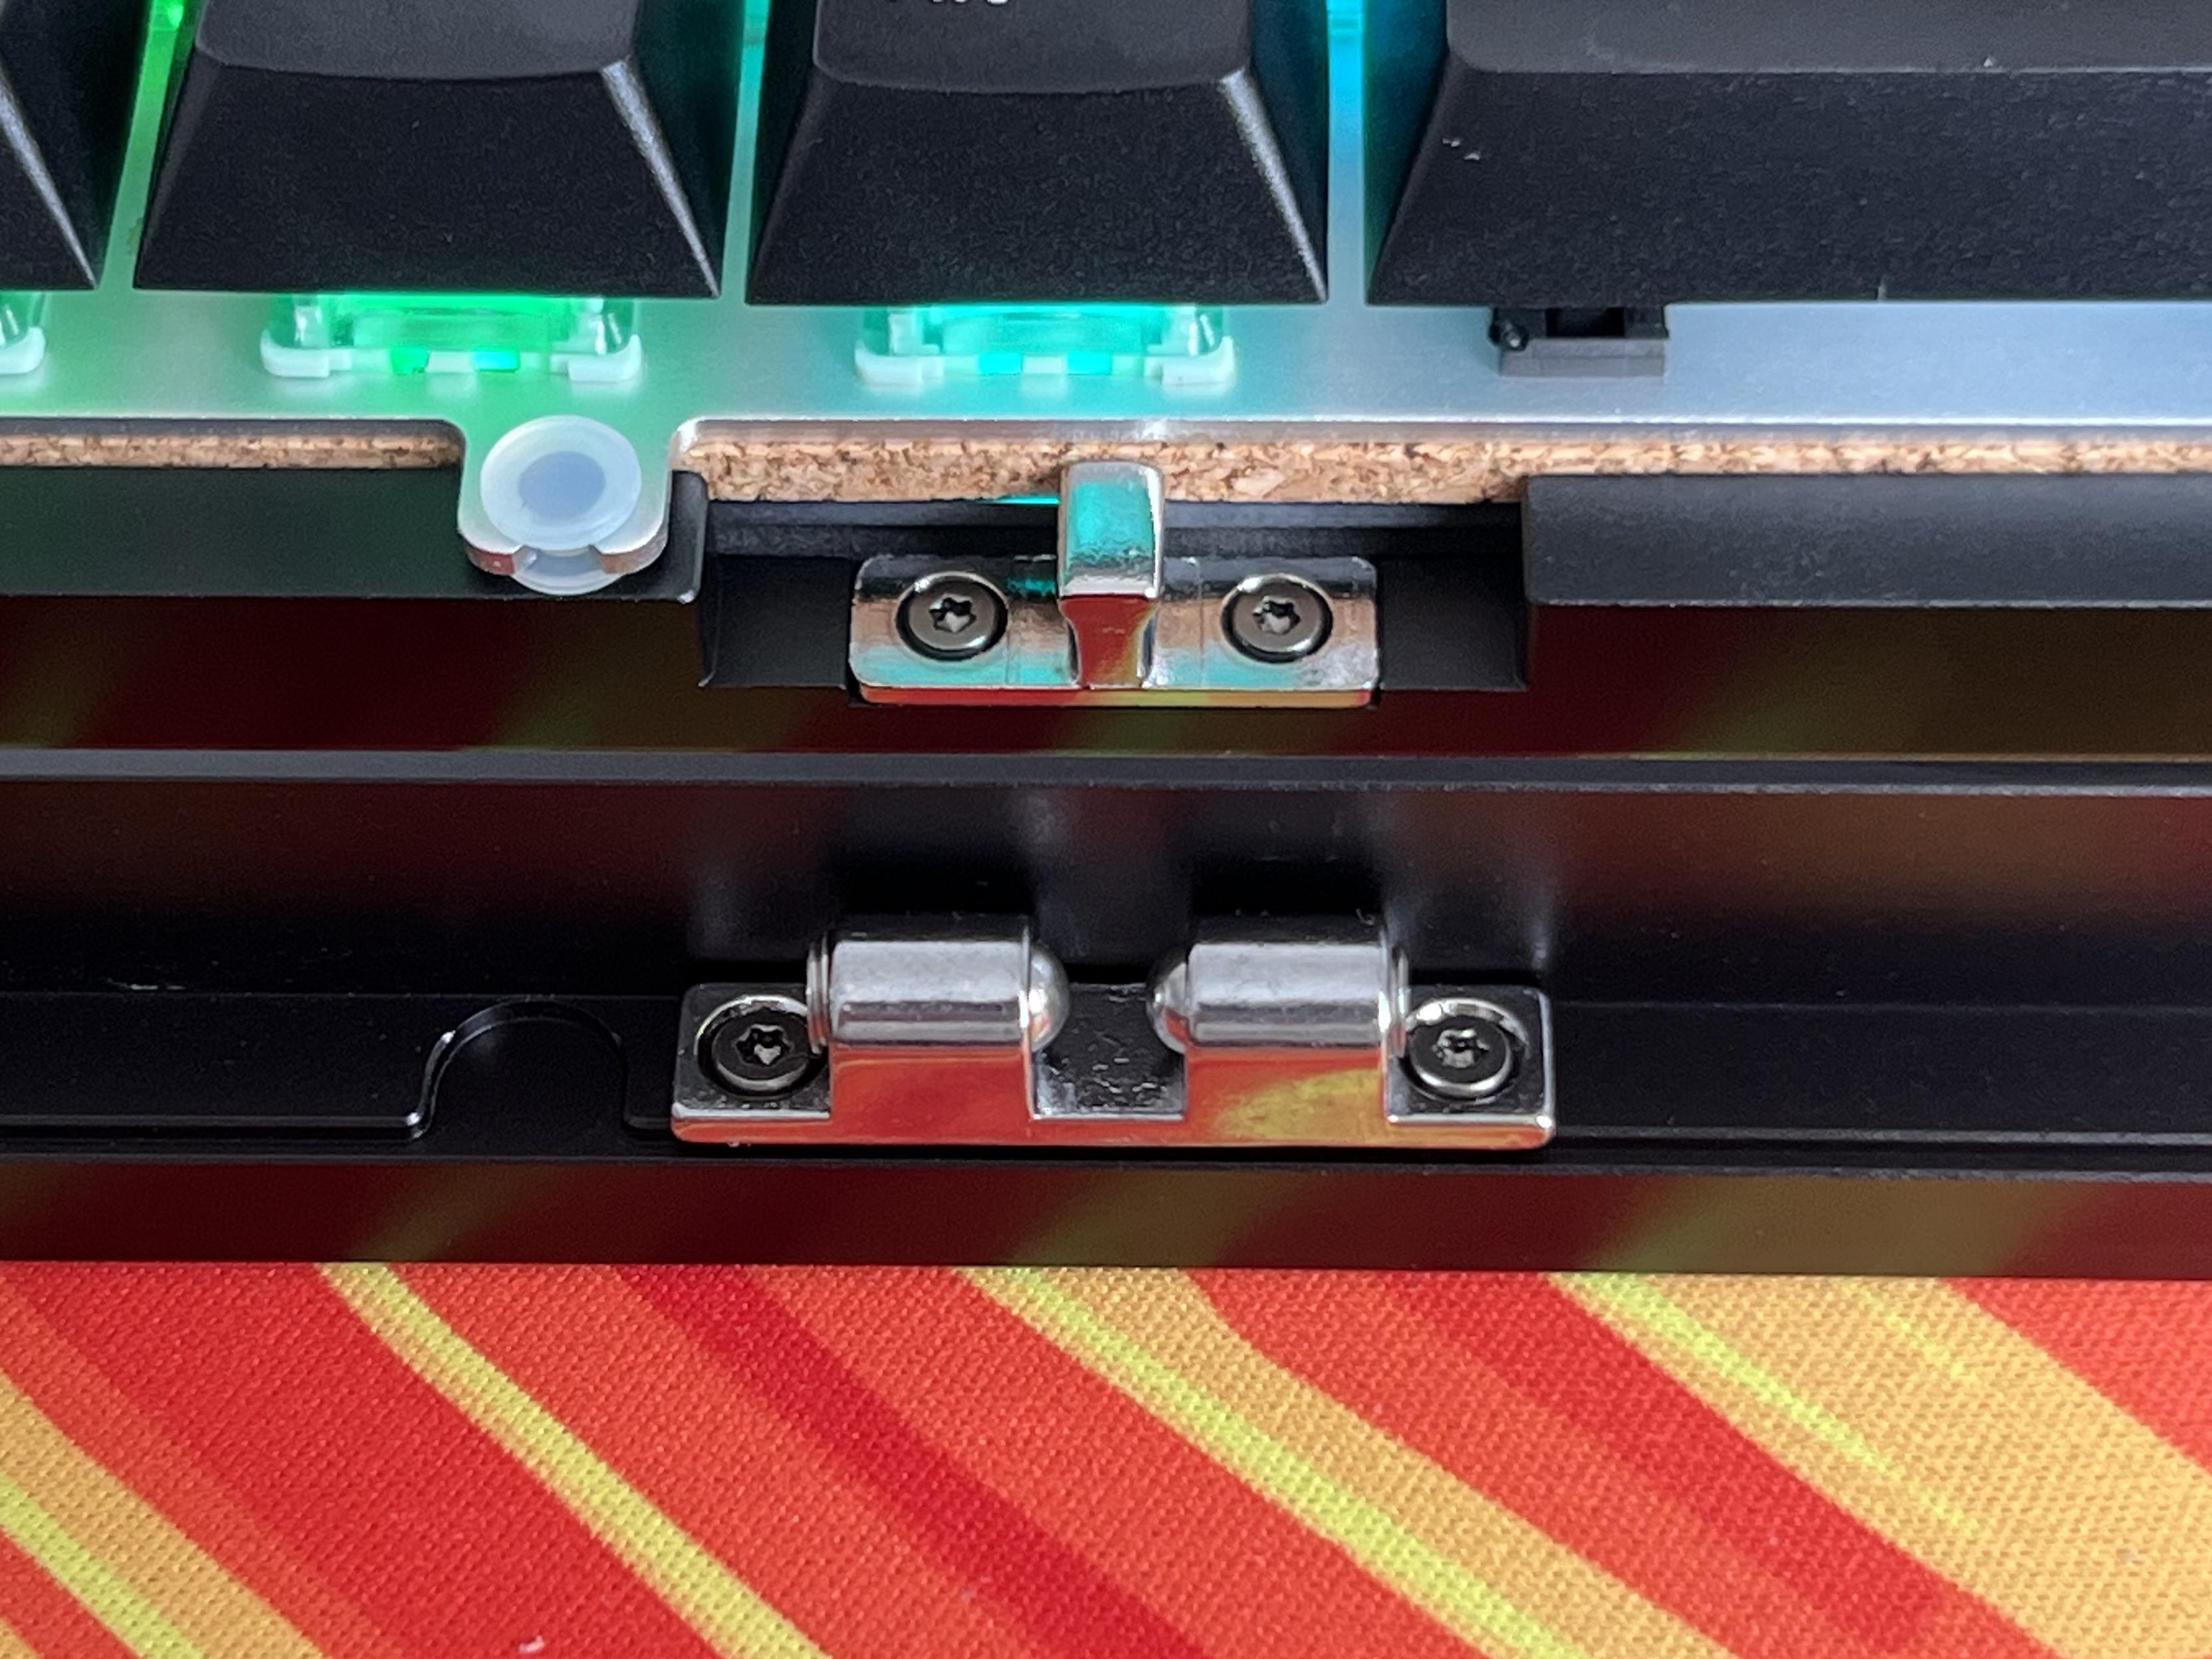
Very much here for the cabinet catches switching from brass to stainless steel? and getting better screws!
Once opened the gasket-mounted PCB lifts right out – so long as you take care to release the ribbon cable underneath – and permits easy access to the underside for modifications. you should have a minor accident with the ribbon cable, there’s a spare in the box.
There are eight sort-of hourglass shaped … you’ve seen an hourglass right? Okay more like train wheels, or tiny 3D printer filament reels? Anyway there are eight of these little silicone grommets that provide damping between the plate – the aluminium sheet through which the switches poke into the PCB – and the top and bottom shells.
There are also gaskets at the extreme corners of the base, isolating the top and bottom shells. I’m not convinced they make a lick of difference, but they at least show consideration to the finer details.
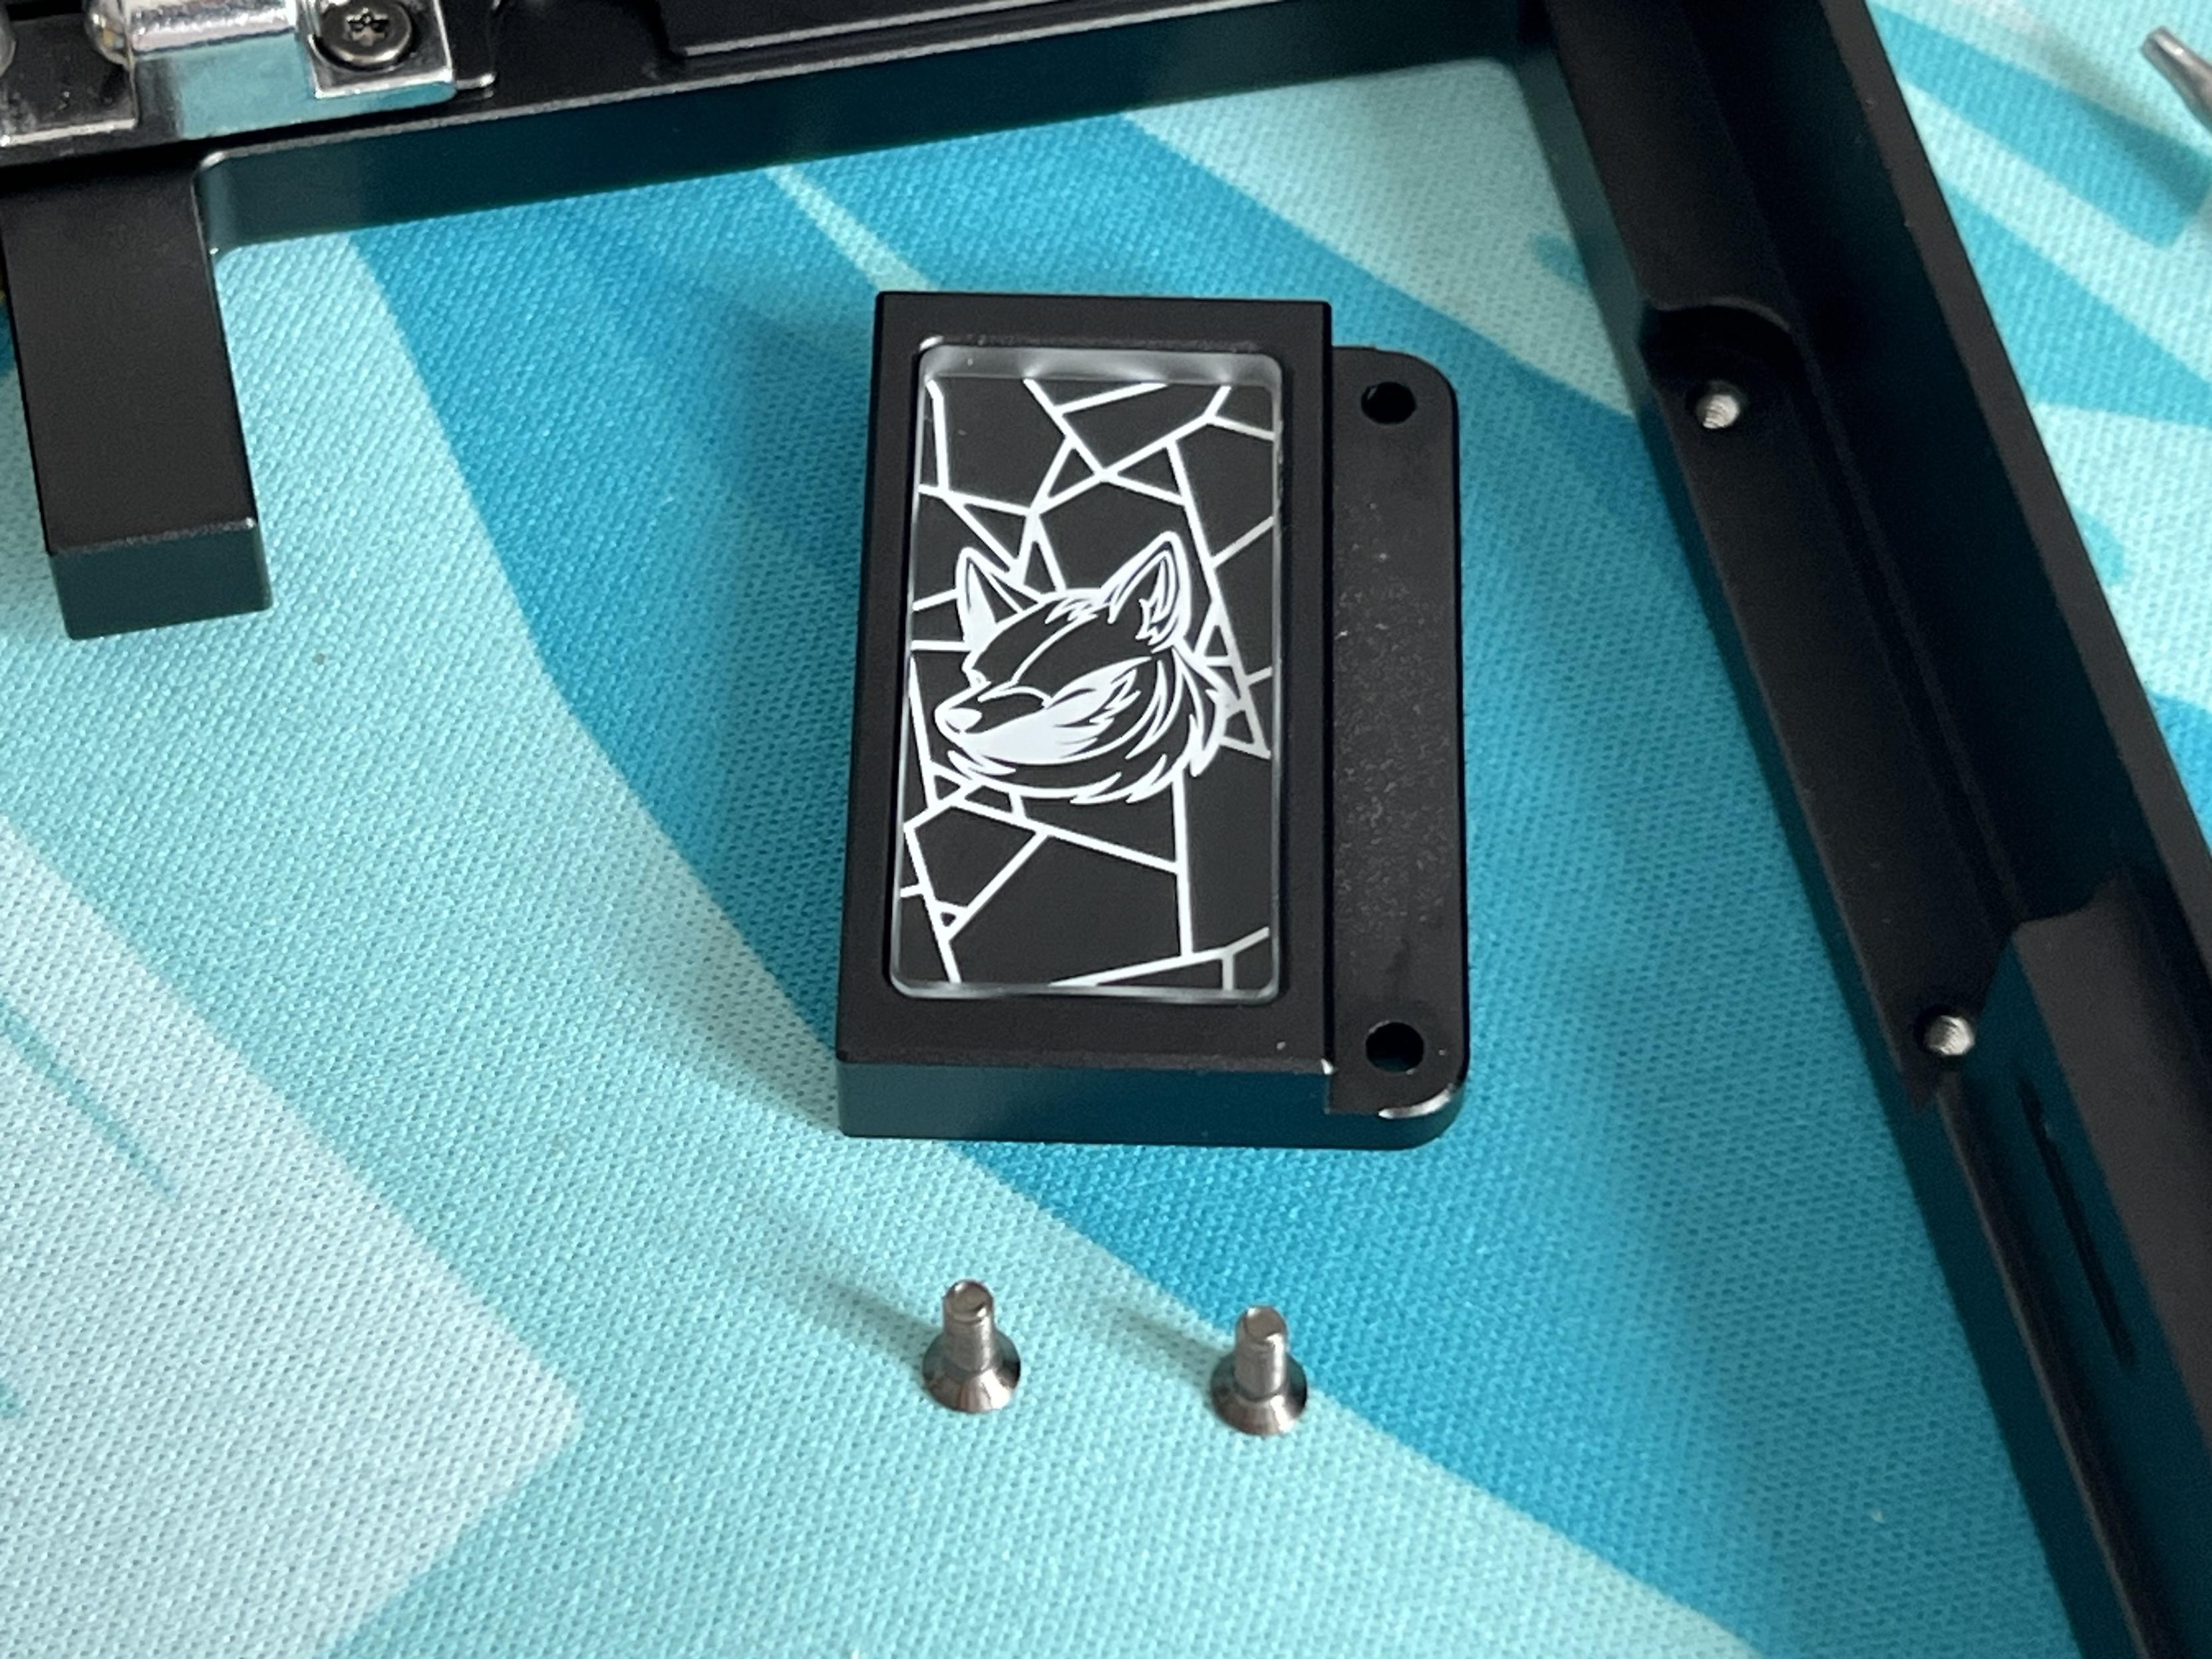
The badge is removable, secured with two screws, and this gives me IDEAS!
On the underside of the top shell the little logo badge is secured with two more torx bolts, these are easy to remove and the badge itself was trivial to measure up, design and print a replacement for. I went for black with a glitter overspray, for something understated that still stands out, but I have some other ideas in the works.
The bottom “weight” is removable from the inside by means of – you guessed it – more torx bolts. This is useful if you want to isolate it for customisation- which could include painting, distressing, weathering and other fun shenanigans. Honestly I wish I could get hold of a bunch to play with different customisation techniques. There are also two side details screwed into the left and right lower edges, again removable if you want to customise them. They’re just plastic, but you wouldn’t know from looking at them.
Underneath the bottom “weight” detail is the USB Type-C connector, separated out onto a daughter board connected by the aforementioned ribbon cable. There are two unpopulated JST placements for LiPo battery connectors, implying some part reuse across the range. The top side also has some test points which are – since there are five of them – almost certainly just the full complement of USB signals. This includes VBUS so if you wanted to tap off some power and put a custom OLED screen where the logo badge sits, you could totally do so.
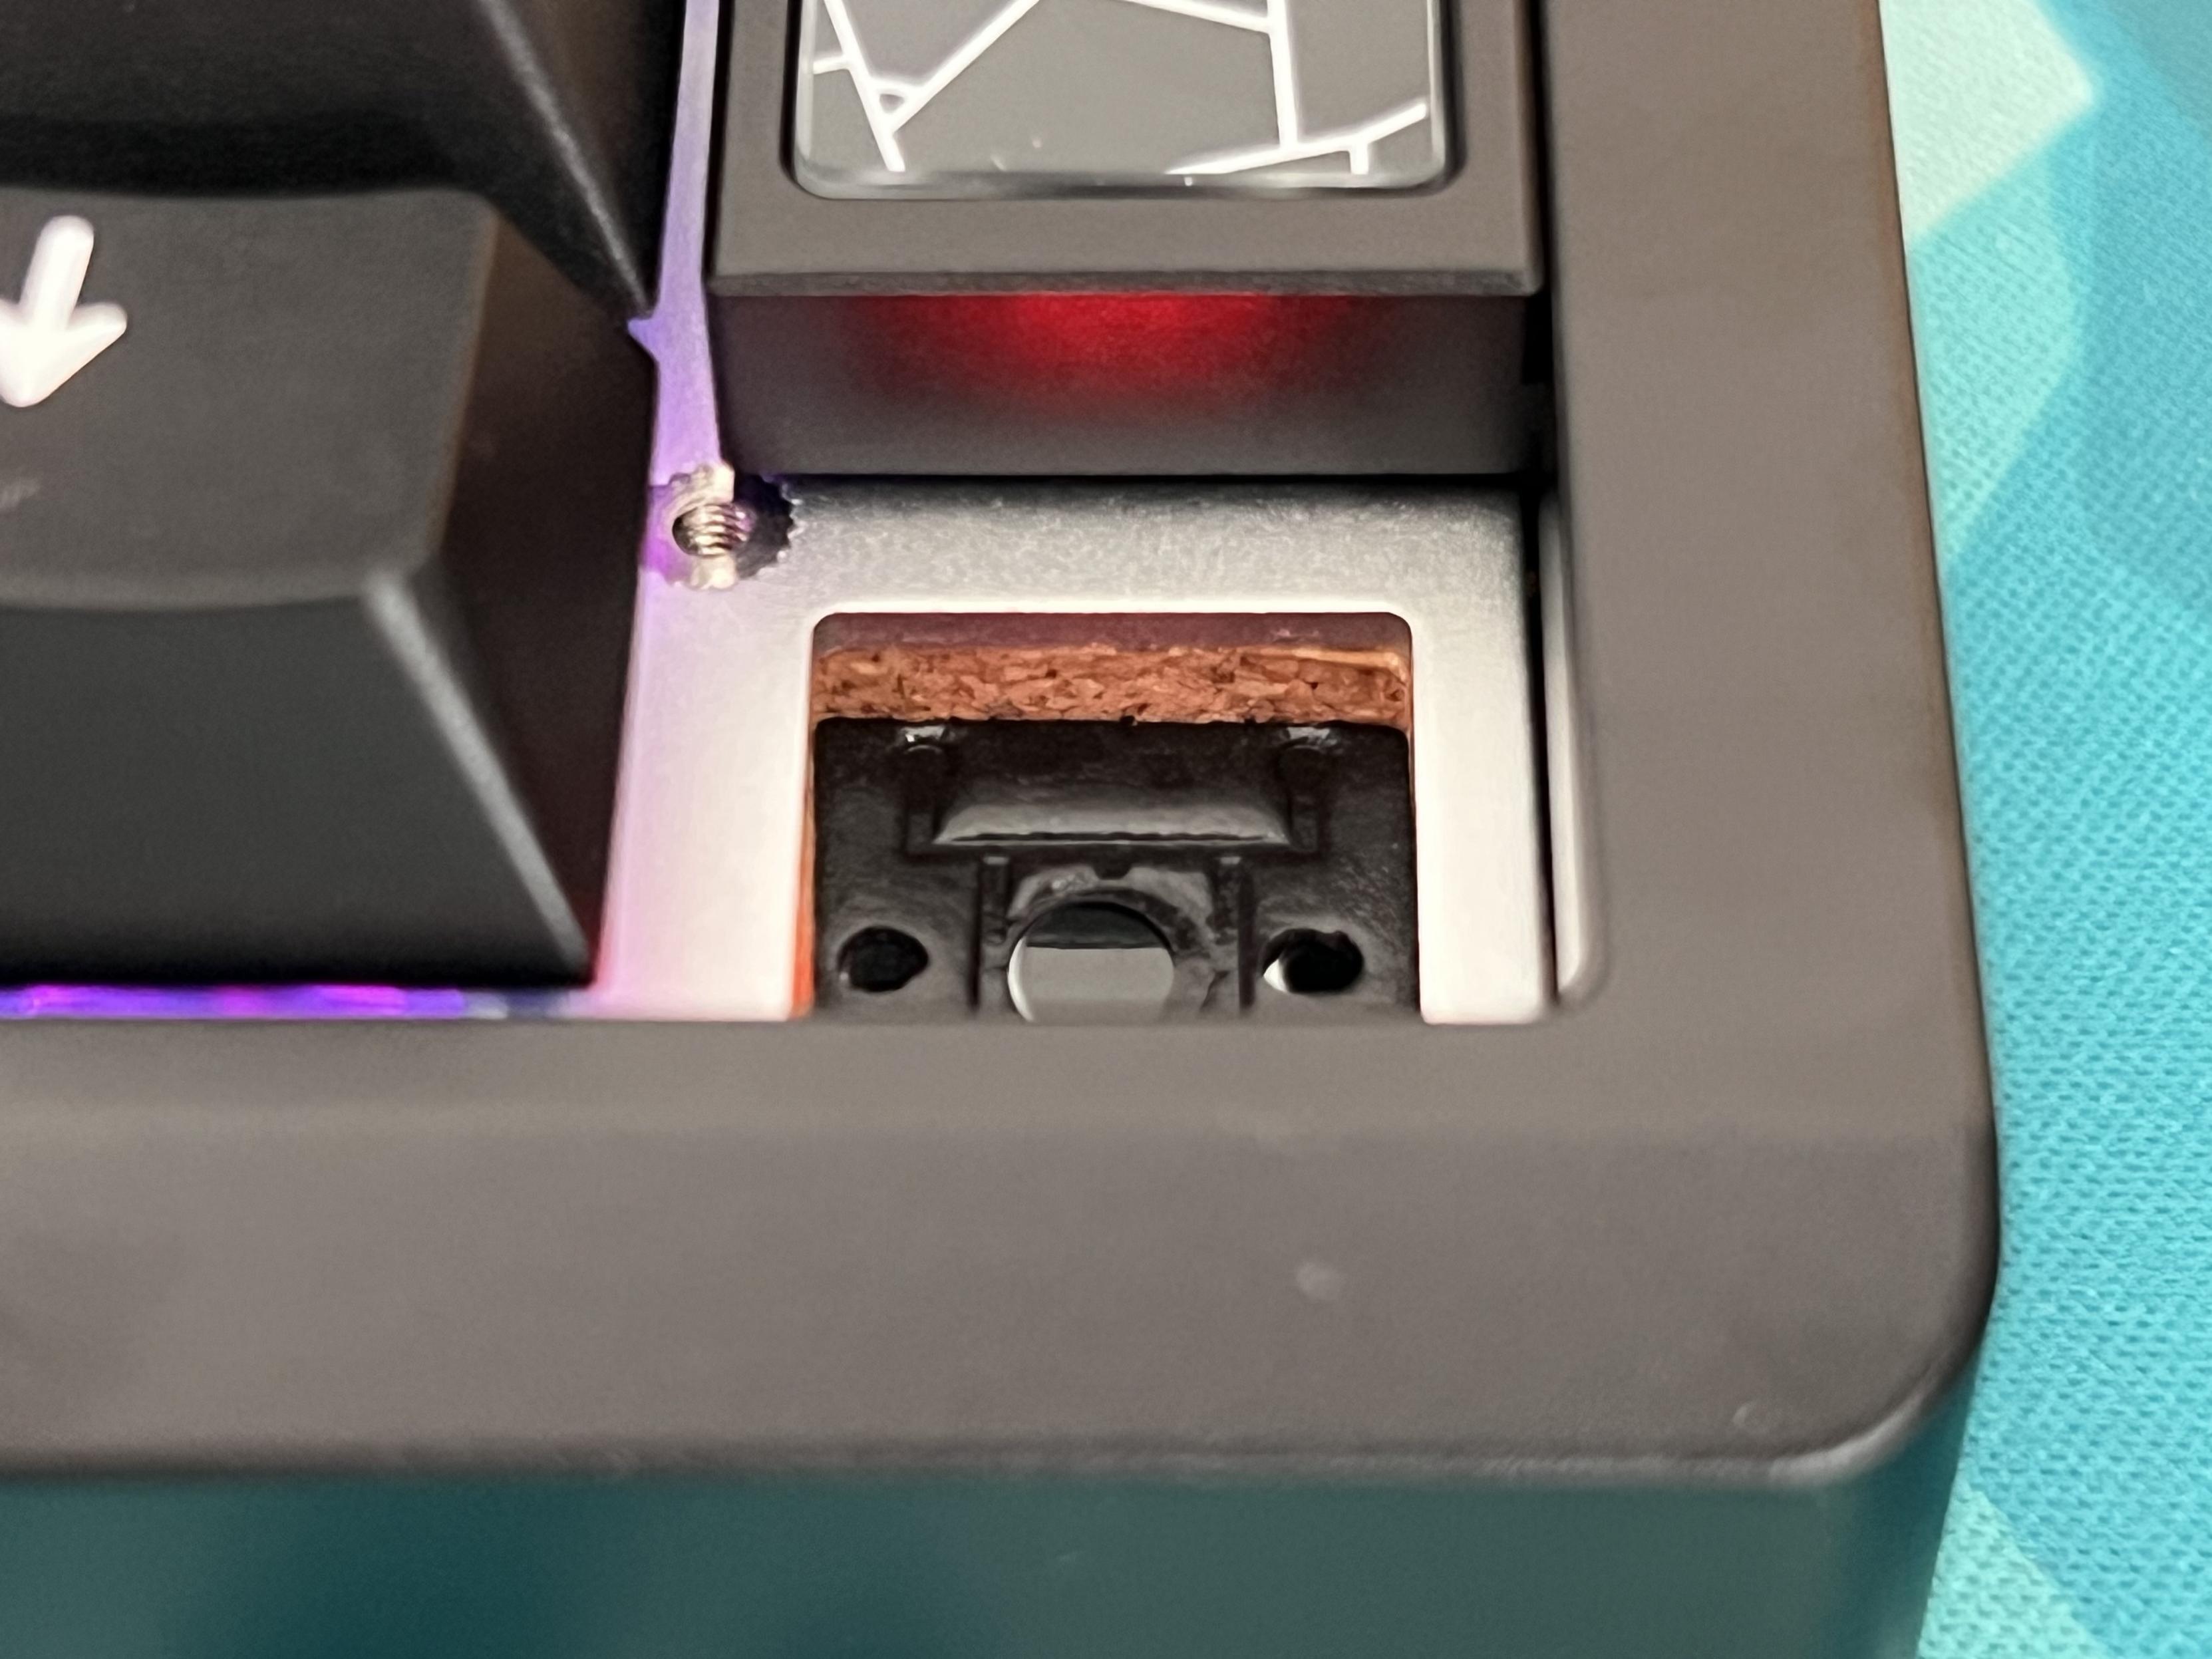
The cork interlayer between plate and PCB is a lovely touch, no doubt contributing to the actually quite pleasing sound of the Slice75.
The plate and PCB are separated by a couple millimetres of cork, with foam damping under the PCB and the ever present sheet of PET film protecting the bottom shell. The plate has a couple of locating holes which fit over corresponding pegs in the bottom shell so you get everything lined up right for reassembly. It’s well thought out though I’d have loved to see a redux of the magnetic quick release cable assembly from the ND75.
The sheer amount of padding and damping, combined with a solid plate and PCB make for a solid keybed. Unlike my customised ND75, into which I stuffed plumbing o-rings for a much bouncier feel, the keybed is firm and unforgiving. This, no doubt, contributes to its sound which is prominent and just a touch thocky (“thock” referring to a deeper, often more desirable sound in keyboard parlance, versus “clack”). In short- it sounds good. That doesn’t mean I’m not left wanting for an o-ring mounting option to make it just as silent as my ND75, but I feel a great many users will be happy with it as-is.
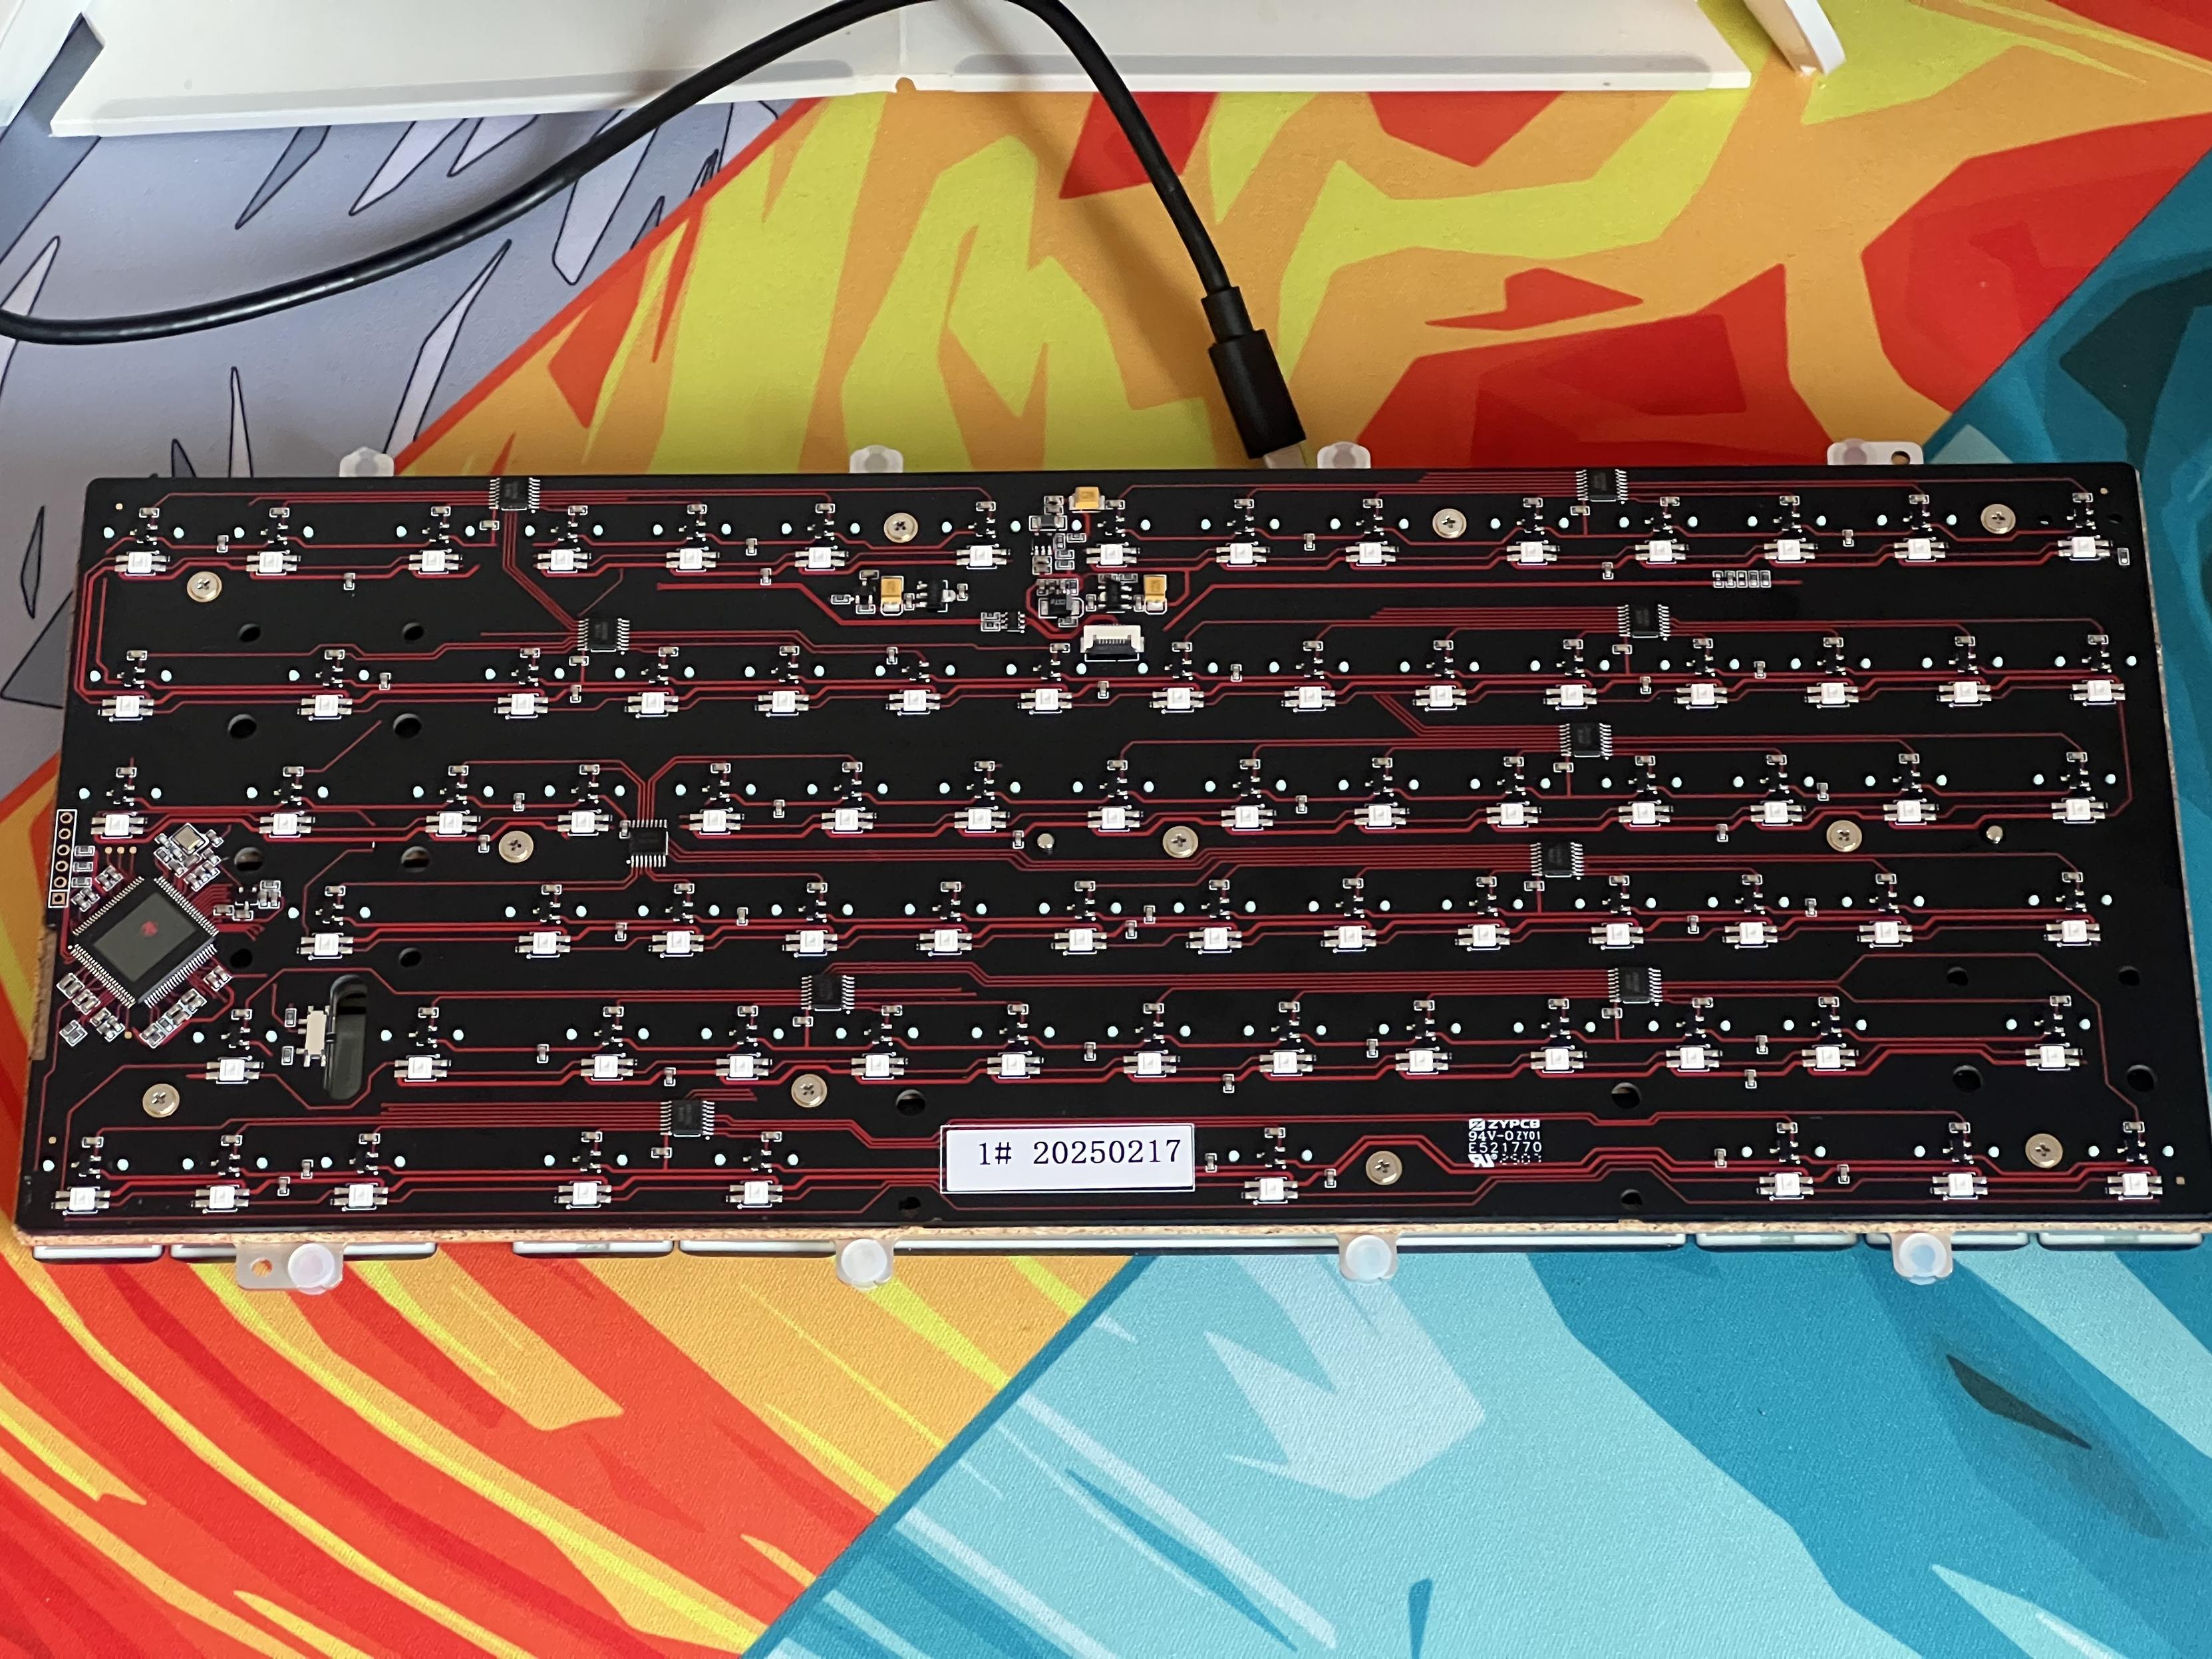
The PCn- once you get at is- has all the traces picked out in red!
It probably goes without saying that this whole build is solid as a rock, hewn as it is from aluminium and comprising just three major parts- the top, bottom and weight. All of the parts fit together beautifully and are finished – inside and out- equally as beautifully. I could not, despite some effort, find any visible tooling marks or any evidence that the keyboard hasn’t simply always been a keyboard.
But that would be all for nothing if it wasn’t good to use…
Typing with Hall-Effect
Though I started with HE using EndgameGear’s KB65HE, I didn’t really fully appreciate it until Keychron’s Q1 HE. There’s a certain character – with the huge caveat that you must like linear, non-tactile switches – to hall-effect that I find particularly comfortable even for regular usage. I think the biggest part of that is being able to tune the actuation depth up to somewhere between 1 and 1.5mm. At this point it becomes possible to type with a very soft touch, avoiding the bottom-out noise and feel of the keys without the risk of missing input.
It’s this same responsiveness that makes it great for gaming, allowing you to get the feel of speed switches without having to swap out to speed switches. A particular advantage of this, both for typing and gaming, is that the response rate is per-key. While you can’t change the tactile feel of typing, you can get some of the benefits of a mixed switch setup- changing keys you use often to be highly responsive, and keys you might hit by accident to require a much deeper press. I’ve done this before with alphas and modifiers, configuring the former to somewhere below 1mm and the latter to somewhere above. You might, like me, find that this works naturally with no need to get accustomed to the difference- modifiers are usually pressed far more deliberately and with more purpose than normal typing.
I’m a sucker for silent linear switches in general, with no particular predisposition toward tactile – I spent half a lifetime using terrible keyboards so anything is a step up – and since there’s nothing much else the traditional switch world can offer my fingers I’m finding it increasingly difficult to move back from hall effect to electromechanical. It’s a good thing I’ve got a whole stack of hall effect boards, I suppose!
All this, of course, is ignoring the benefits to gaming.
Gaming with Hall-Effect
By gaming I – of course – mean Taiko no Tatsujin Pop Tap Beat on Apple Arcade (can we talk about how many flippin’ songs that has?) which – wouldn’t you know – runs a treat on macOS and uses keyboard input. I found myself able to consistently hit perfect notes, though I am still utterly stymied by the counter-intuitive patterns in the more difficult and complex songs. In particular I found the Slice 75 HE far, far superior to the DualSense controller I had to use with the PS5 version and much better than my gaming laptop’s integrated keyboard, upon which I spent far too long playing the Taiko no Tatsujin on Xbox Game Pass.
Some of the gaming are especially controversial since one of the upsides of an analog keypress is that it has far, far more than just the one finite “trigger” point of a traditional switch. Not only this, but it’s possible to detect when a hall-effect switch is being pressed and again when it’s being released- this is meaningfully different from when it *is* pressed and when it *is* released. One of the most touted benefits of this is “Rapid Trigger”, the trick of allowing a single keypress to re-trigger before it is fully released. While you can, in theory, push a key down to its actuation point and then wiggle it to generate a lot of keypress events in practice you’d have to be a lot more precise on an electromechanical switch than a magnetic one.
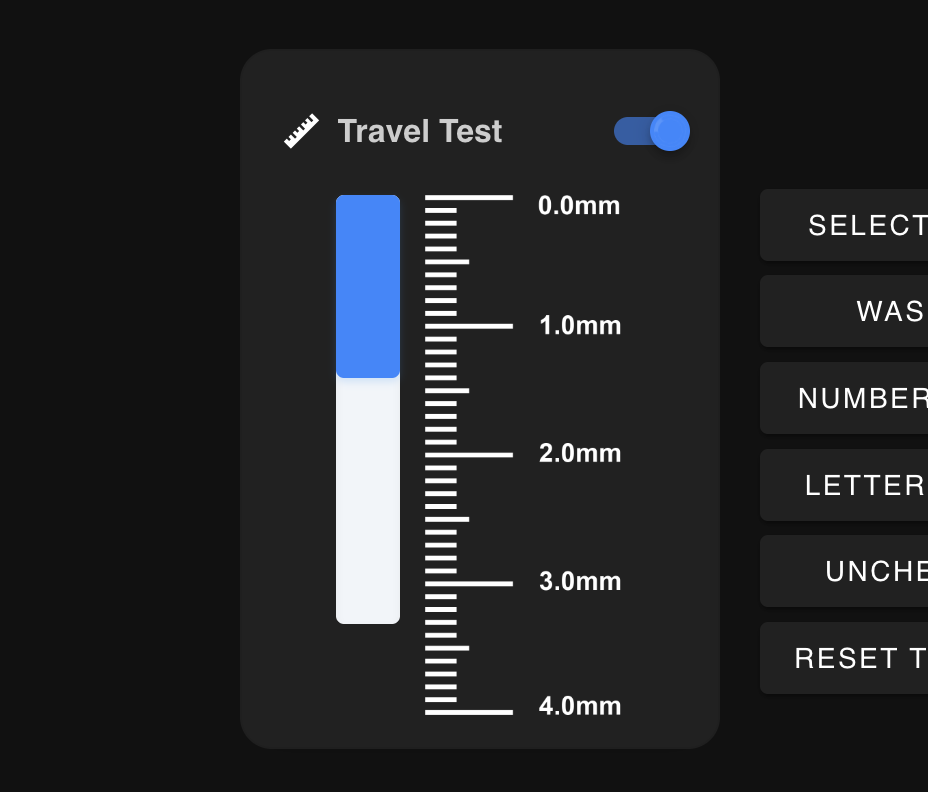
The web software has these little travel and keystroke testers, which are immensely useful for getting things tuned just right.
While I am ill-equipped to produce accurate latency tests, I can knock up a Python script to test input frequency and get an insight into what different features are doing. During my tests my MacBook keyboard managed around a 6Hz manual repeat rate while Slice 75 HE was closer to 6.5Hz. For comparison, pressing and holding a key produced a 12Hz repeat so… perhaps I need practise. I’ll have to stress I’m not exactly at the peak of gaming shape, and tricks like hypertapping are beyond me, but this improvement over a *low profile* keyboard is small, but at least measurable.
The Software
But this isn’t the limit. In the Chilkey web software’s “Advanced Functions” menu you can employ several tricks to take advantage of hall effect for faster, more elaborate key presses. Mini-macros in a sense. If this strikes you as perhaps a little controversial and possibly cheaty then… well it might be. While a search for hall-effect might have you believe it’s a cheaty keyboard for cheaters, it’s not some magic bullet and – for goodness sake – we’ve had rolling the mouse wheel for pistol rapid shots for years. Poor input filtering is on the game devs!
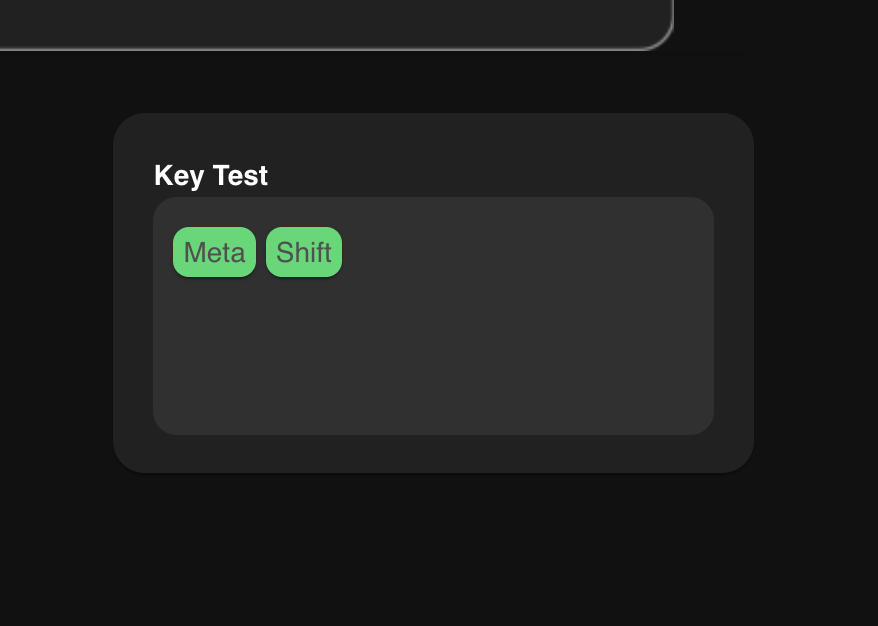
“MPT” (Maybe Multi Position Trigger?) allows a keypress to register at three different actuation depths. It’s notable that these must be three distinct keypresses or they will simply blur into one- if you want to assign “K” three times, for example, and have it tap in quick succession then this wont work. What it does, however, is give you a quick way to activate a combination of keys with precision since the depth of your press controls how far into the three steps you actuate. Each key is actuated when it hits its corresponding depth, and if you maintain that depth then the given key will auto-repeat (as a normal key press would). A full push of the key will trigger a press for each bound key in sequence, and releasing it will trigger the release events in reverse order with the last pressed key releasing first. There’s a little “Key Test” area in the software that does a remarkably good job of visualising this- showing presses in green, releases in white and clearing the view of keys are a short delay.
A rather more sophisticated alternative to “MPT” is “DKS” (Dynamic Keystroke Switching). This lets you configure a single key to trigger four events with just a single stroke- two as it crosses the threshold of two different actuation depths, and two again when it’s released. The benefit of DKS is in the name- specifically the “keystroke” bit. Each configurable step generates not a press or release event but a single discrete keystroke. With DKS set up on my “K” key, and the press and release triggers at both the 1.4mm and 3mm default depths I was able to get my manual key repeat rate up to 25Hz. I wasn’t able to improve much past this by decreasing the depth, but could raise this to 30Hz with a sloppy two finger technique.
By contrast, by using a macro to spam key events I was able to hit 80Hz but had no real finesse or control- this wouldn’t work if I wanted to spam inputs for something like Clone Hero but does give some insight into how quickly the Slice 75 HE can chuck keystrokes at your computer. Note that input frequency doesn’t necessarily correlate with scan rate nor latency and the latter is much trickier to test.
The web software has these little travel and keystroke testers, which are immensely useful for getting things tuned just right.
“DKS” has three additional phases- each up and down phase has an additional transition between it – but (if set to the same key) these extend the individual key events such that they appear held rather than a simple stroke. Trying to stretch my “K” in every slot binding across all seven phases ironically made it behave like a normal, non-advanced key.
In fact the transition phase triggers immediately after the phase before it so the two down phases can behave like a pair of two-key combos for a total of four sequential key presses on the downstroke. That’s enough to roll some direction keys or fire off some spell combos from a hot bar. Since the first two and last two key presses are separated by actuation depth you can create actions that ramp up depending on the strength of your keypress.
There’s a lot more scope to the software that I’m not going to cover here- I think you’re probably familiar with key remapping, macros and so forth… the Slice 75 HE does all this too.
What I will point out is that the web software worked great in Chromium on macOS up to and including downloading and installing new firmware entirely in-browser with no trouble whatsoever. Since I’ve only recently had to fire up a Windows virtual machine (UTM on macOS) in order to prod and poke at obscure, Windows-only drivers this is truly a breath of fresh air.
Finally like the ND75 ISO the Slice 75 HE also has a little concealed switch hidden under the right shift key. Instead of power, though, this time it’s the macOS/Windows mode switch. It’s still tricky to get to, but it makes so much more sense for something you’ll probably only ever set and forget to be concealed away for a clean, overall look.
The Slice 75 HE was shipped with firmware v1.0.5 and updated to and tested on v1.0.9.
Okay, But Latency?
After some deliberation I was able to contrive a Python script to test for latency using a traffic light system relying on my own response times. It flashes a sequence of circles in red, amber and green respectively and measures the response time between flashing the green circle – for “go” – and the incoming keystroke.
In order to filter out early keystrokes (corrected by tapping again far later) and slow reaction times I recorded only response times lower than 100ms.
For my MacBook Air’s built-in keyboard I scored an average of 65.02ms with a low of 31.01ms and only one miss. A second run – after some practise – gave an average of 42ms with a low of 11ms and two misses. A third, 48.77ms with a low of 15.43ms and four misses.
For the Slice75 HE, I scored an average of 50.72ms with a low of 15.92ms and three misses. A second run of the Slice75 HE test results in a second average of 50.06ms and a low of 10.25ms but with an enthusiastic nine misses. A third run gave 52.86ms and a low of 7.66ms (five misses).
After flipping back to the MacBook Air keyboard I did a final run on the Slice 75, scoring an average of 50.17ms with a low of 10.35ms and two misses.
A few misses were common since I designed the test to allow me to anticipate the green circle rather than just react to it, sometimes I would hit just a little too early. Averages are a little unreliable since they are skewed by my slowest response times, but it is interesting to note that the Slice75 averages were very consistent compared to those of my integrated keyboard.
The low numbers indicate the best possible response times, taking into account my own reaction times (which I have attempted to compensate for) and the 16.66ms delay between subsequent frames on my 60FPS laptop screen (which is less reliably accounted for). Even if I eliminate the outlier 31.01ms low from my MacBook scores, the Slice75 handily places lower with an average low of 11.27ms versus 13.13ms. Are these numbers rigorously scientific? No. Are they that different? No. Do they really show anything? Also no. Perhaps, at best, they indicate the range of my reaction times and the theoretical minimum latency for a keystroke.
What’s acutely interesting to me is that I reduced the keyboard polling rate from 8000Hz to 125Hz and received very similar results – with a lowest latency of 9.47ms. It’s important to note that the lowest latency physically possible is theoretically achievable with even a 1Hz polling rate, but requires that your keystroke be timed right before polling occurs. Imagine running to catch a bus to get to work – you could be 20 minutes if you make it to the bus right as it pulls up to the stop, or an hour if you need to wait for the next bus. Similar principle here. The low readings I report above are potentially a perfect alignment of framerate, reaction time, switch actuation time, keyboard matrix scan rate and polling rate. Though it cannot mitigate the other factors, a higher polling rate should make low latency inputs more achievable and more consistent- and my tests hinted at this.
What does noticeably change with a higher polling rate is the speed at which macros can fire off keystrokes. My “spam K” macro – with 1ms pauses between events – simply blurred into a single keystroke at 125Hz- that’s because there’s a whole 8ms between individual polls, rather than just the 0.125ms of 8000Hz.
The Slice75 HE feels more responsive, though, and much, much nicer to actually type and game on.
Switch Choices
Slice75 HE comes installed with Gateron Jade Pro switches, they look ace with a jade base and crystal blue top. They feel snappy and responsive, and strike a good balance in actuation force, though they tend to bottom out in all cases and keep the Slice75 loud and proud.
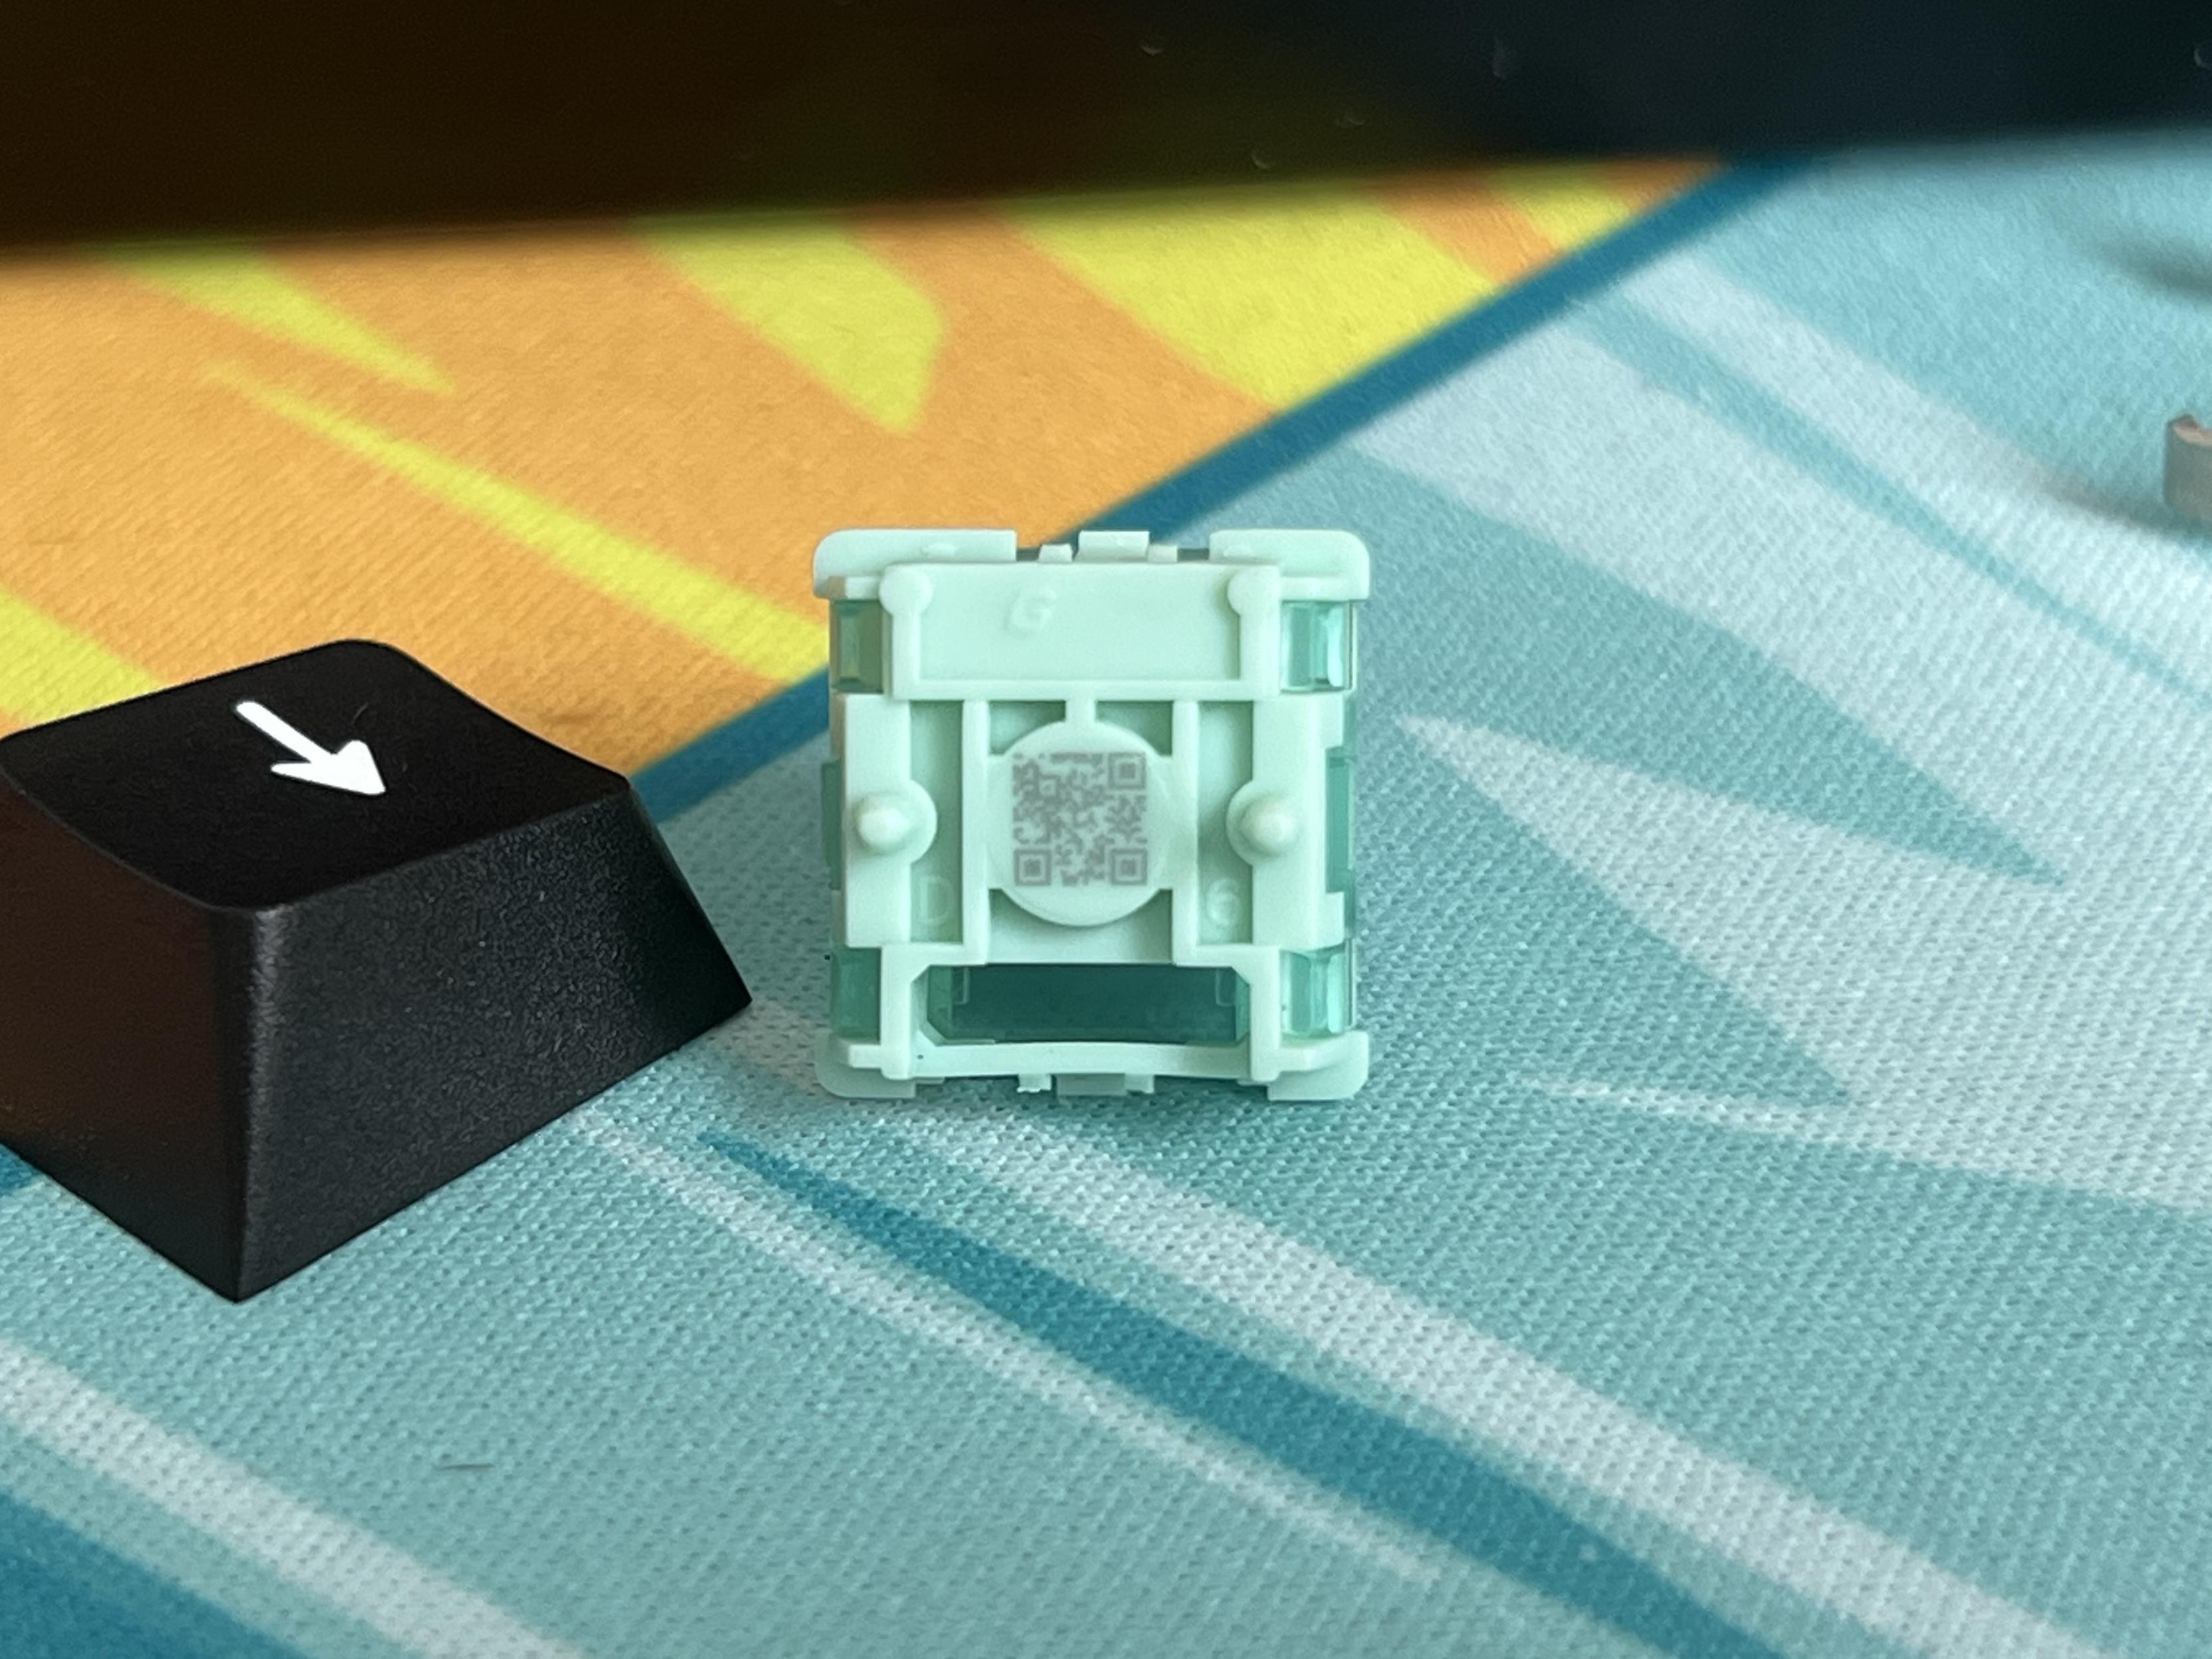
The Jade Pro switches have a tiny little QR code on them- I wasn’t able to read it!
While the software gives a list of switch types to choose from, you may find many similar, compatible switches out there- for posterity the supported list is:
Gateron Jade Pro, TTC Magneto RGB, TTC Magneto, Gateron Jade Gaming, WS Flux and Haimu.
Right after sending me Slice75 HE, Chilkey dropped the white variant with their new Wuque Studio octagonal stem Flux switches. With any luck I’ll be able to test these in the Slice75 but in the meantime they’re an interesting option for existing owners or those who want the black/grey boards. The octagonal stem claims to increase stability by reducing deflection at 45 degree angles, the math checks out but whether these feel any better remains to be seen.
I tested the handful of HE switch samples I had available. When swapping switches I had to unplug and re-plug the keyboard for it to auto-calibrate and accept the switch, otherwise it would spam spacebar.
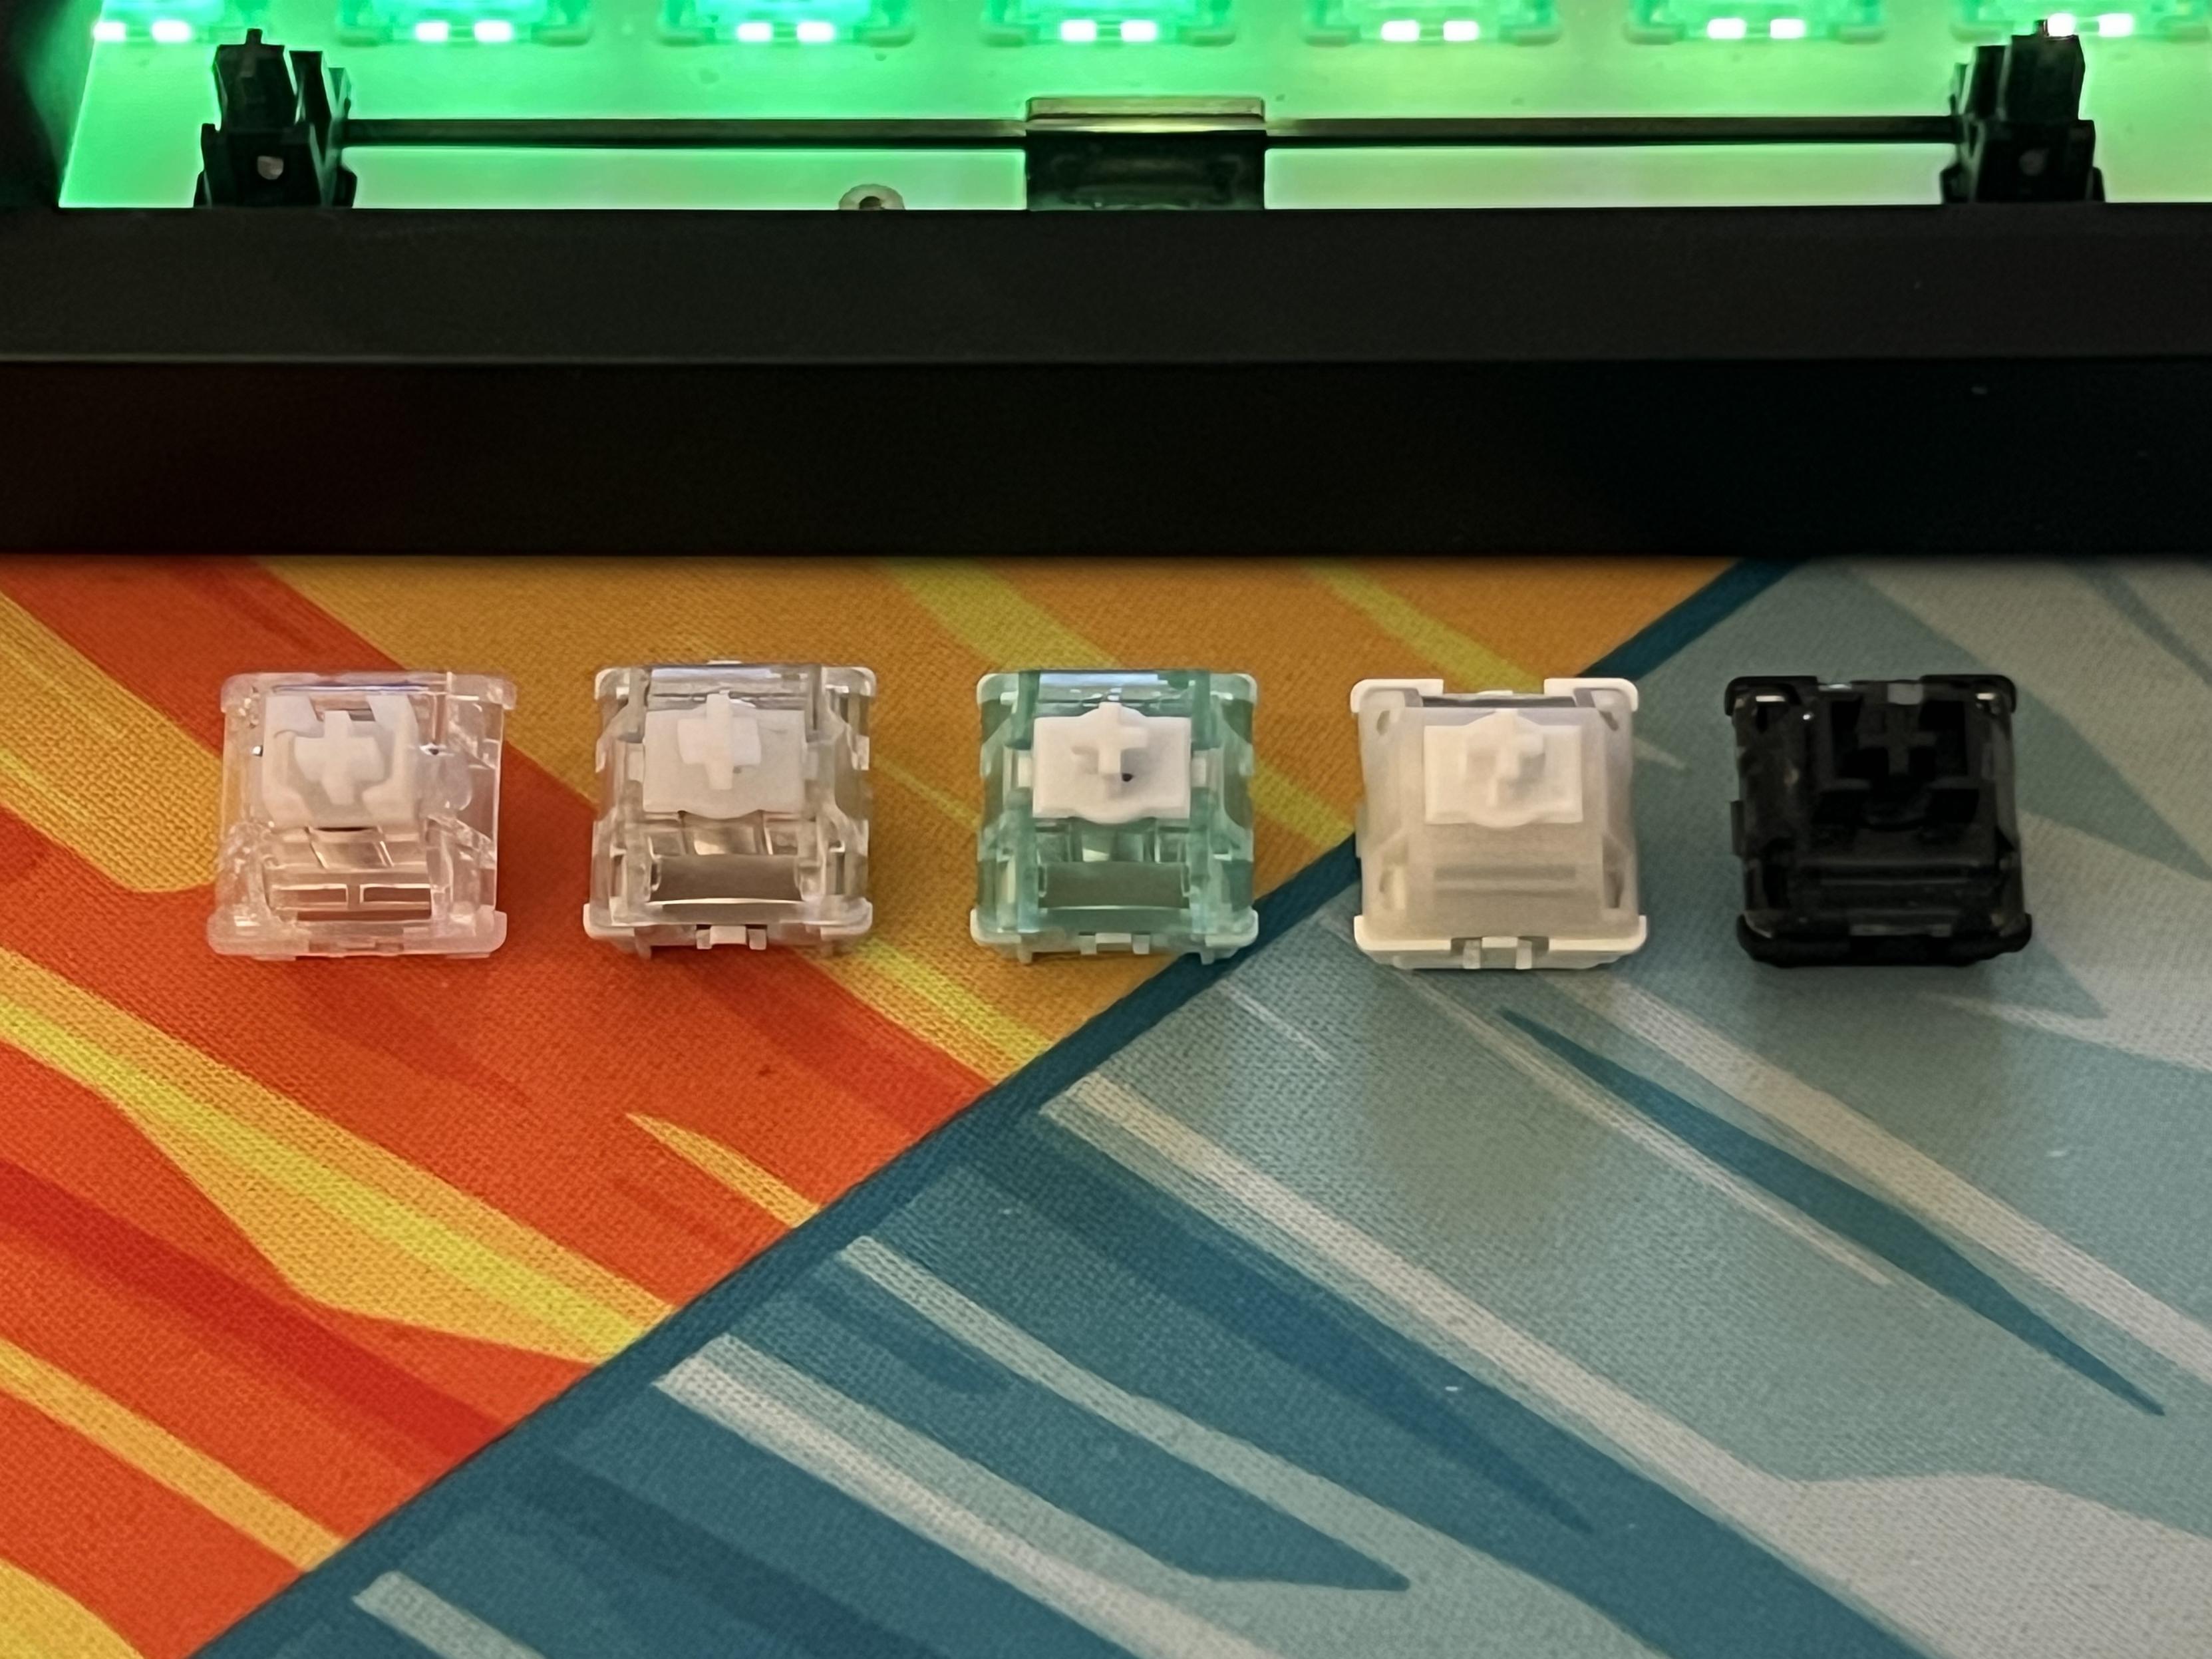
A little procession of Hall effect switches to try. Two of these are variants of Gateron’s Jade Pro, and the GuGu Black Knight is probably the nicest.
GuGu Black Knight switch sample from ProtoTypist: worked well and had a much smoother stroke along the full range than the stock Gateron Jade Pro switches – it’s hard to tell with one switch under my spacebar, but I think they have potential. I think the smooth stroke is due to the higher initial actuation force and smaller gap between initial and bottom-out force, and these are indeed a little firmer with a much softer bottom-out sound. A road to a quieter Slice 75 HE, perhaps?
Geon Raw HE switch: also worked but doesn’t feel as good as the stock Gateron Jade Pro, nor as smooth and precise as the GuGu Black Knight.
Epomaker “HaiMu” (from the HE68 Lite): also worked, nice box stem like the GuGu Black Knight, lower actuation force by feel but no datasheet to back this up. Not as much horizontal stability, but surprisingly good nonetheless.
Gravastar x Gateron Magnetic Jade Pro: pretty much identical to the stock Jade Pro but with a backwards stem (notch faces right with south facing LED) and in grey/clear. Strangely it still required a power cycle on the board to stop it mashing spacebar.
Suffice to say there is some variation in sound and feel to be found, even across only a couple of switch samples.
Overall
The Slice 75 HE is a hair shy of perfection, caught out only by the curious case of the very green backlight. I tried to set the backlight to yellow to match the Aperture Priority keycaps I had installed, but for love nor money couldn’t get anything but green. After much sleuthing, and many attempts to hit a colour resembling yellow, I ran some tests which seemed to implicate the addressable LEDs. That’s to say I’m pretty sure (and I have kinda done things with LEDs professionally for over a decade) the backlight is afflicted by a hardware flaw, rather than a design oversight or software bug. The LED components themselves are biased green/blue and this cannot be fixed in software without seriously affecting the board’s brightness and dynamic range for other colours.
I would also love some alternate mounting options, but I’m quickly getting used to the snappy, responsive and firm typing feel of the Slice75 HE and it has- for now – displaced the equally worth ND75 ISO from my desk. Oh, yes, ISO version please Chilkey!
Oh and a couple of spare switches in the box, please?
Overall the Slice 75 HE is a well built, beautifully finished board with acoustics to match and a crisp, responsive feel that would satisfy regular typists just as much as it would augment gamers. The switch (versus the ND75) to torx screws and silver cabinet catches for the enclosure is a subtle one, but it adds to the cohesion of the board as a whole, and makes it all feel that little bit more premium. This is helped significantly by the cork damping between the plate and PCB. It all feels good and I wish I had another to take apart and paint. I might hit the bare aluminium plate with some black spraypaint, at least.
I have been experimenting with custom badge designs but I need a better paint match and more careful painting!
I’m still exploring alternate badge designs and you can find a very basic STL and source OpenSCAD file to get you started here: https://gist.github.com/Gadgetoid/dc5c5f2b991a597c84c2e921fdf32c80
If you’re interested in the Chilkey Slice75 HE you can buy it direct from Chilkey or locally in the UK from ComputerOrbit (not affiliated, but they are the official UK vendor alongside Prototypist and their list price is significantly lower than Amazon’s).