Cricut Joy Xtra Review
I wanted to decry Cricut’s closed-source hardware and dependence upon the mobile app, but unfortunately the Cricut Joy Xtra has an annoying habit of being fast, dependable and empowering. In no small terms, it opened up a whole new world of artistic expression I had previously not explored.
It took me a while to get there.
Cricut sent me their Joy Xtra free of charge with only a couple of stipulations- the most salient being “do some kind of project with it.” That’s fair enough, I thought, since that’s exactly what I wanted it for in the first place. I just wasn’t sure what project.
In lieu of anything productive to do, I set about plumbing the depths of Cricut’s closed-source approach to software and hardware.
At first I looked for some open source software to run the Joy Xtra and came up with nothing. There’s a “Cut Freedom” Discord with talk aplenty about software hacks, but the trail to potential Joy ended up cold with the very sudden (and perhaps concerning) exit of a member from the scene.
Cricut actively work against efforts to work around their software offerings and control their hardware directly, and that’s antithetical to my love of all things open-source. If I were to level one complaint about the Joy Extra it would be this- despite the high price of materials and the machine itself, it remains locked down.
I’d much rather reap the benefits of an ecosystem without being explicitly locked into it, and I would probably make more use of my Cricut, and buy more branded materials, if it were simply easy to send an .svg file from my Linux machine, or directly from Affinity Designer without having to navigate Cricut’s software.
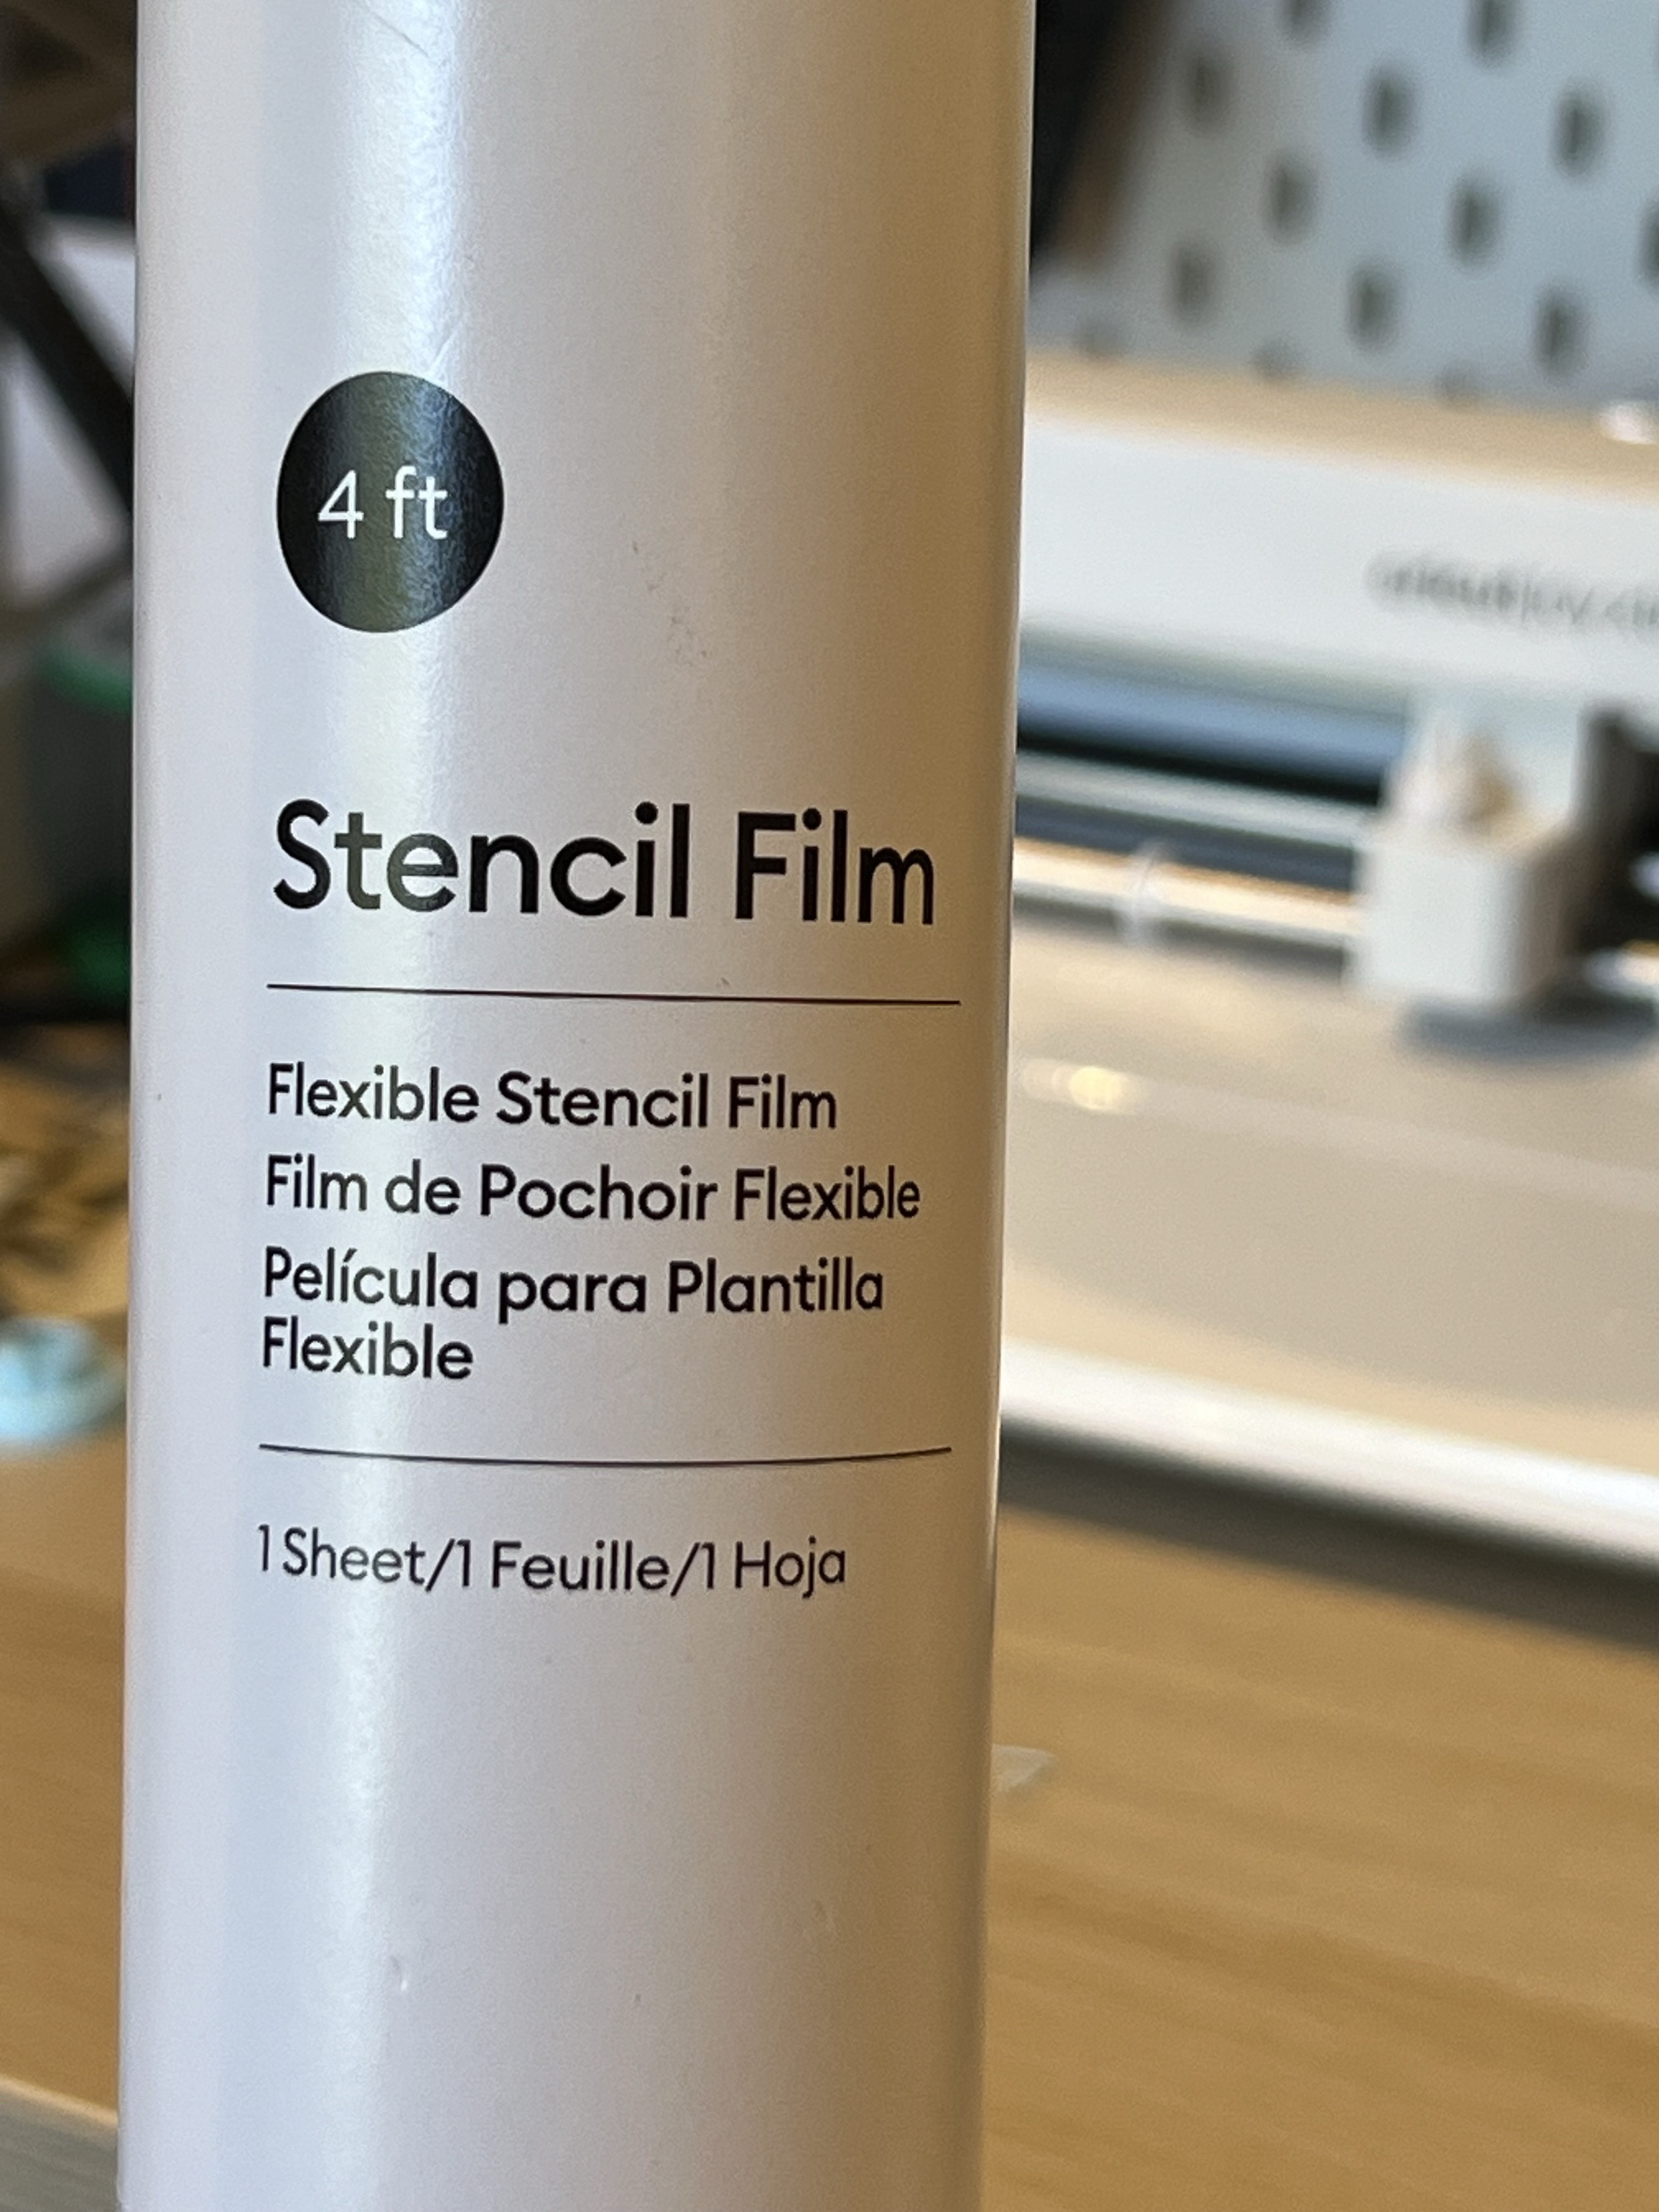
And that’s the thing, for better or worse their ecosystem is quite useful. It gives people like me – with no prior knowledge of or experience with cutting/plotting machines – an easy (if perhaps expensive) way to grab compatible supplies. I briefly looked into off-brand stencil film, for example, but without the necessary experience or patience to delve into research for experimentation I turned to Cricut’s branded product. This, at least, assures me I’m picking something that my machine can cut.
Though I found with stencil vinyl and, indeed, other supplies that my local Hobbycraft only stocked materials for the Joy and the larger machines, with a Joy Xtra-sized gap in their offering. Odd, since they sell the machines. I figured I’d just buy the wrong sized stuff and cut it manually, and that has worked incredibly well.
I should clarify that Cricuts supplies lock-in isn’t absolute. In lieu of their adhesive cutting mats – roughly £12 each – I picked up a pack of three off-brand mats on Amazon – £14 for three – and they have worked great though I have all but destroyed the light grip one with repeated use and misuse. I could easily draw on A4 paper (though getting it off the sticky mat proved to be tricky) and the Cricut can, in theory, cut any material from any supplier as long as it’s thin and soft enough. It certainly didn’t make any effort to stop me, though the app includes presets for all of Cricut’s own-brand materials so – to hammer the point home – I could pick “Stencil Film” and be sure my “Stencil Film” would be cut properly. And it was.
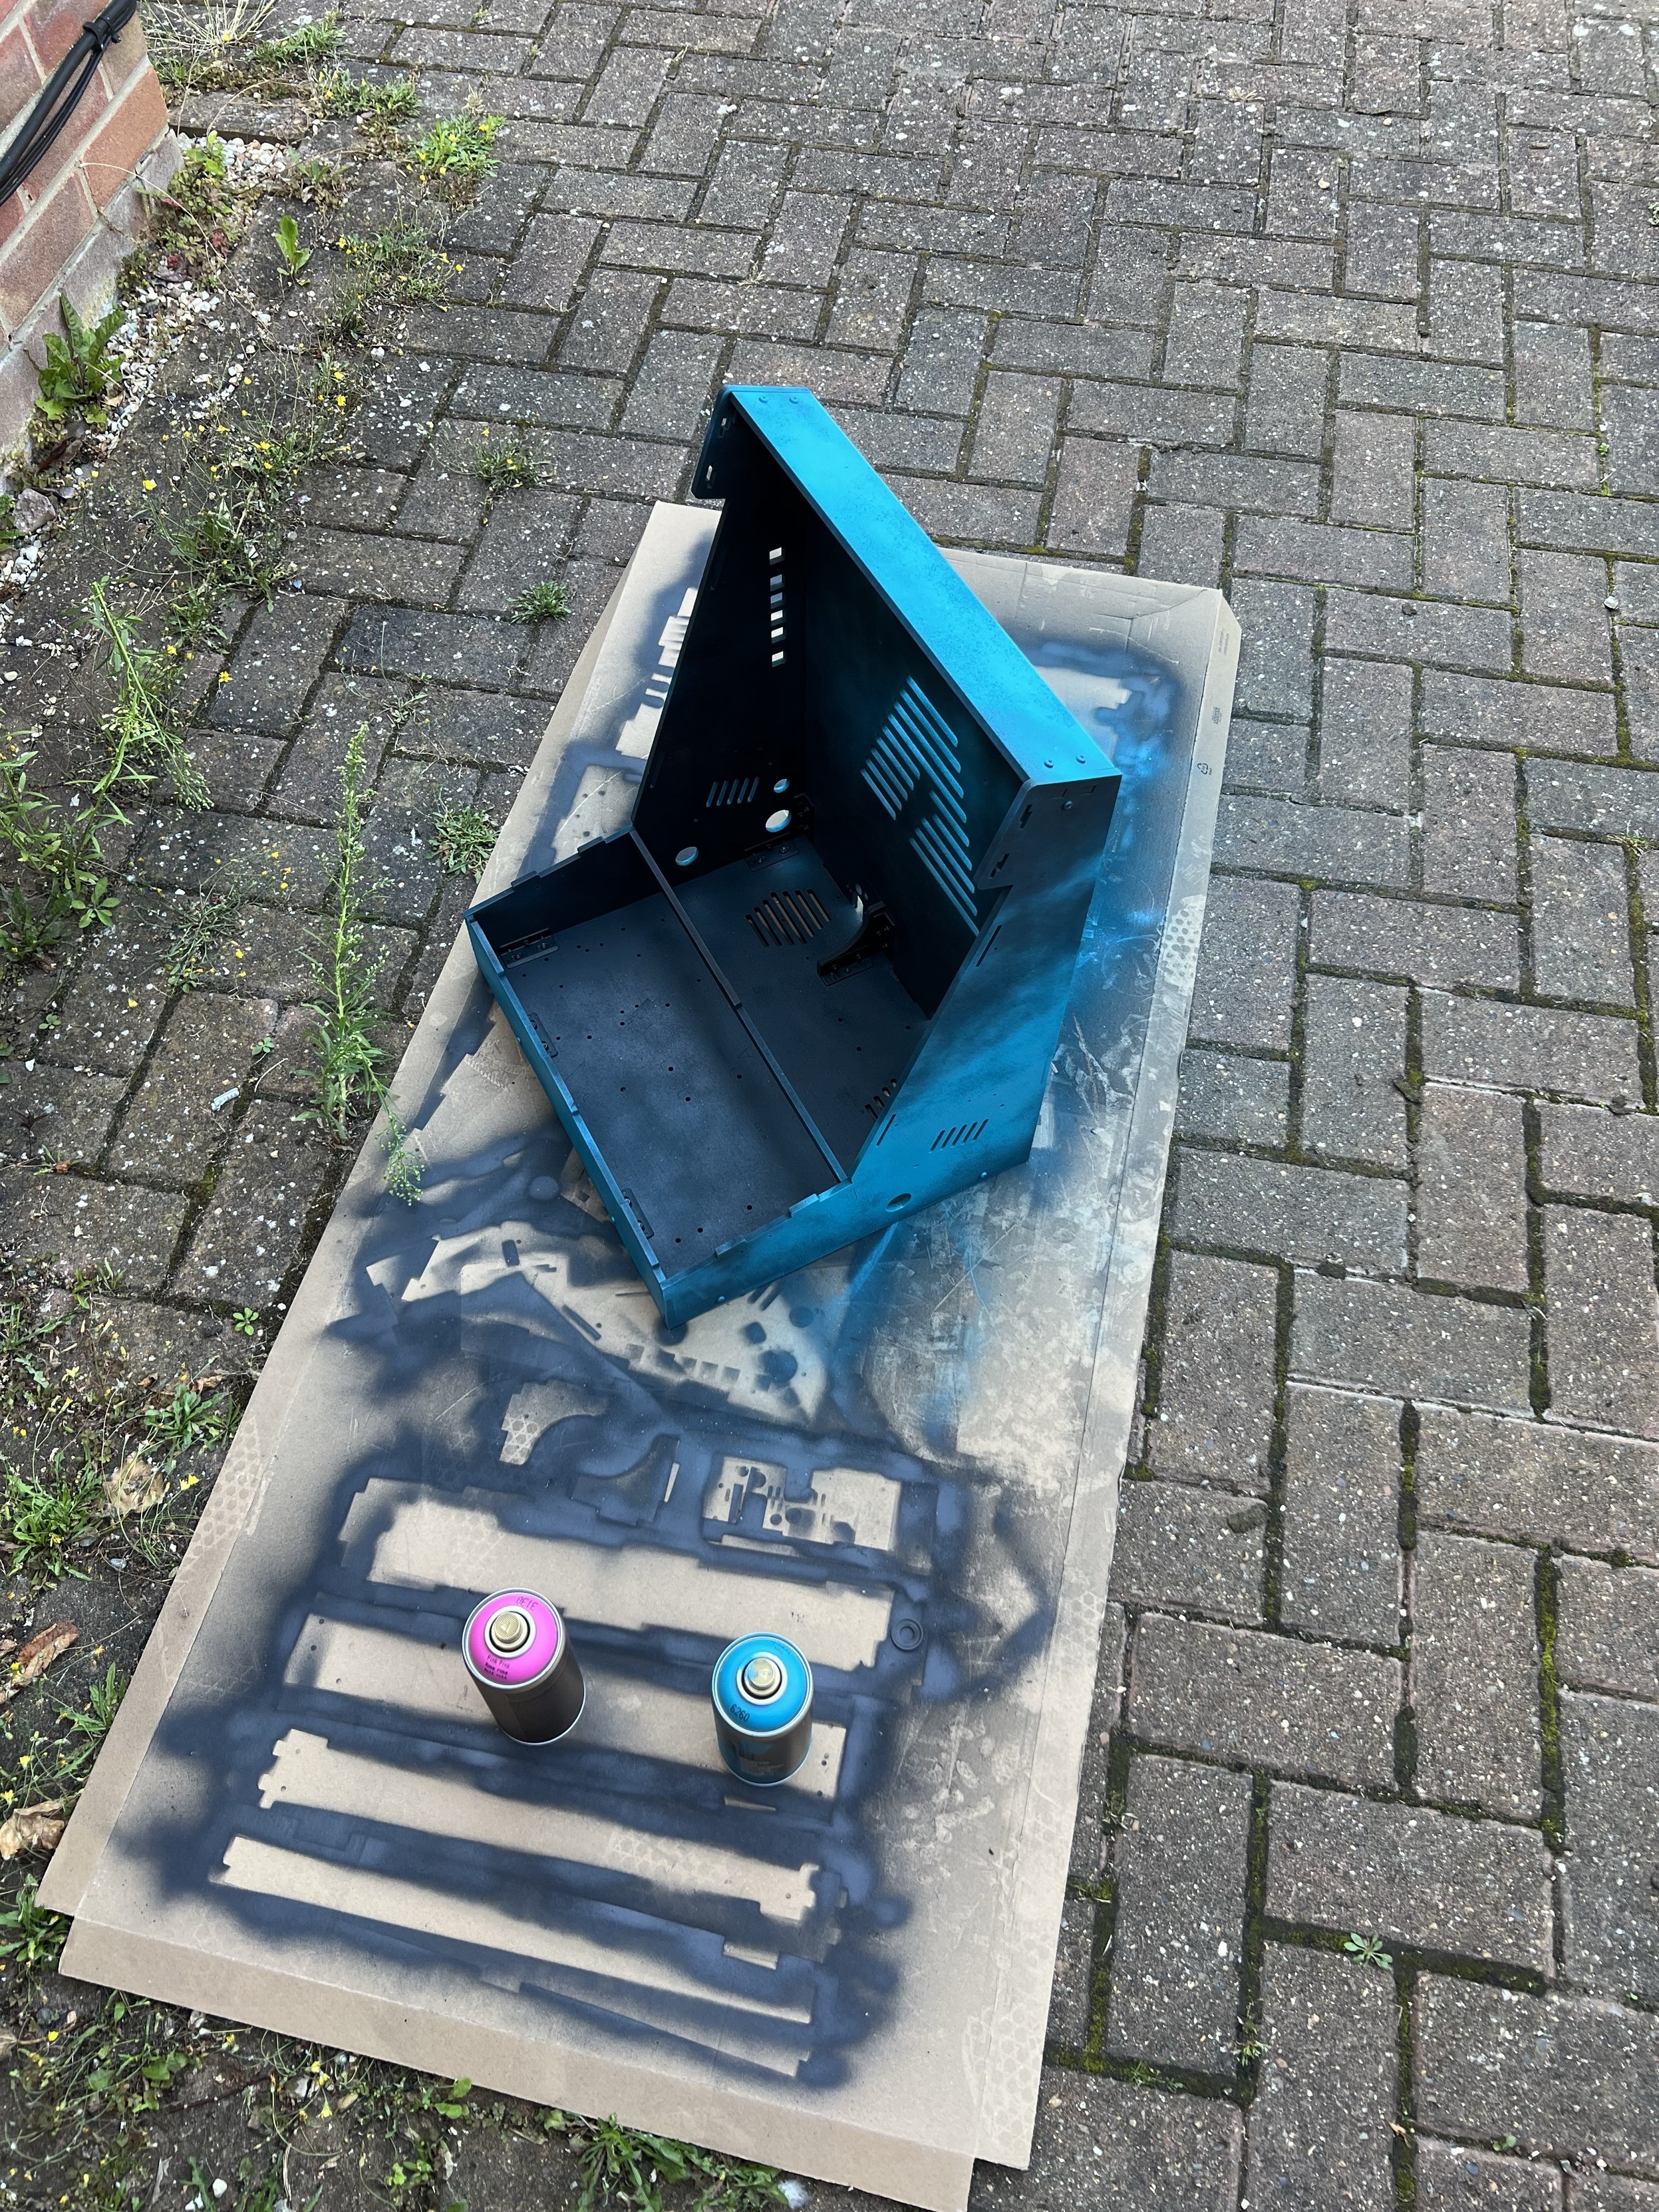
Deploy stencil film!
In fact all of my painting stencils were cut on an off-brand light tack cutting mat, into pieces of film I had badly hand-cut with scissors. Did this matter? Not at all. Well… sometimes…
More than once I managed to mis-feed the cutting mat and stencil film, causing it to mangle or dog-ear the corners, or crease the film on top. The machine is definitely not infallible and, unfortunately, neither am I. If, like me, you fail to leave enough room around the cutter, it will happily push the cutting mat out of the back and collide with whatever’s behind it. Oops.
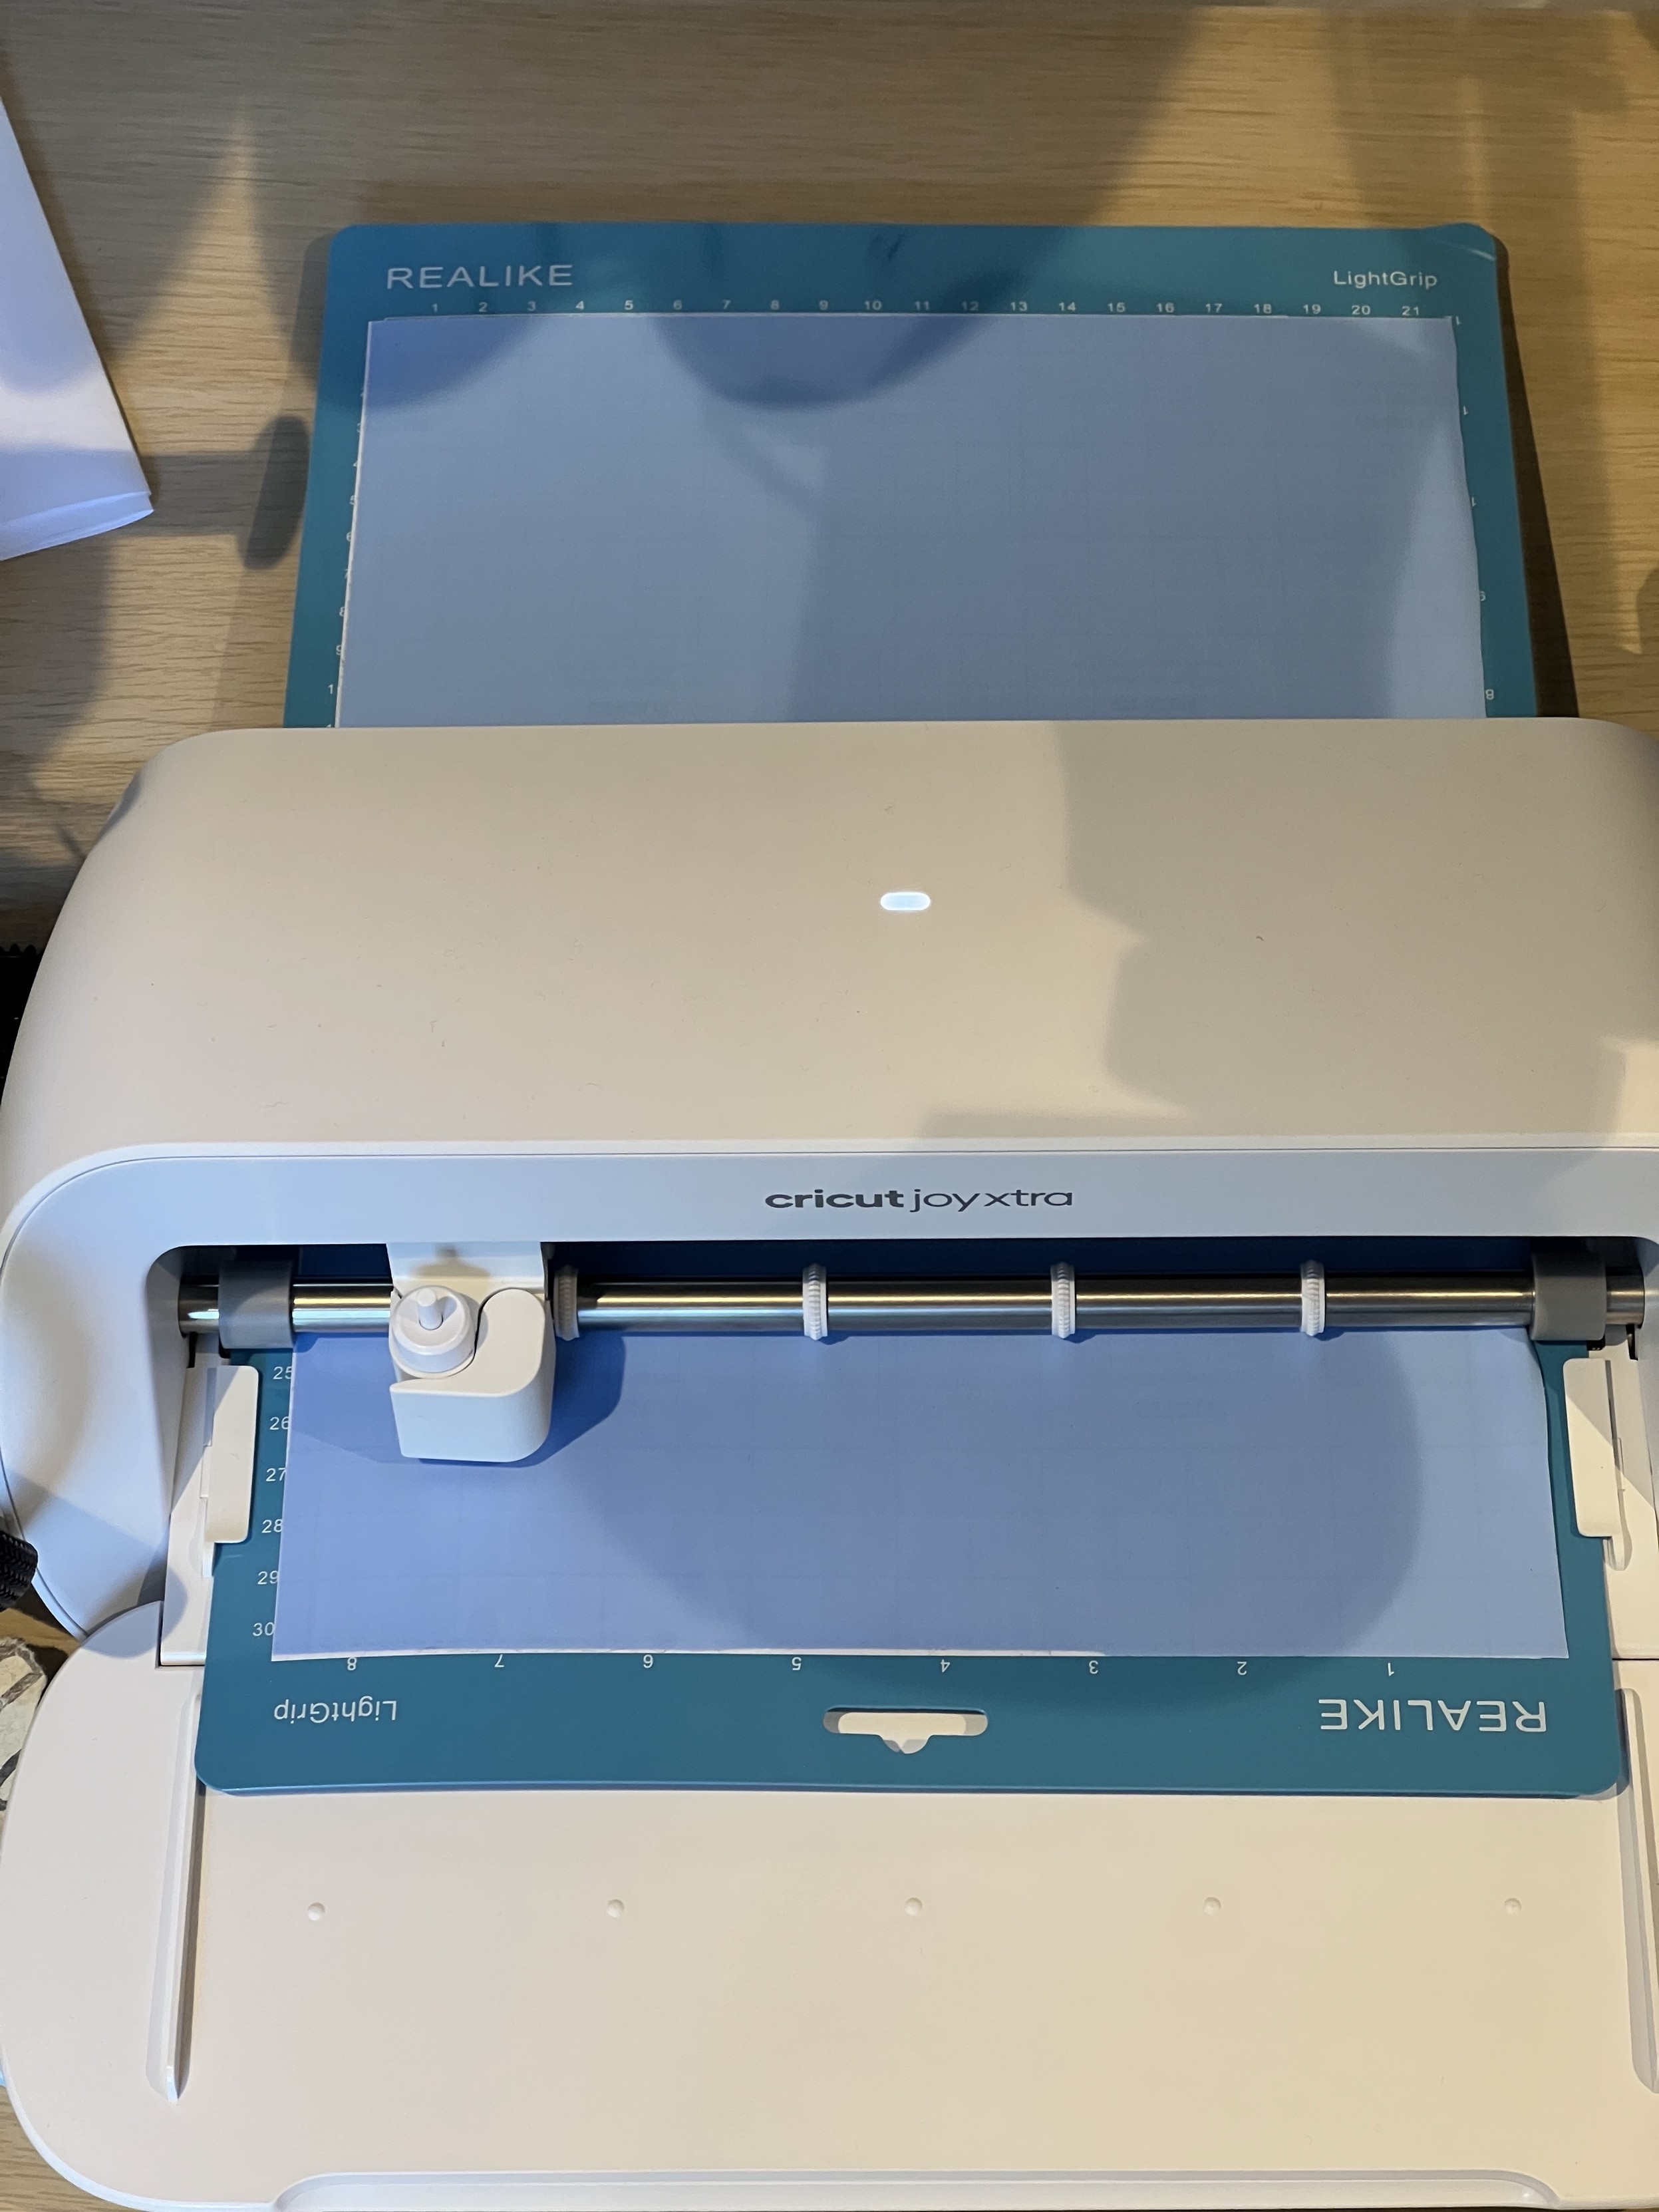
Anyway, I digress. I started my tentative exploration of the Cricut Joy Xtra with some simple plotting efforts. I decided right away that I disliked the “Design Space” app, and that I was going to spend as little time as possible in it. As such I don’t have an awful lot to say about it, except how it fits into my workflow. I turned to Inkscape to prepare my artwork, in lieu of crafting shapes or purchasing excruciatingly priced fonts in the app.
The Inkscape (or any vector app of your choice, really) workflow is simple, but a little contrived. For the most part you can vector away as you might normally – if you’re artistically inclined or have some experience – but you should take extra care to avoid overlapping paths (you’ll just waste pen ink) – and even extrarer care to ensure all of your artwork is converted to plain ol’ paths (the Cricut app doesn’t like much else.)
Once vectoring efforts are complete, it’s a small matter of exporting to a plain .svg (easy enough in Inkscape) and then getting that .svg file over to your phone. You can do this in one of two ways: The hard way; which involves stubbornly refusing to use the Design Space desktop app, and running a webserver on your desktop computer which you can visit on your phone to download your .svg files into the … mobile app. Or the easy way; which involves installing Cricut Design Space on your Windows or macOS computer and uploading the files via that.
Since I run Linux on my workstation and had no option to run the desktop app, I chose the hard way, and used `python -m http.server` to haul my .svg files over to my phone for placement and plotting.
It wasn’t until well into my efforts with stencils that I started the Affinity Designer free trial on my Mac, and discovered I could simply AirDrop .svg files to my phone and cut out the tedious extra step of navigating to the file in Safari. At time of writing I’ve even installed the Design Space app on my Mac, and while it’s a little clunky I can browse all the files I uploaded from my phone and – crucially – upload more directly from my computer.
When all is said and done, the results of a vinyl transfer are awfully impressive. I managed to decal a metal water bottle in such a way that it looked like part of the original metal, and it’s held up to daily use and washing for the past few weeks. Though, future note to self, make sure to stick a cut rectangle around the decal so its easier to lift onto transfer tape!
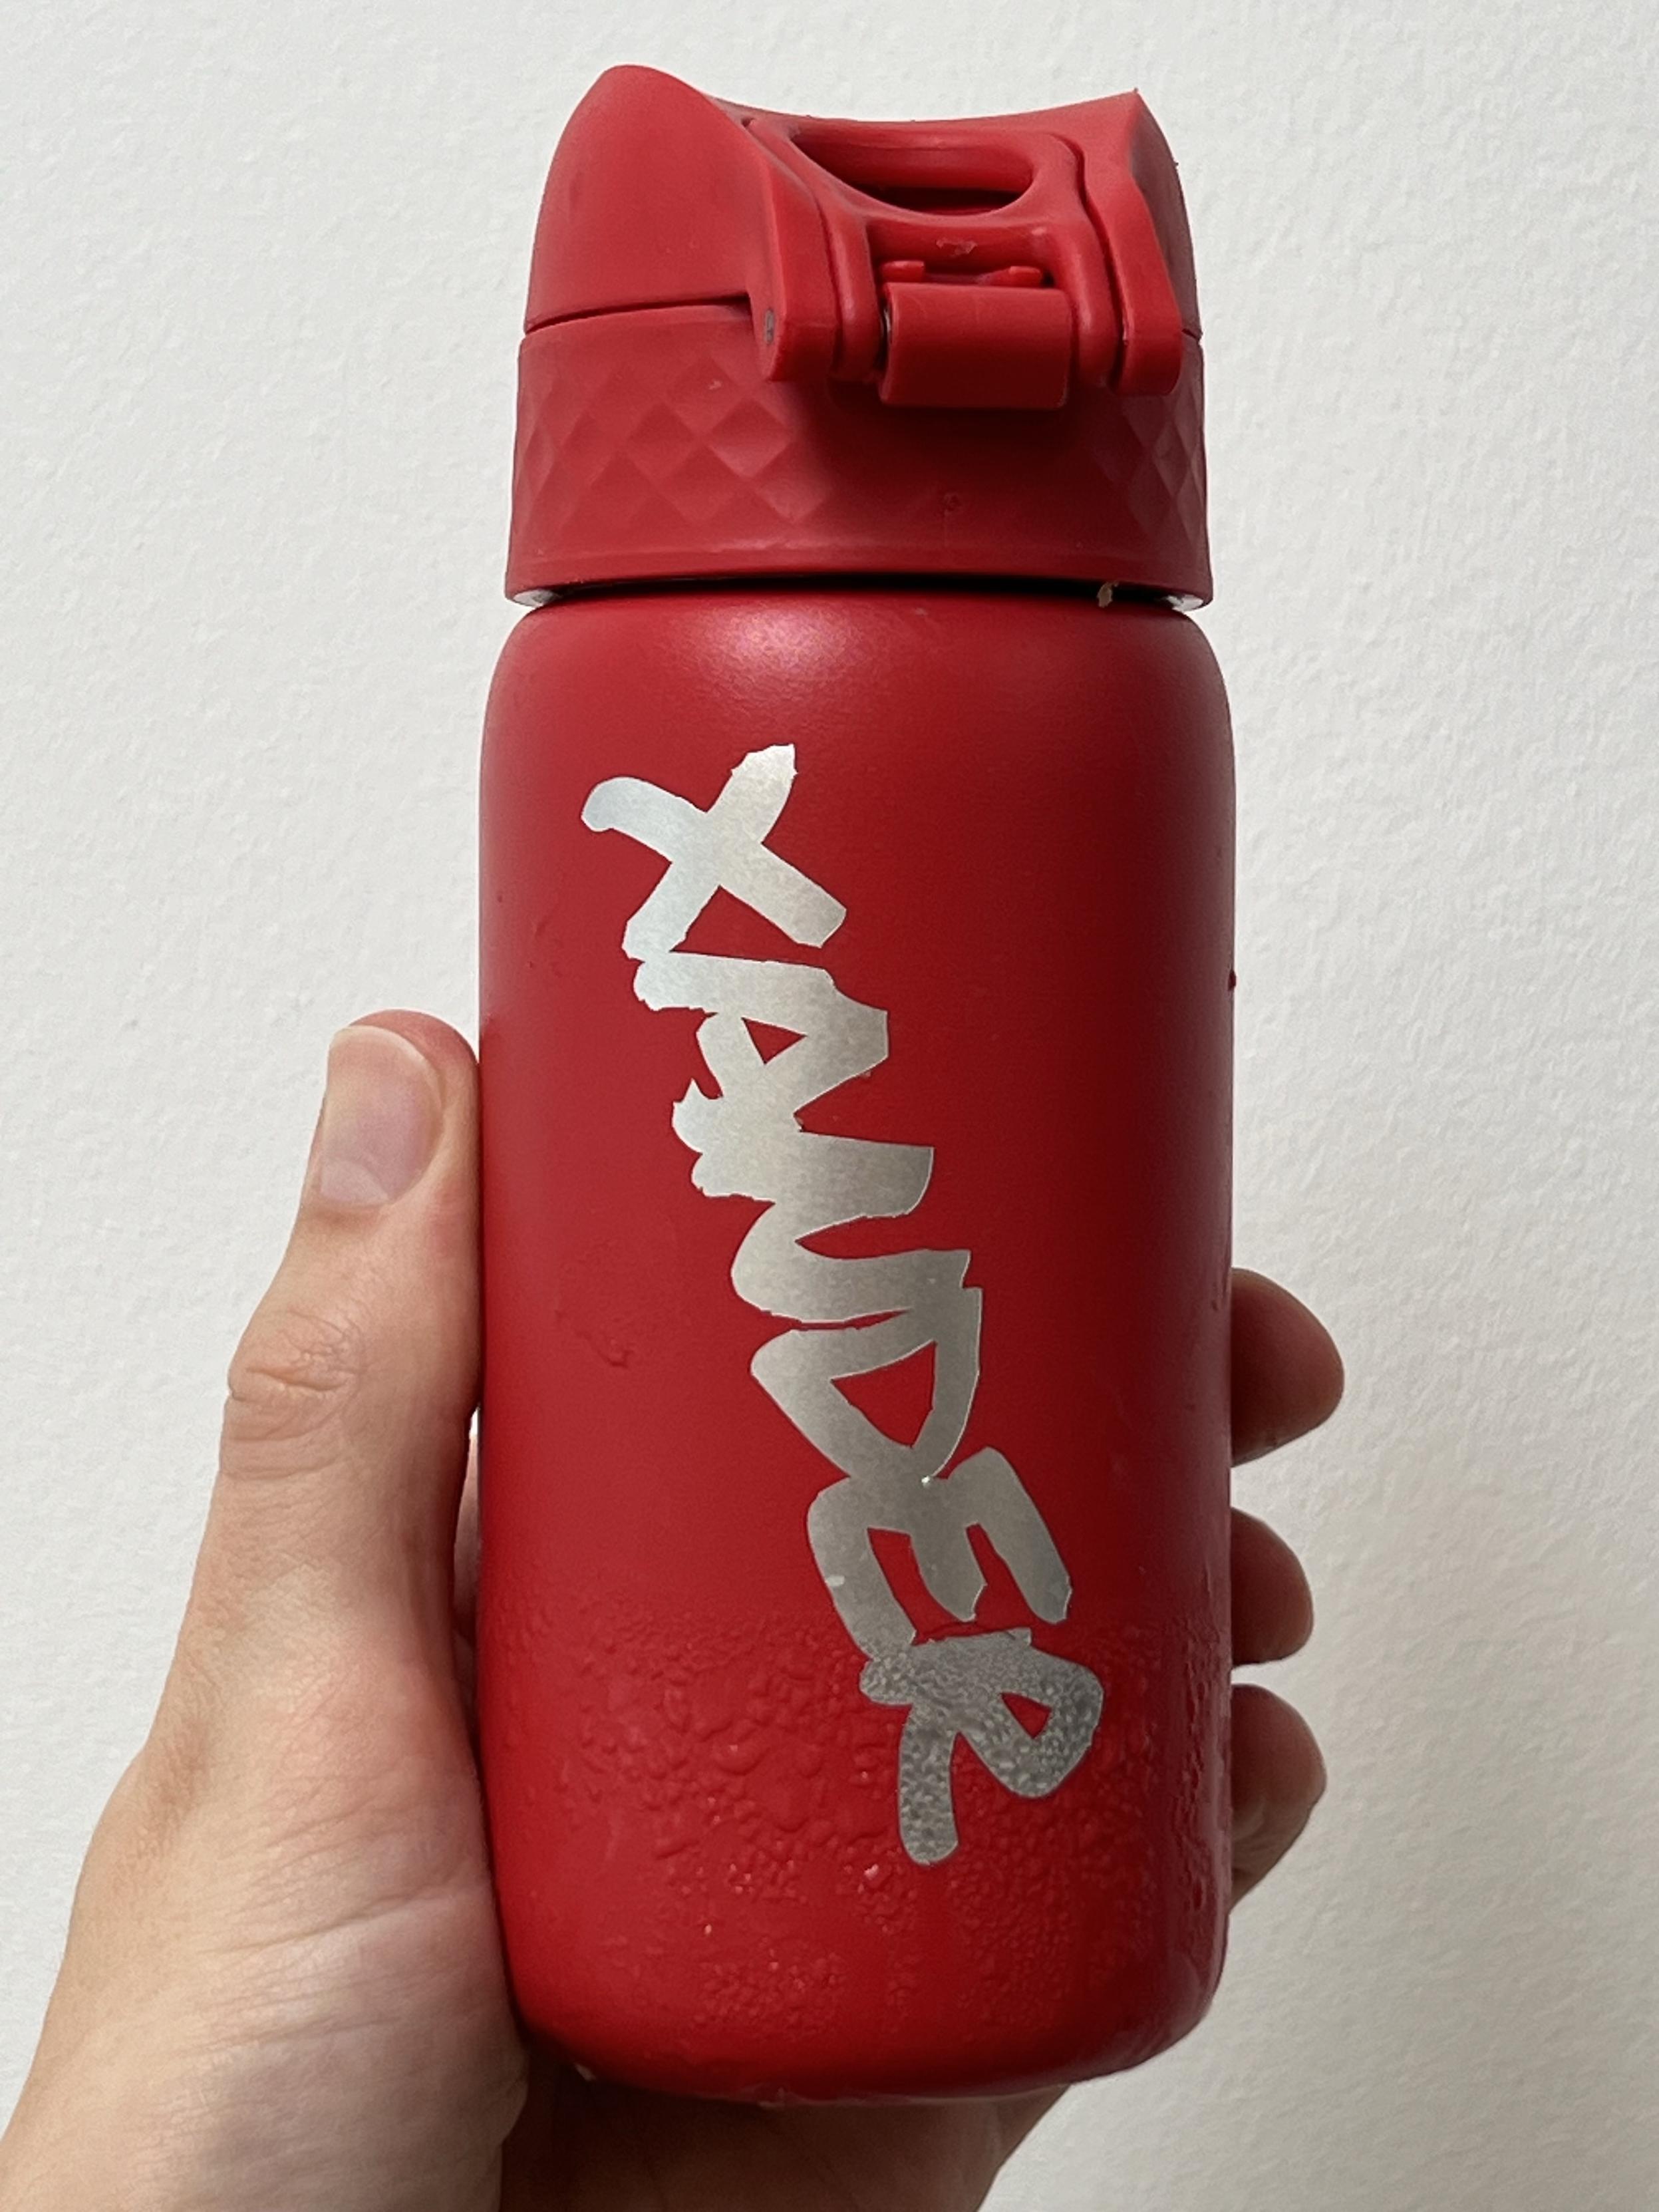
I am enormously pleased with how well this vinyl transfer turned out! It’s holding up too.
I suppose the long story short is that a workflow involving Inkscape or Affinity Designer is, perhaps, a little more complicated than it needs to be. In an ideal world you’d be able to use your design application of choice and simply “print” to the Cricut Joy Xtra without having to engage with their app at all. Unfortunately for artistic or technically minded users, Cricut’s app is a bastion of micropayment nonsense, so they absolutely, positively, totally want you to be exposed to it. It’s an upsell opportunity! Gotta get those longtail dollars. Recurring payments. I’m surprised they don’t just rent the machines. Since they can, allegedly, lock you out of them at the drop of a hat I suppose you never really own your cutter anyway.
The app, as such, is more concerned with hawking individual shapes for 89 pence a pop, and fonts for nearly a fiver than being an especially good example of an art tool. As someone who values money more than the hours and hours it would take me to recreate these things manually, these offerings are uninspiring and sometimes insultingly overpriced (there are only so many random amorphous blob vectors you could justifiably spend 89p on). If I were to step into the shoes of someone making a batch of gift cards, personalised glasses, wedding invitations or stickers then I might venture that there are plenty of shapes complex enough and useful enough to warrant the price. These are, however, mired in a never-ending sea of questionably useful carp. I searched for “pumpkin” and the results suggested there were eleven thousand matches. Want ten thousand gopher/capybara images? Cricut Design Space has got you. Thirteen thousand diamonds? Sure! A rip-off of the Mozilla pixel dinosaur? .. yeaaah. Uh, wait, what? Oh and if you search for “microsoft” the results sure do contain a lot – and I mean a lot – of apples. What’s the deal with that?
Anyway, in spite of Circuts less than stellar software strategy and tenuous, if not hostile, relationship with the oh so old fashioned concept of ownership I managed to have an awful lot of fun with the Joy Xtra. When it came down to cutting things it performed admirably, smashing out some of my stencil designs with such speed that I was – at one point – convinced something had gone wrong and the cut hadn’t finished.
Patching up the panel I split and tearing down for a coat of paint!
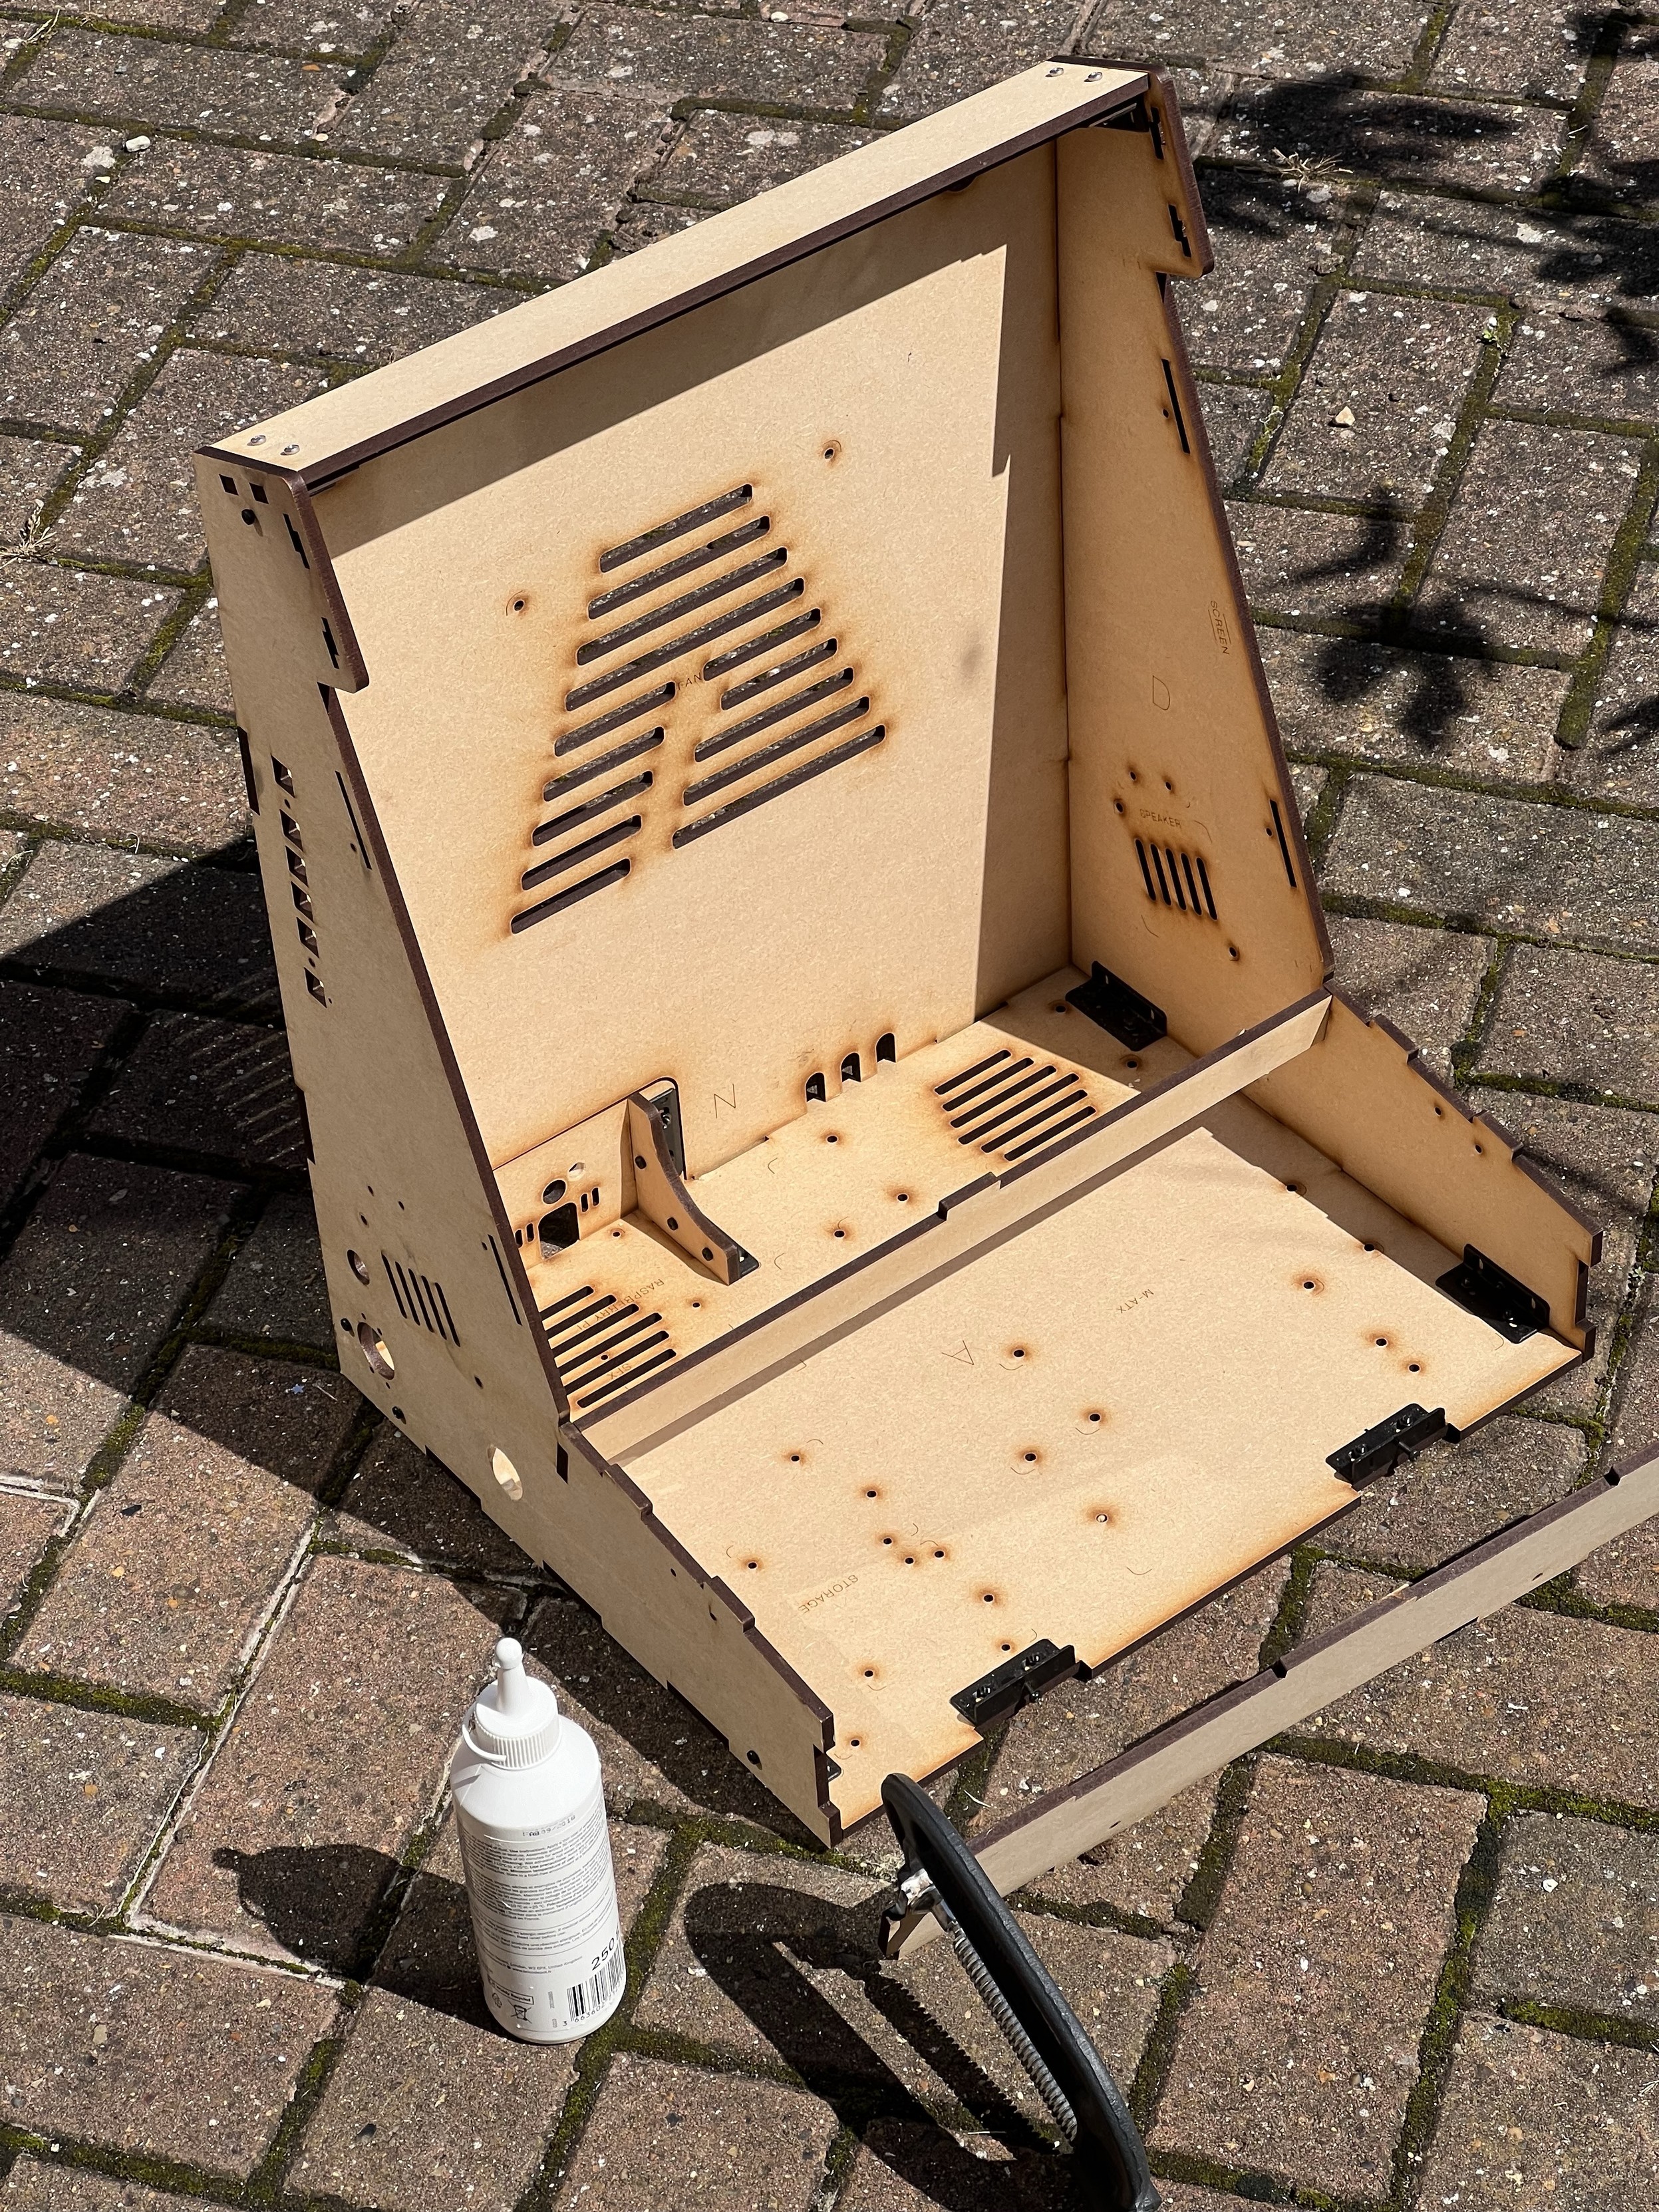
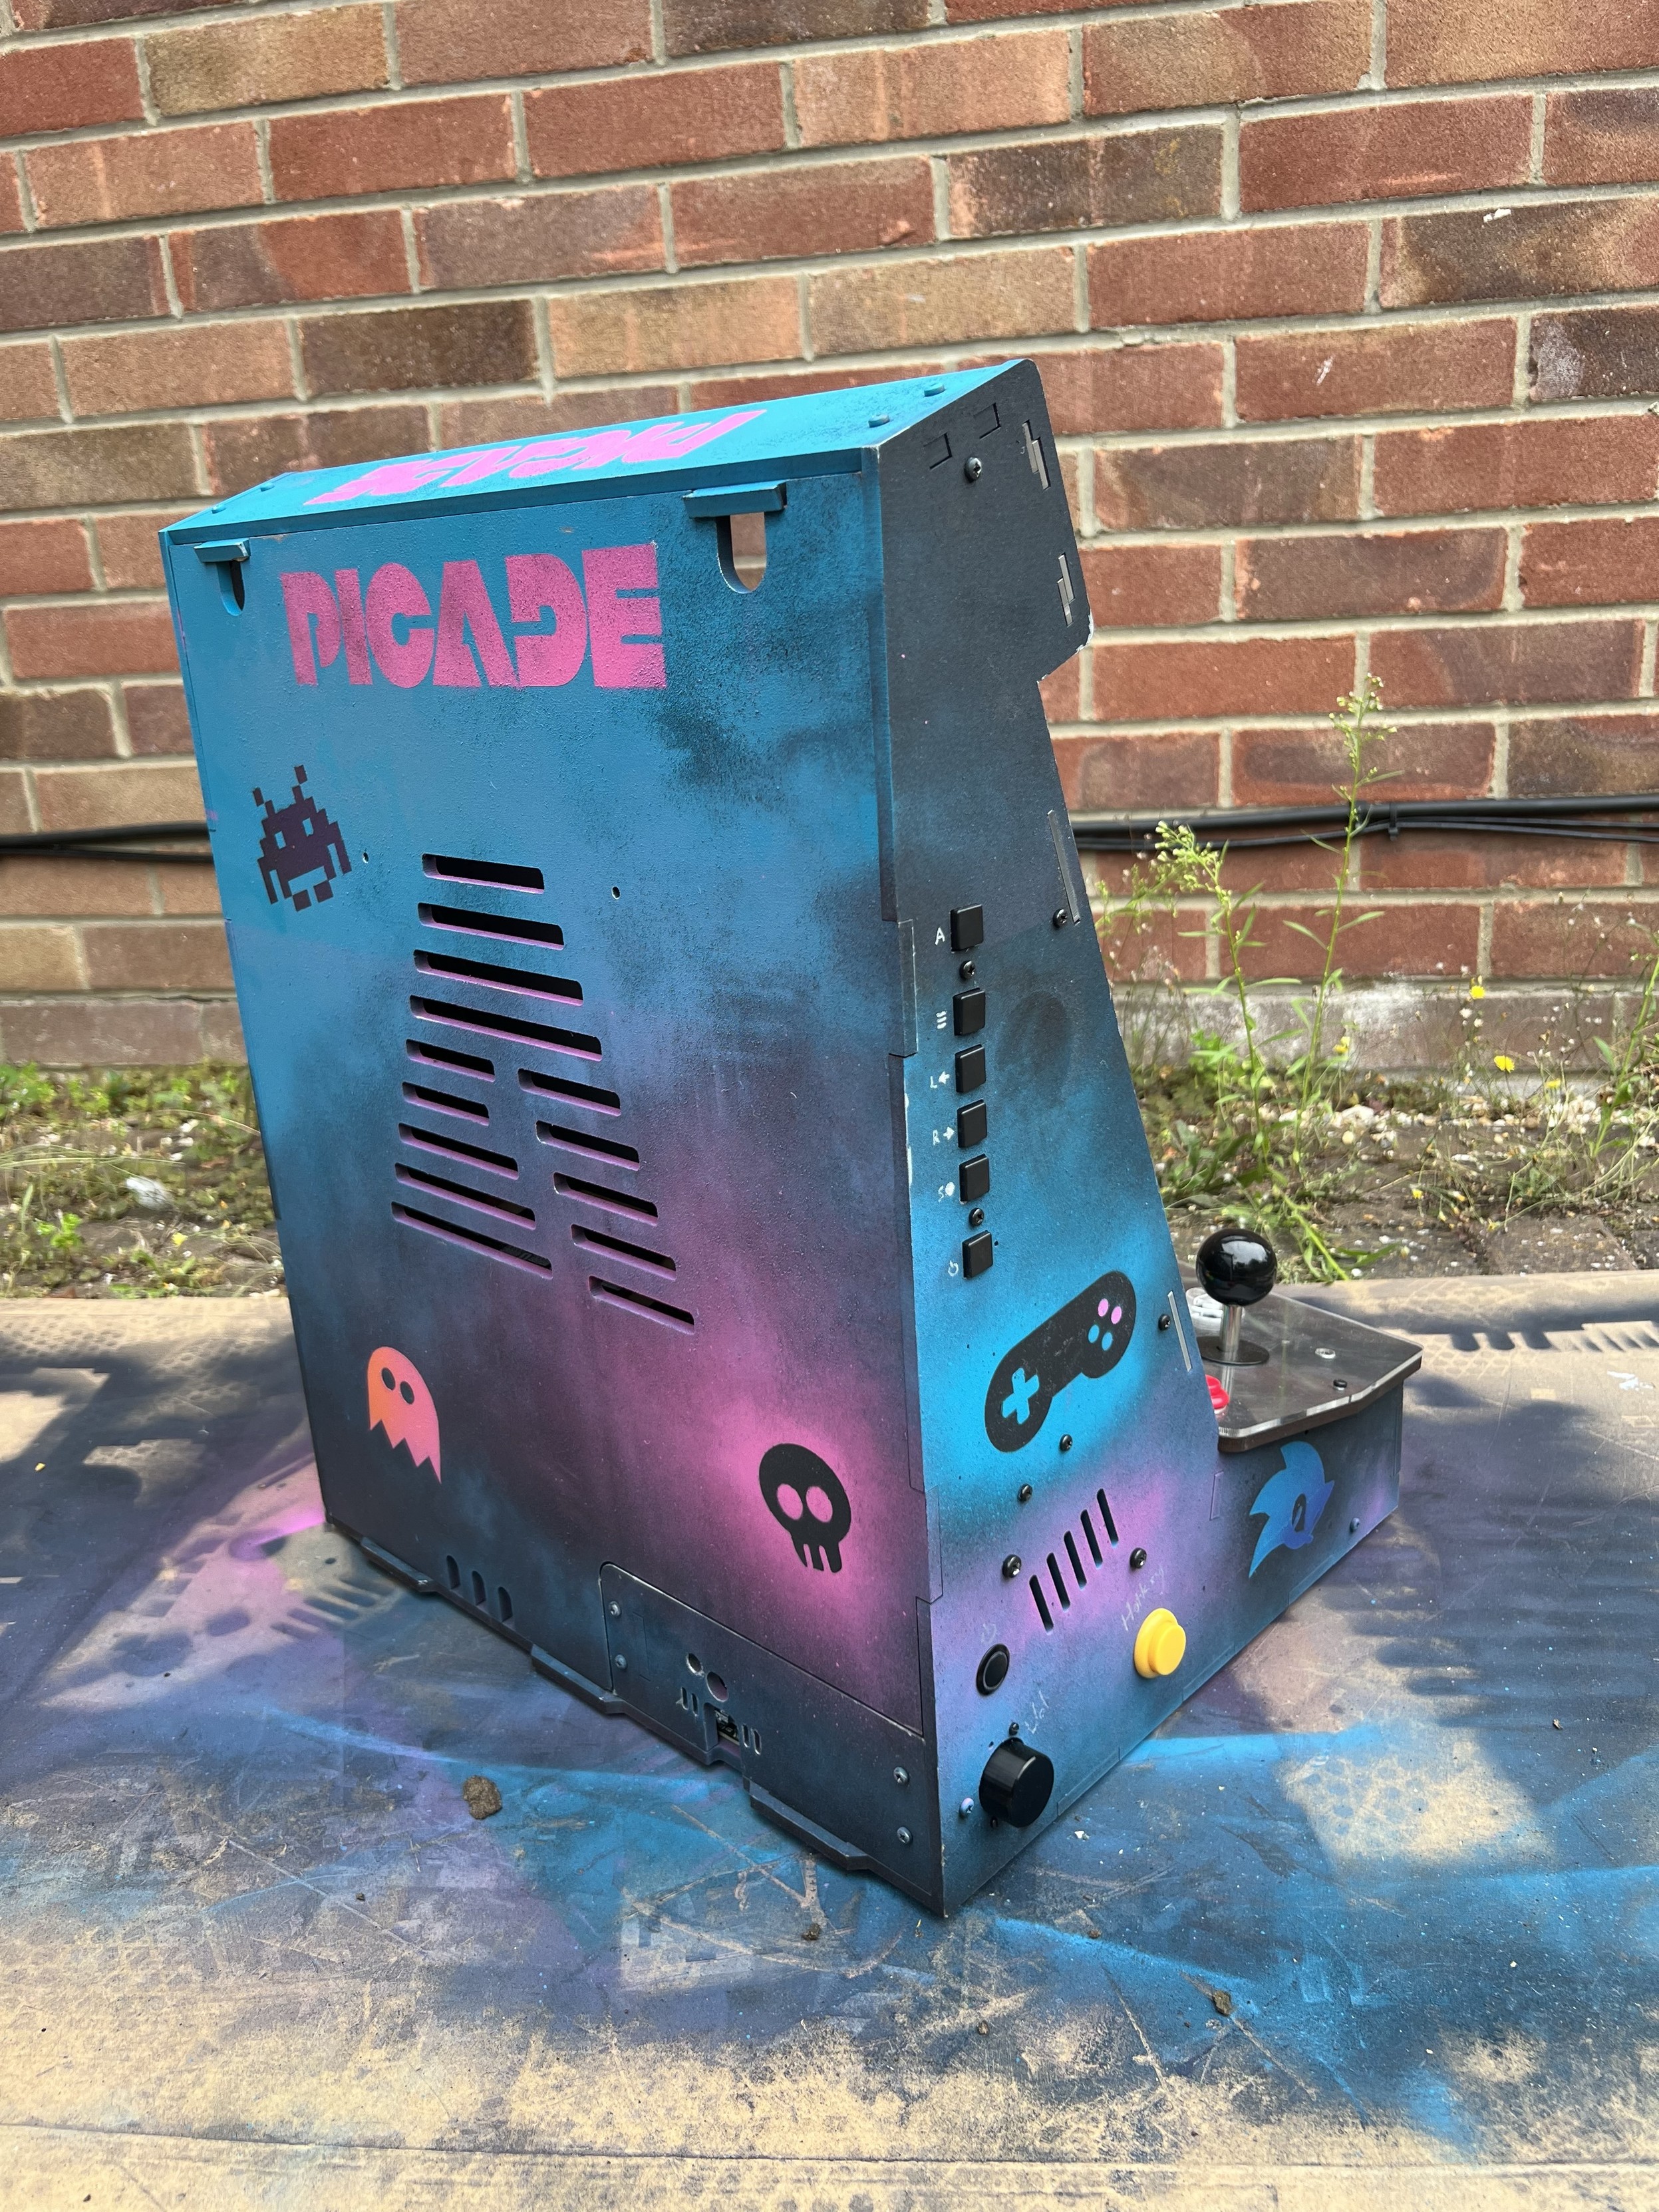
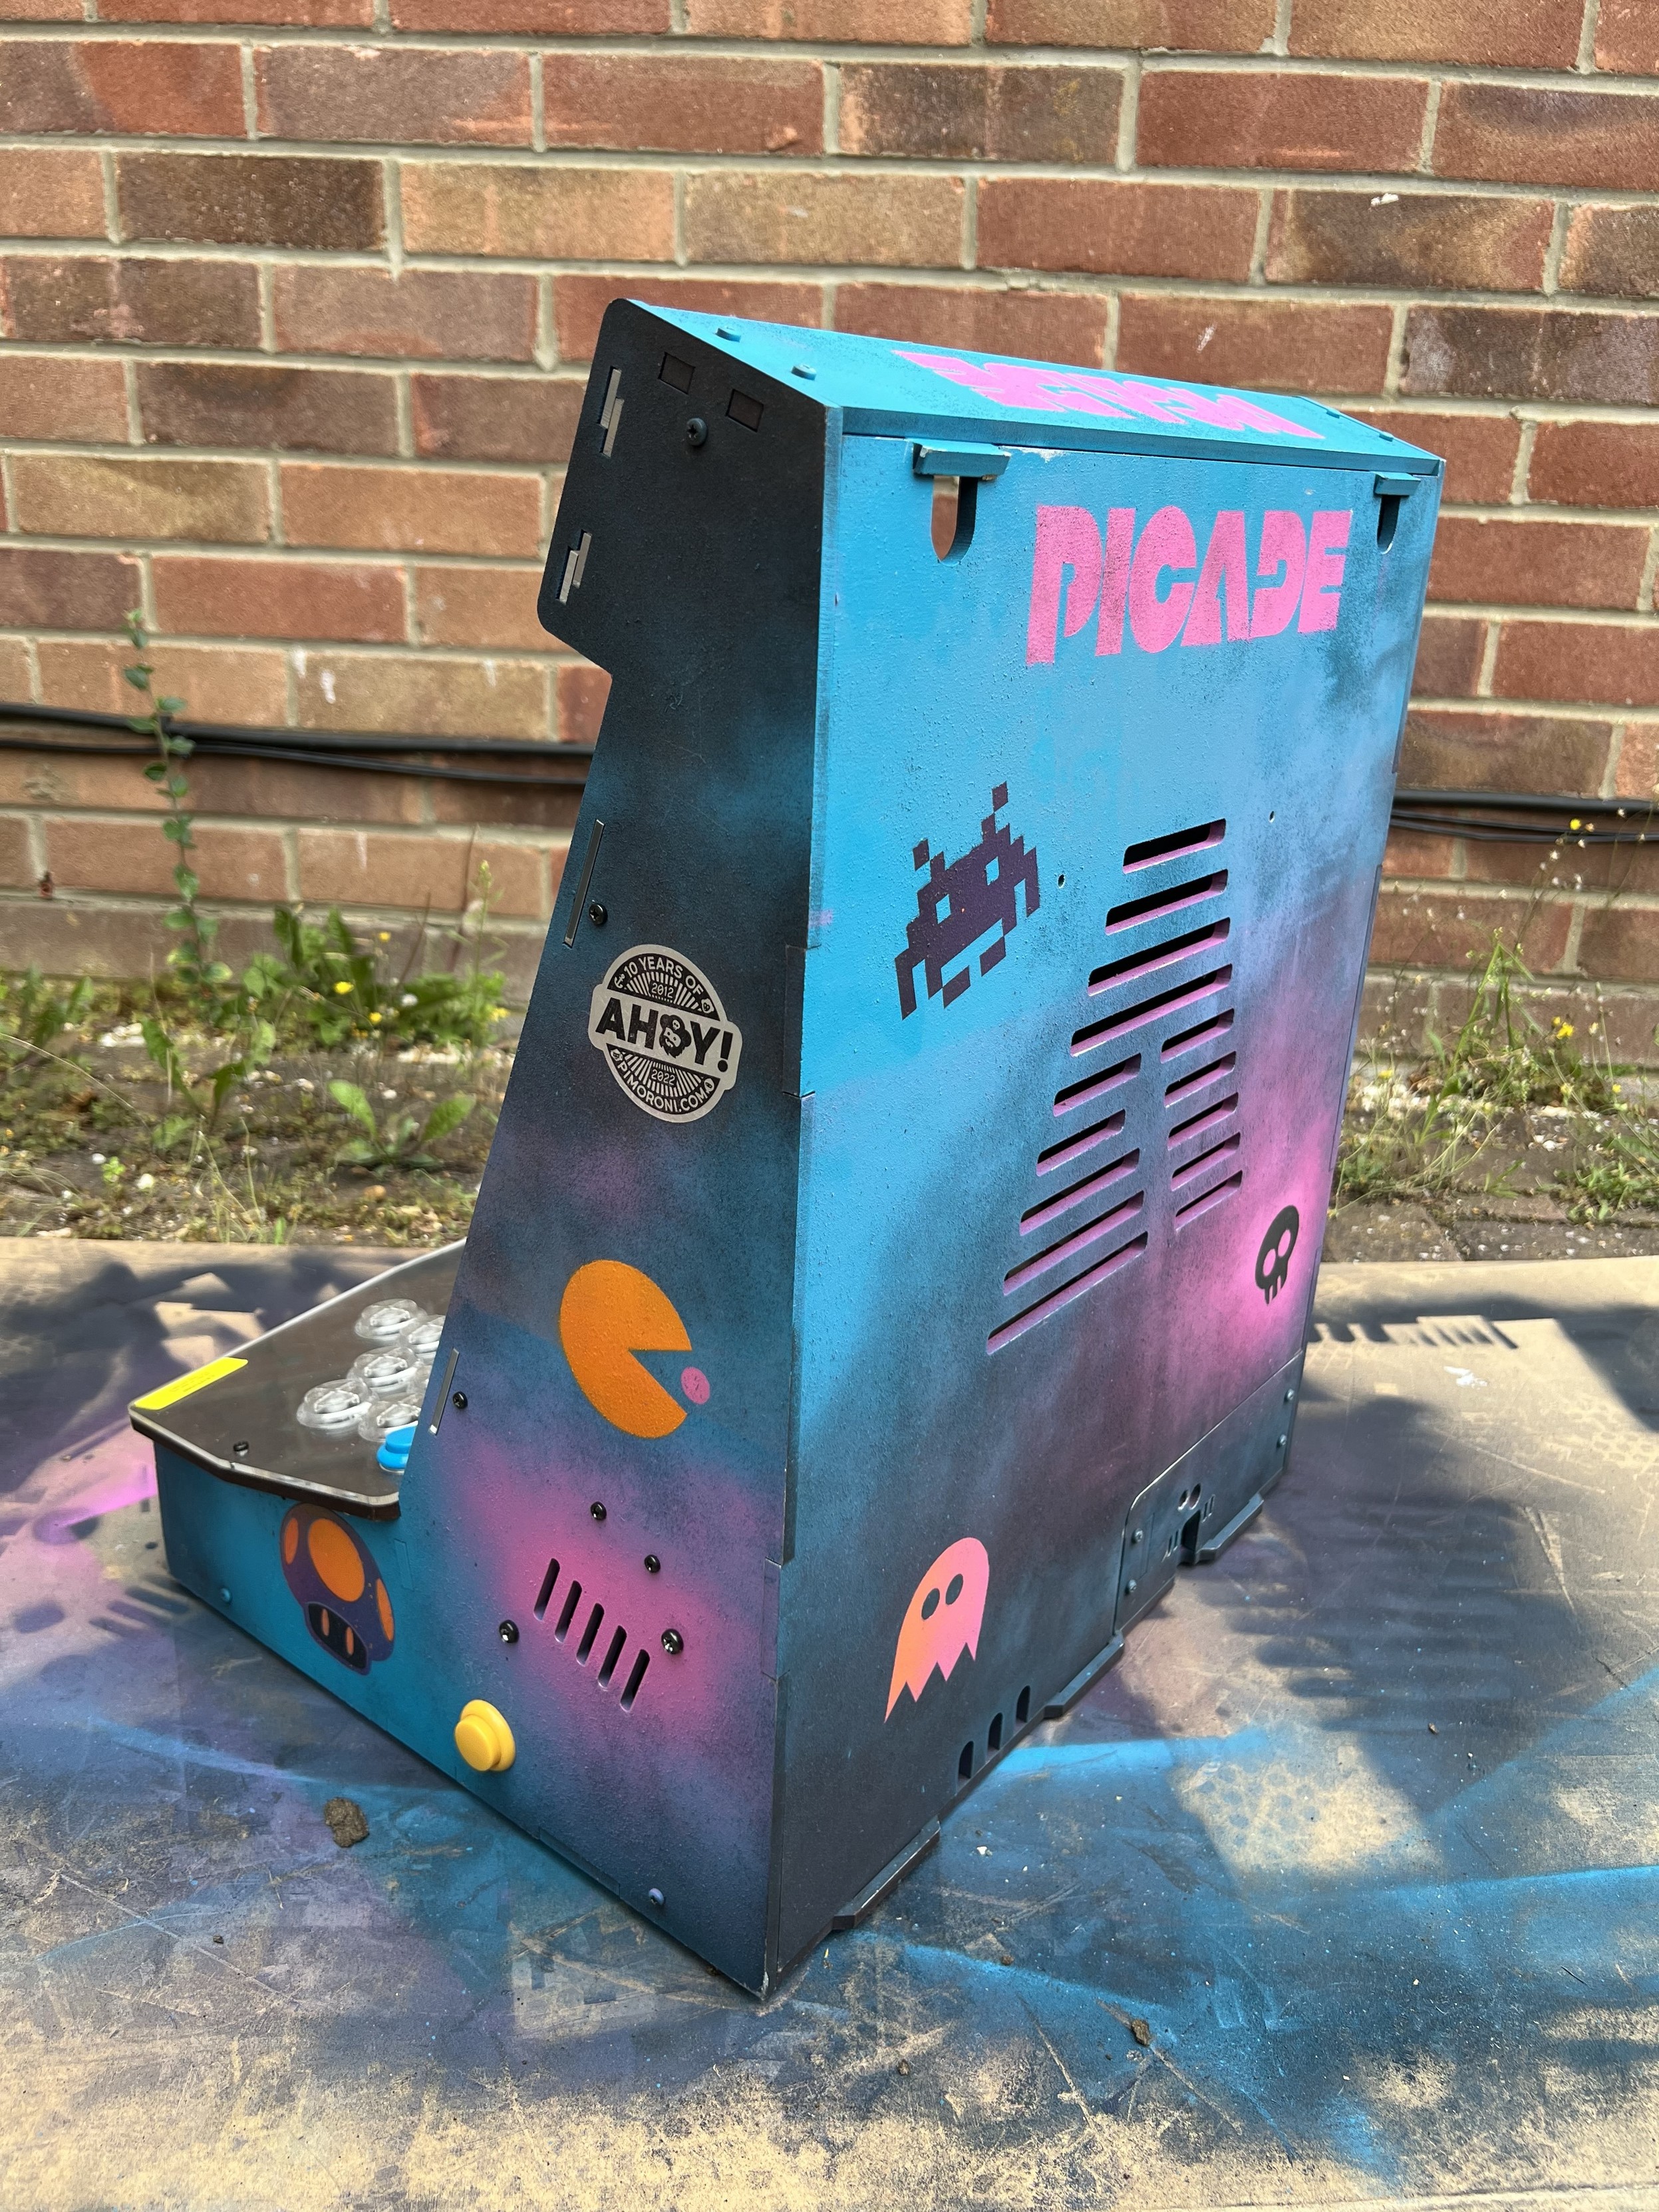
It took me a while to find a project, but the penny dropped suddenly when I realised my Picade Max cabinet (a prototype for the Pimoroni product, so I would work on firmware for the audio and input boards) was an eyesore of grotty, raw, uncoated, plain, boring, mdf. “I could paint this!” I declared. “I could… paint this?” I wondered.
I could paint this. Apparently. In fact Cricut’s affinity for bashing out stencils and their actually reasonably good (okay I don’t have much experience with other stencil film) stencil film made the task of spraying designs onto my arcade cabinet an absolute breeze. Which is just as well, since I needed a breeze to get rid of the spray paint fumes.
Painting ensues
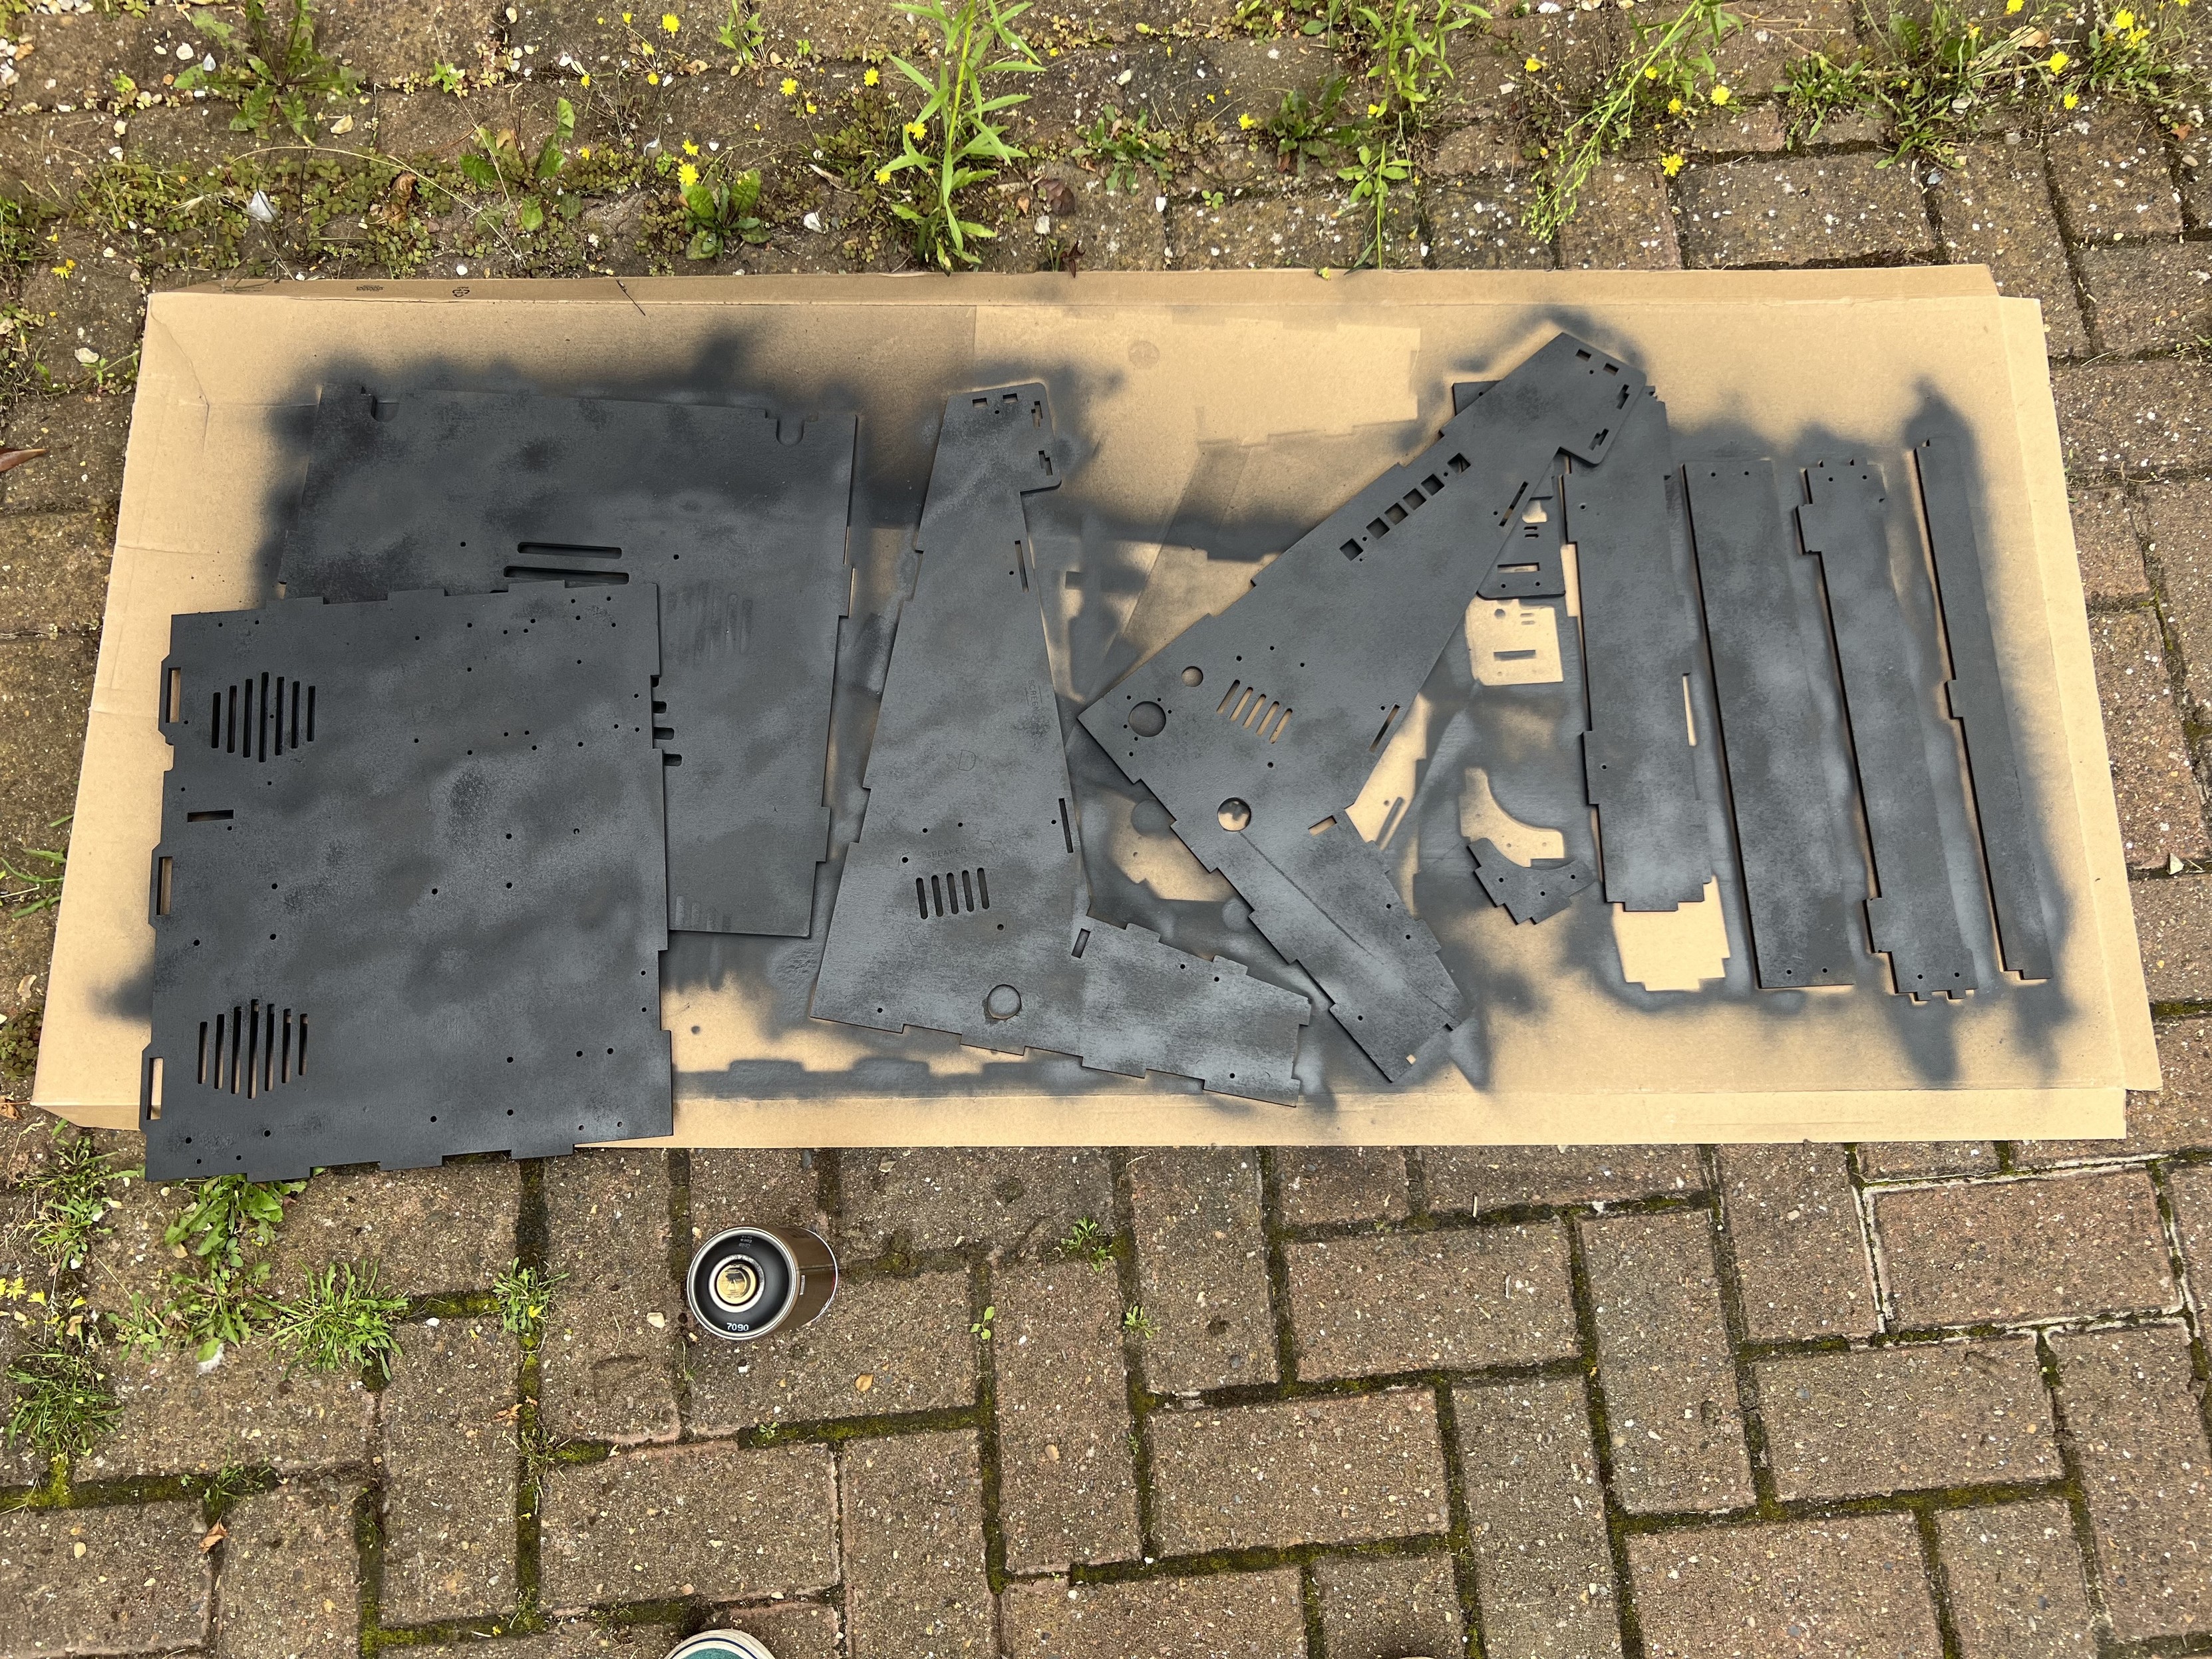
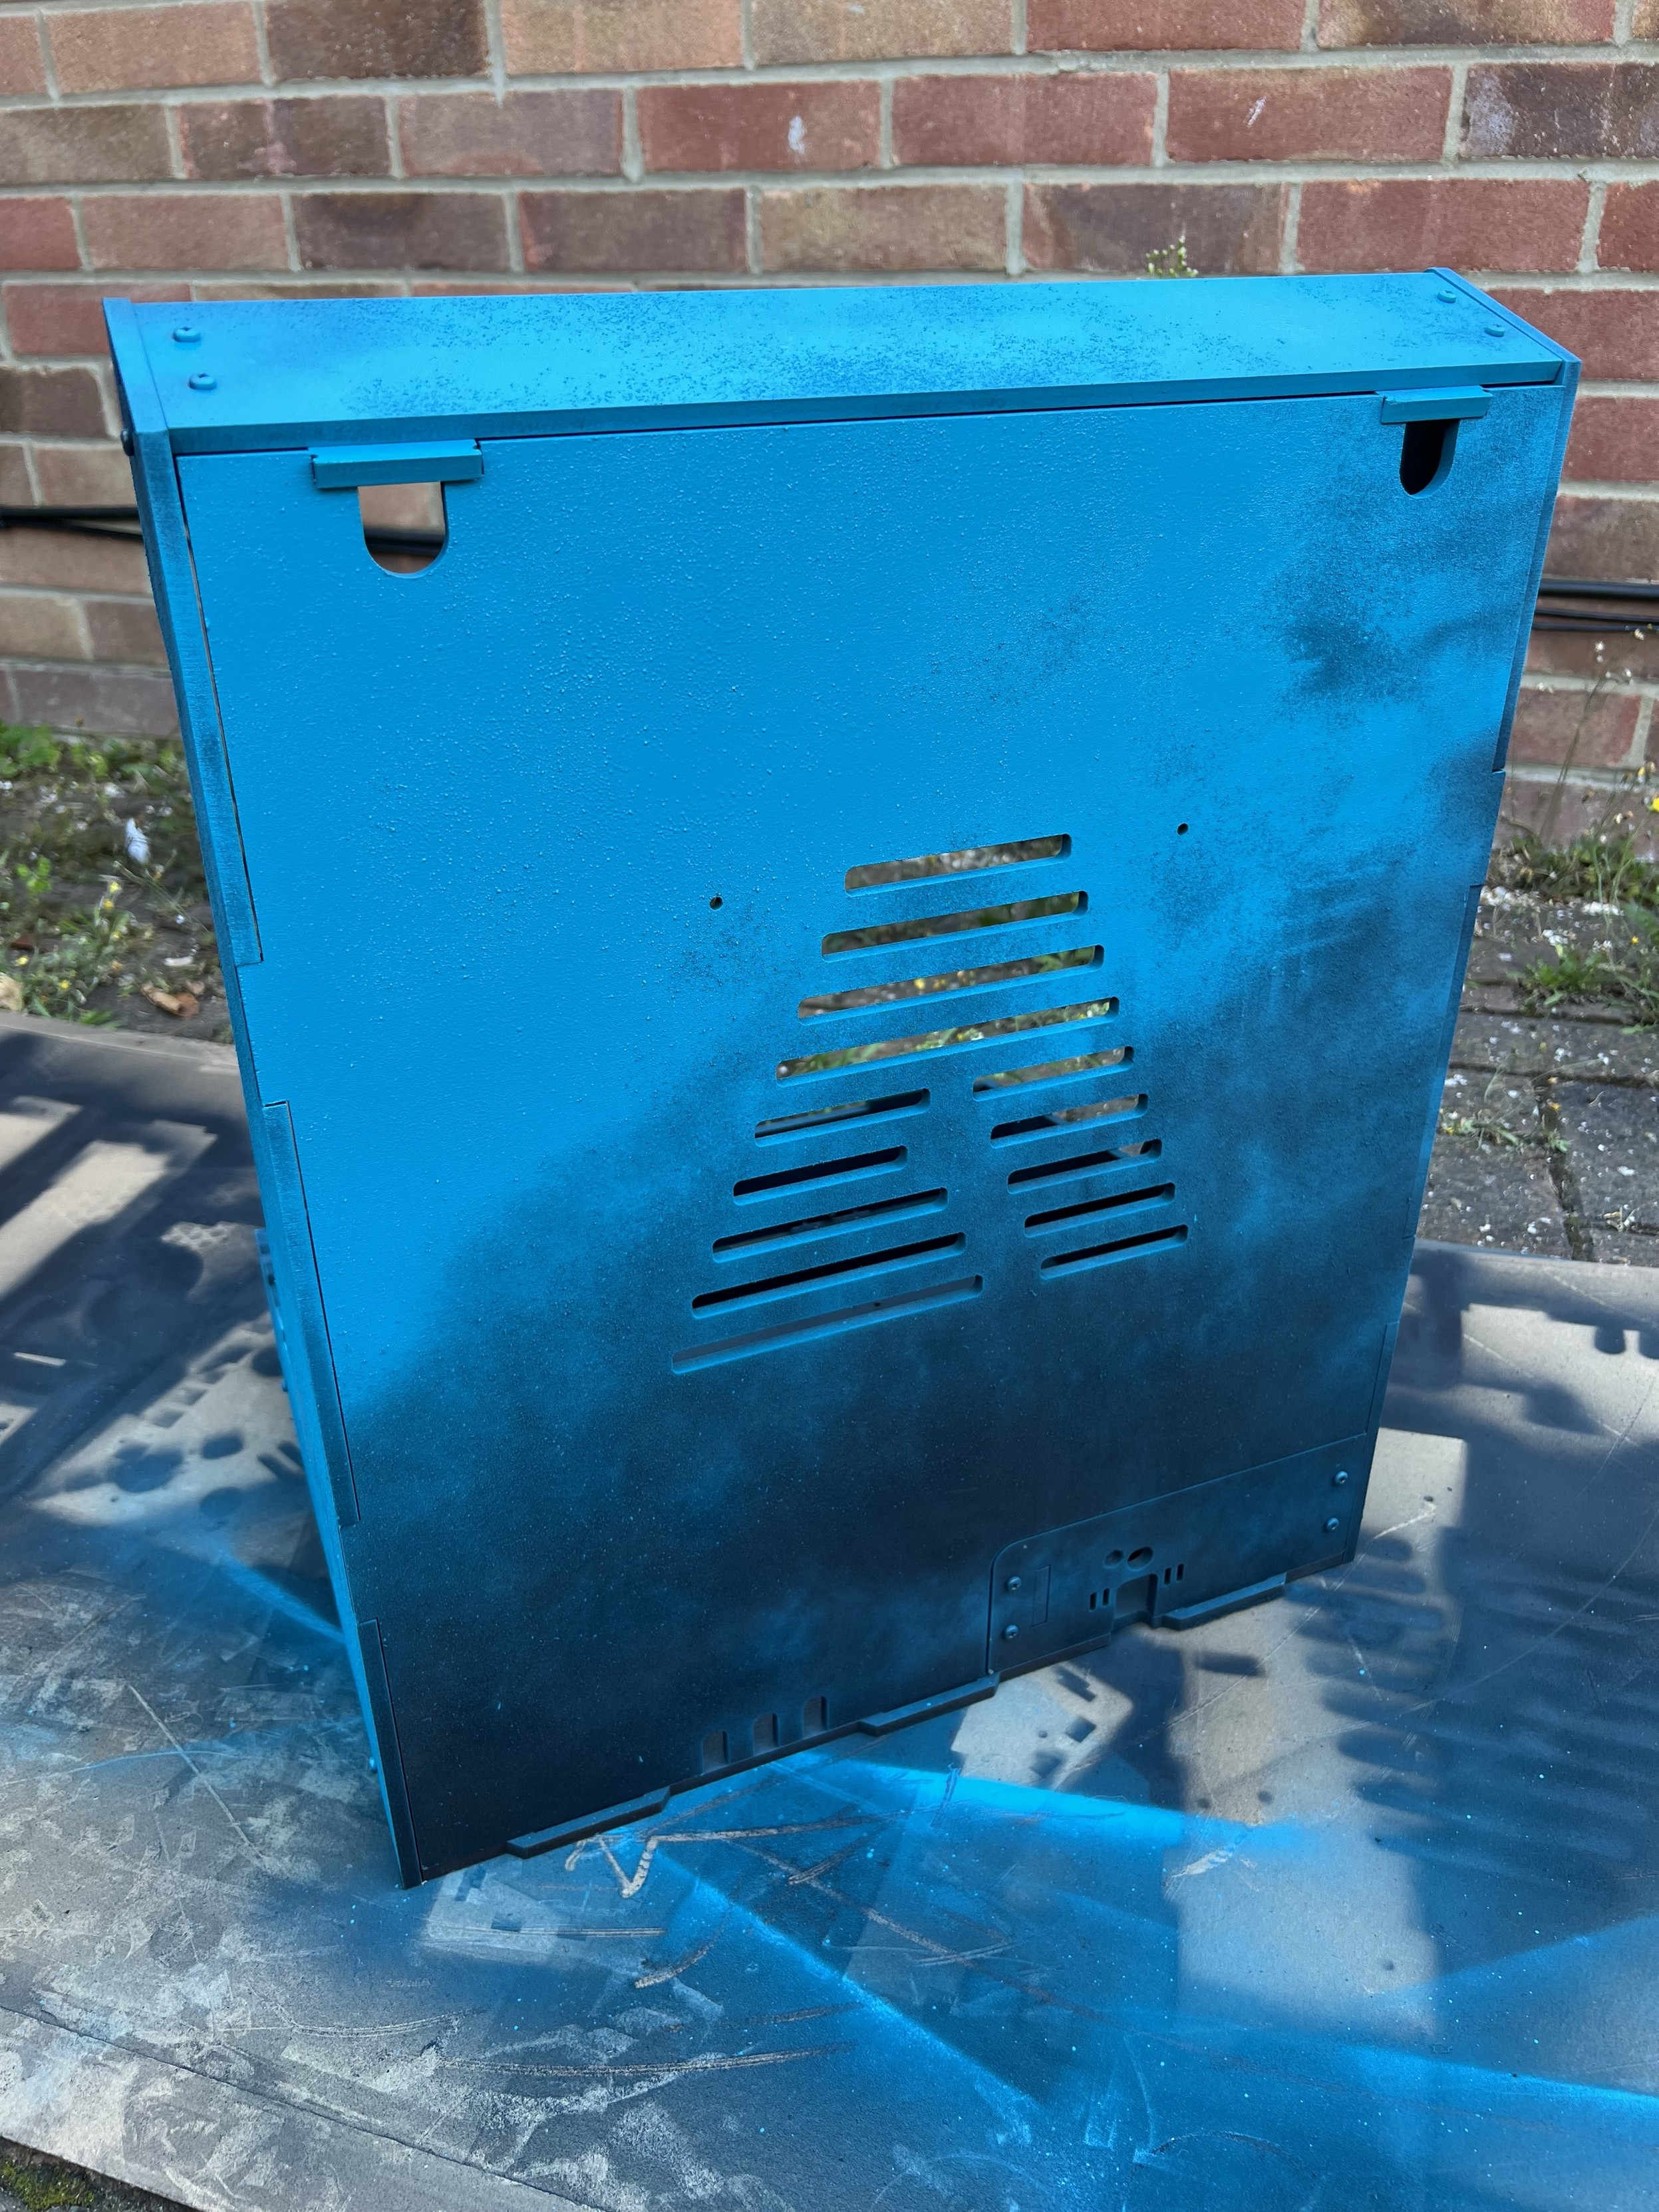
I started, as one might, with an undercoat of “coke” black. This was the first spray painting I had done since building questionably durable, laser cut, laminated plywood skateboards back at Pimoroni HQ many, many moons ago. It didn’t go super well, but I resigned for a grunge look and decided that imperfection was perfection.
Reassembled and adding colour
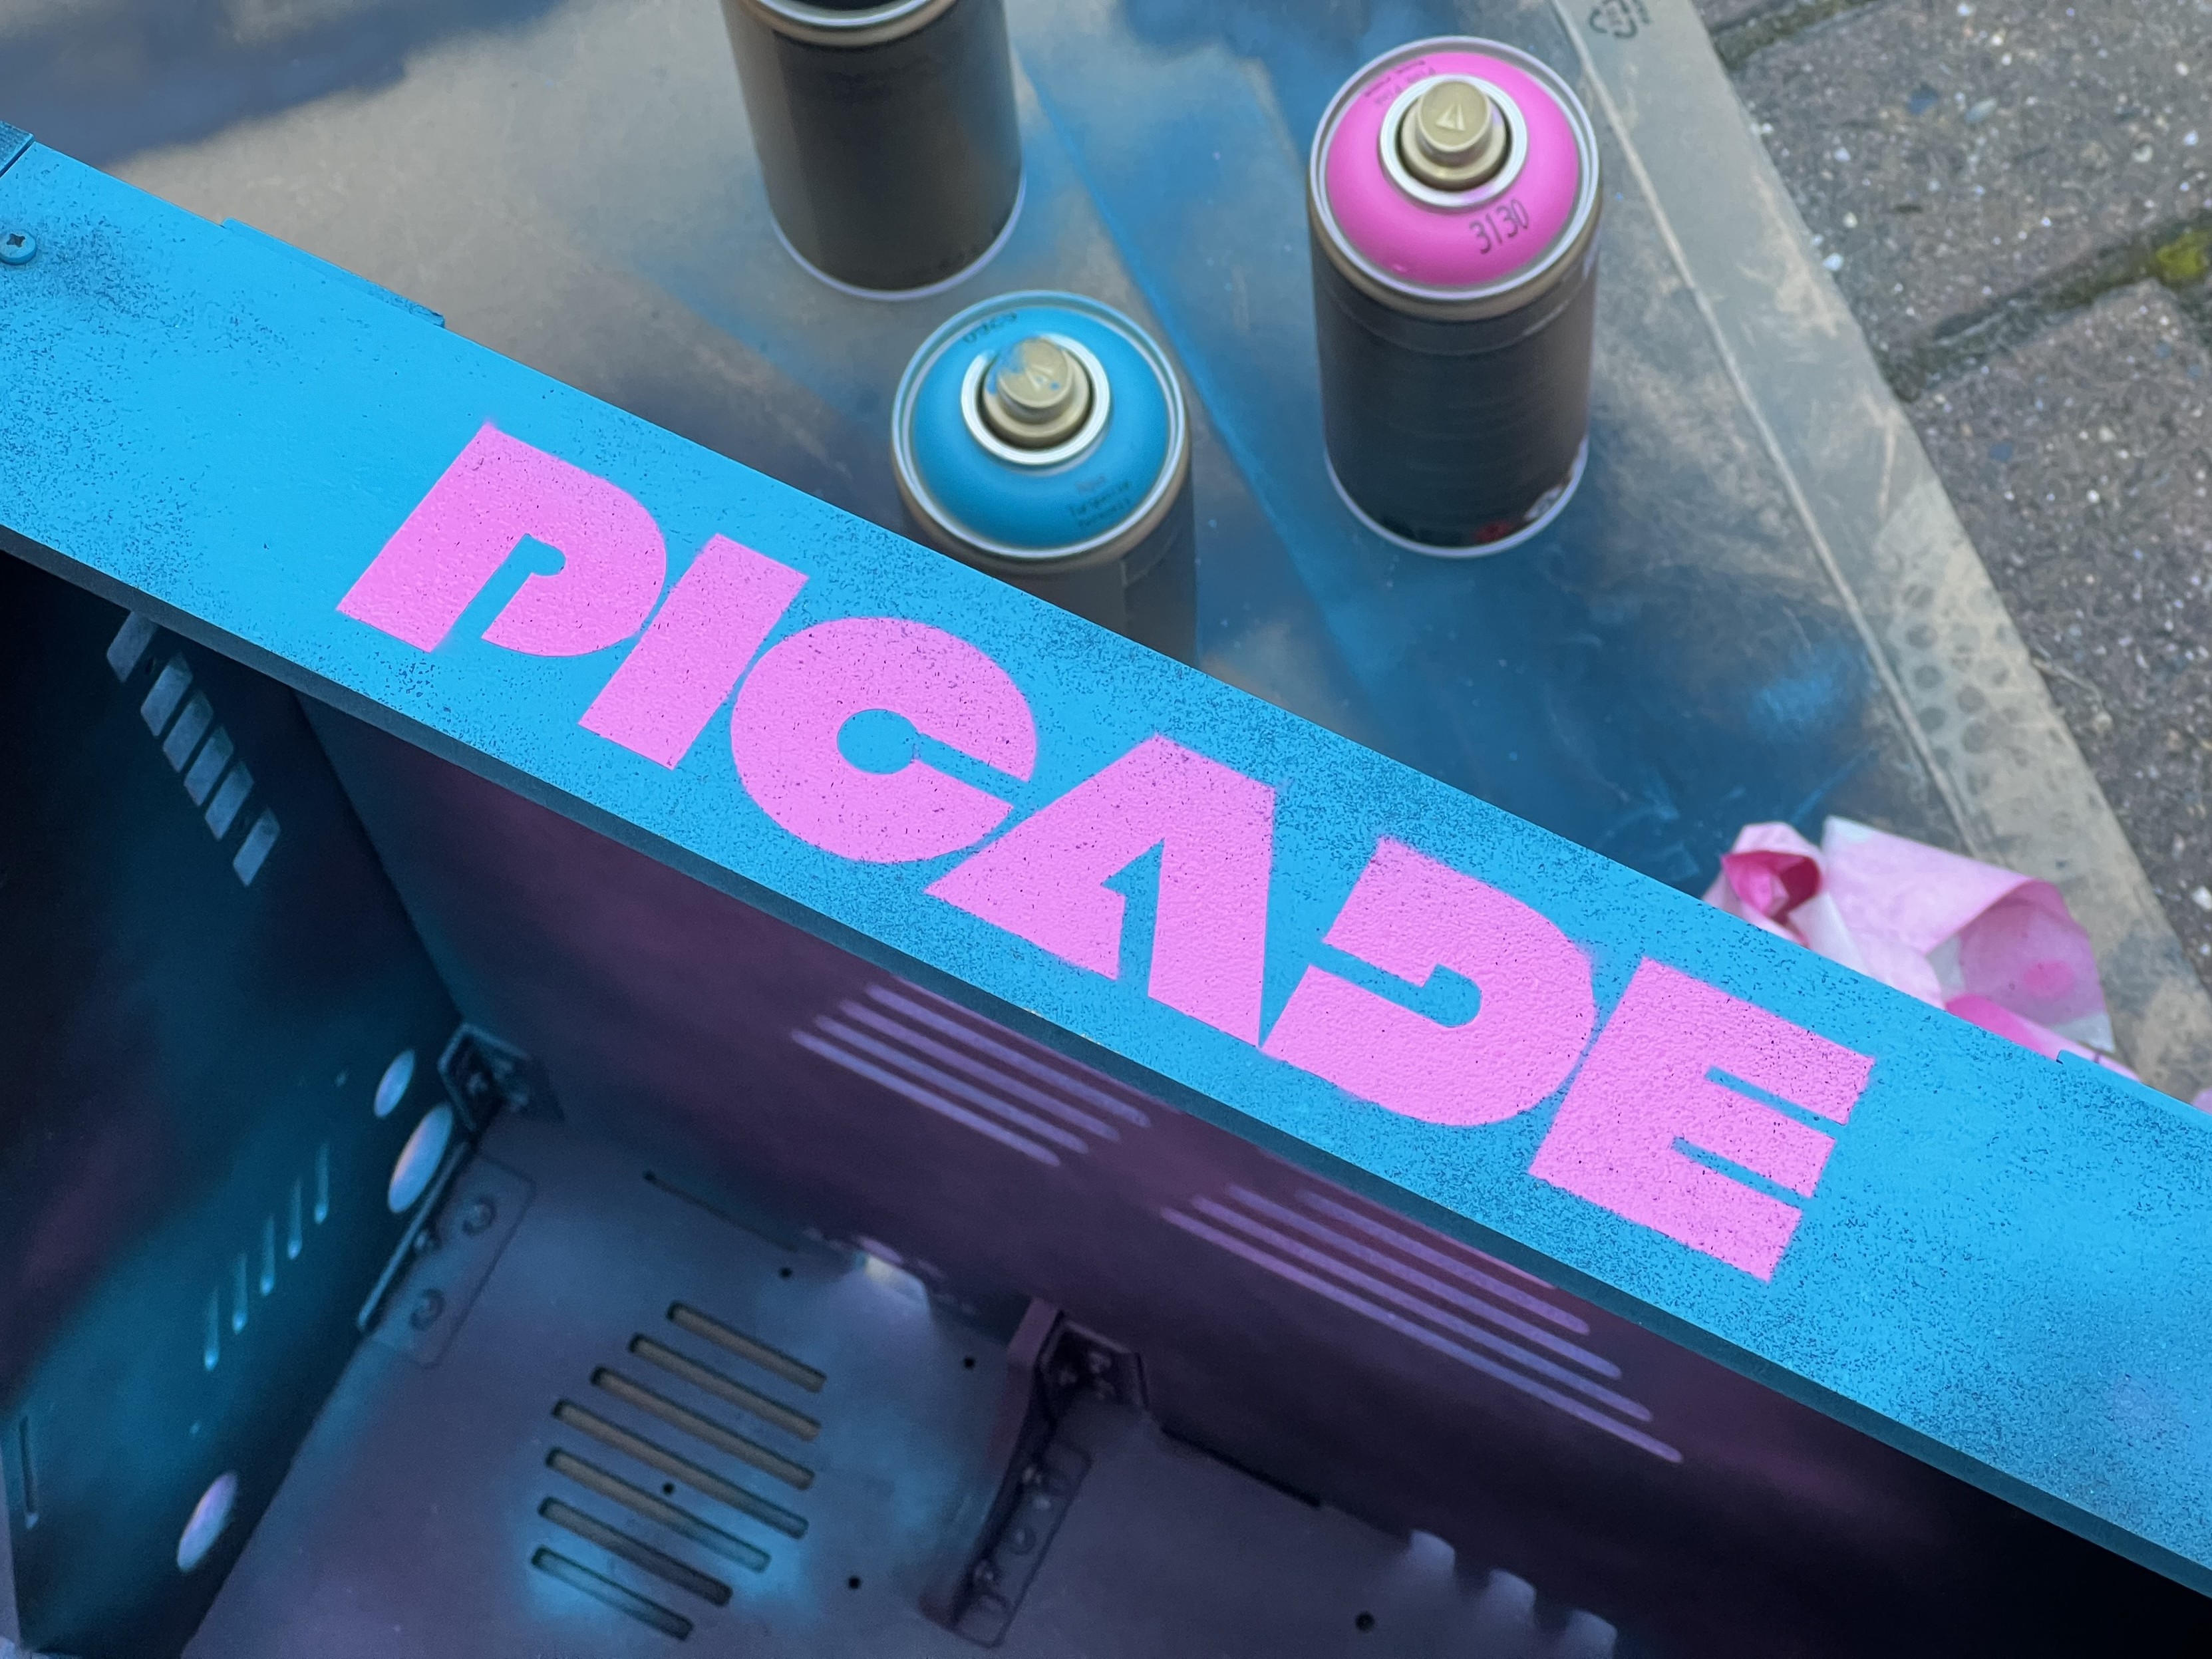
I had picked Montana “Gold” spraypaint simply because they had it in Hobbycraft and it was on sale, and picked colours mostly based on what I was instinctively drawn to. This turned out to be a sort of electric blue (which I think is G6260 Aqua) and a vibrant pink (which I think is F4000 Fluorescent Gleaming Pink).
Despite choosing these colours by fair dice roll they worked phenomenally well together. Even the cans look great side by side.
Over the black I put a base coat of blue, this would be my primary colour for the cabinet and lay the groundwork for some decals, accents and such. It’s bright and cheerful, but has something of an industrial look. If I had a rickety spaceship it would probably feature heavily on the bulkheads.
That’s … enough blue 🤣
Again I was still finding my groove with spraypaint control so the coat was patchy and uneven. But, remember, imperfection is perfection. It ended up looking great.
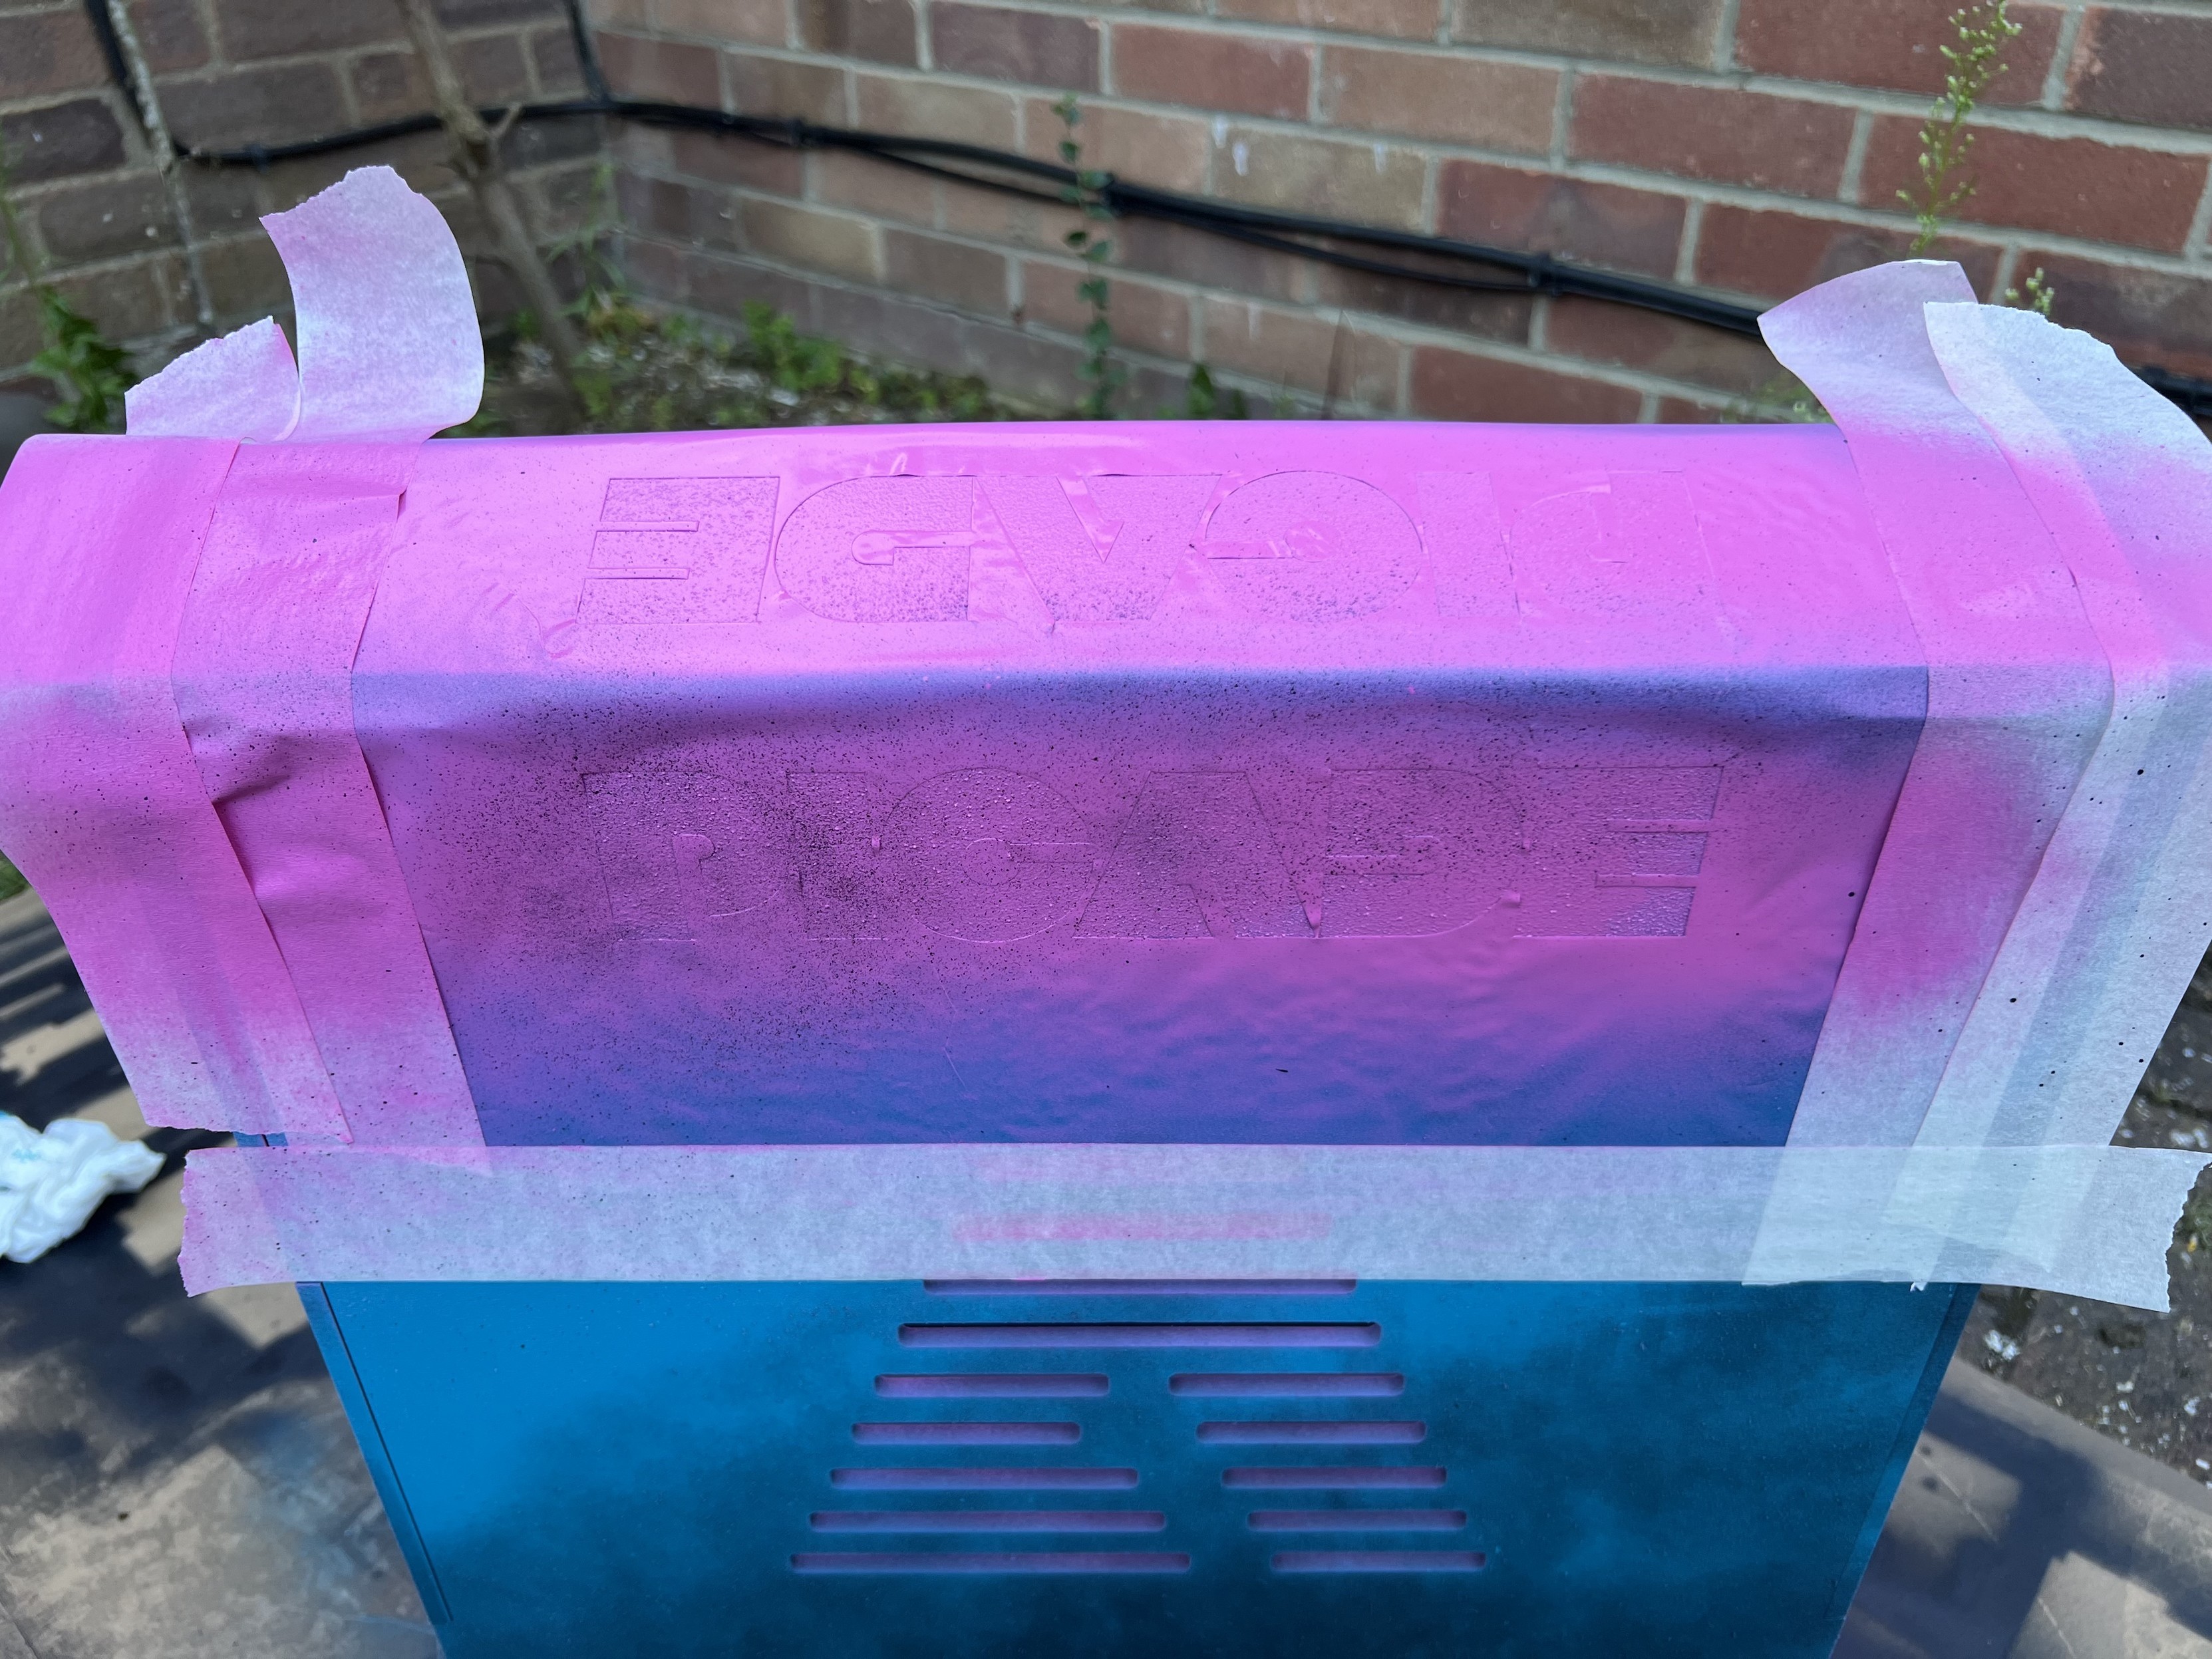
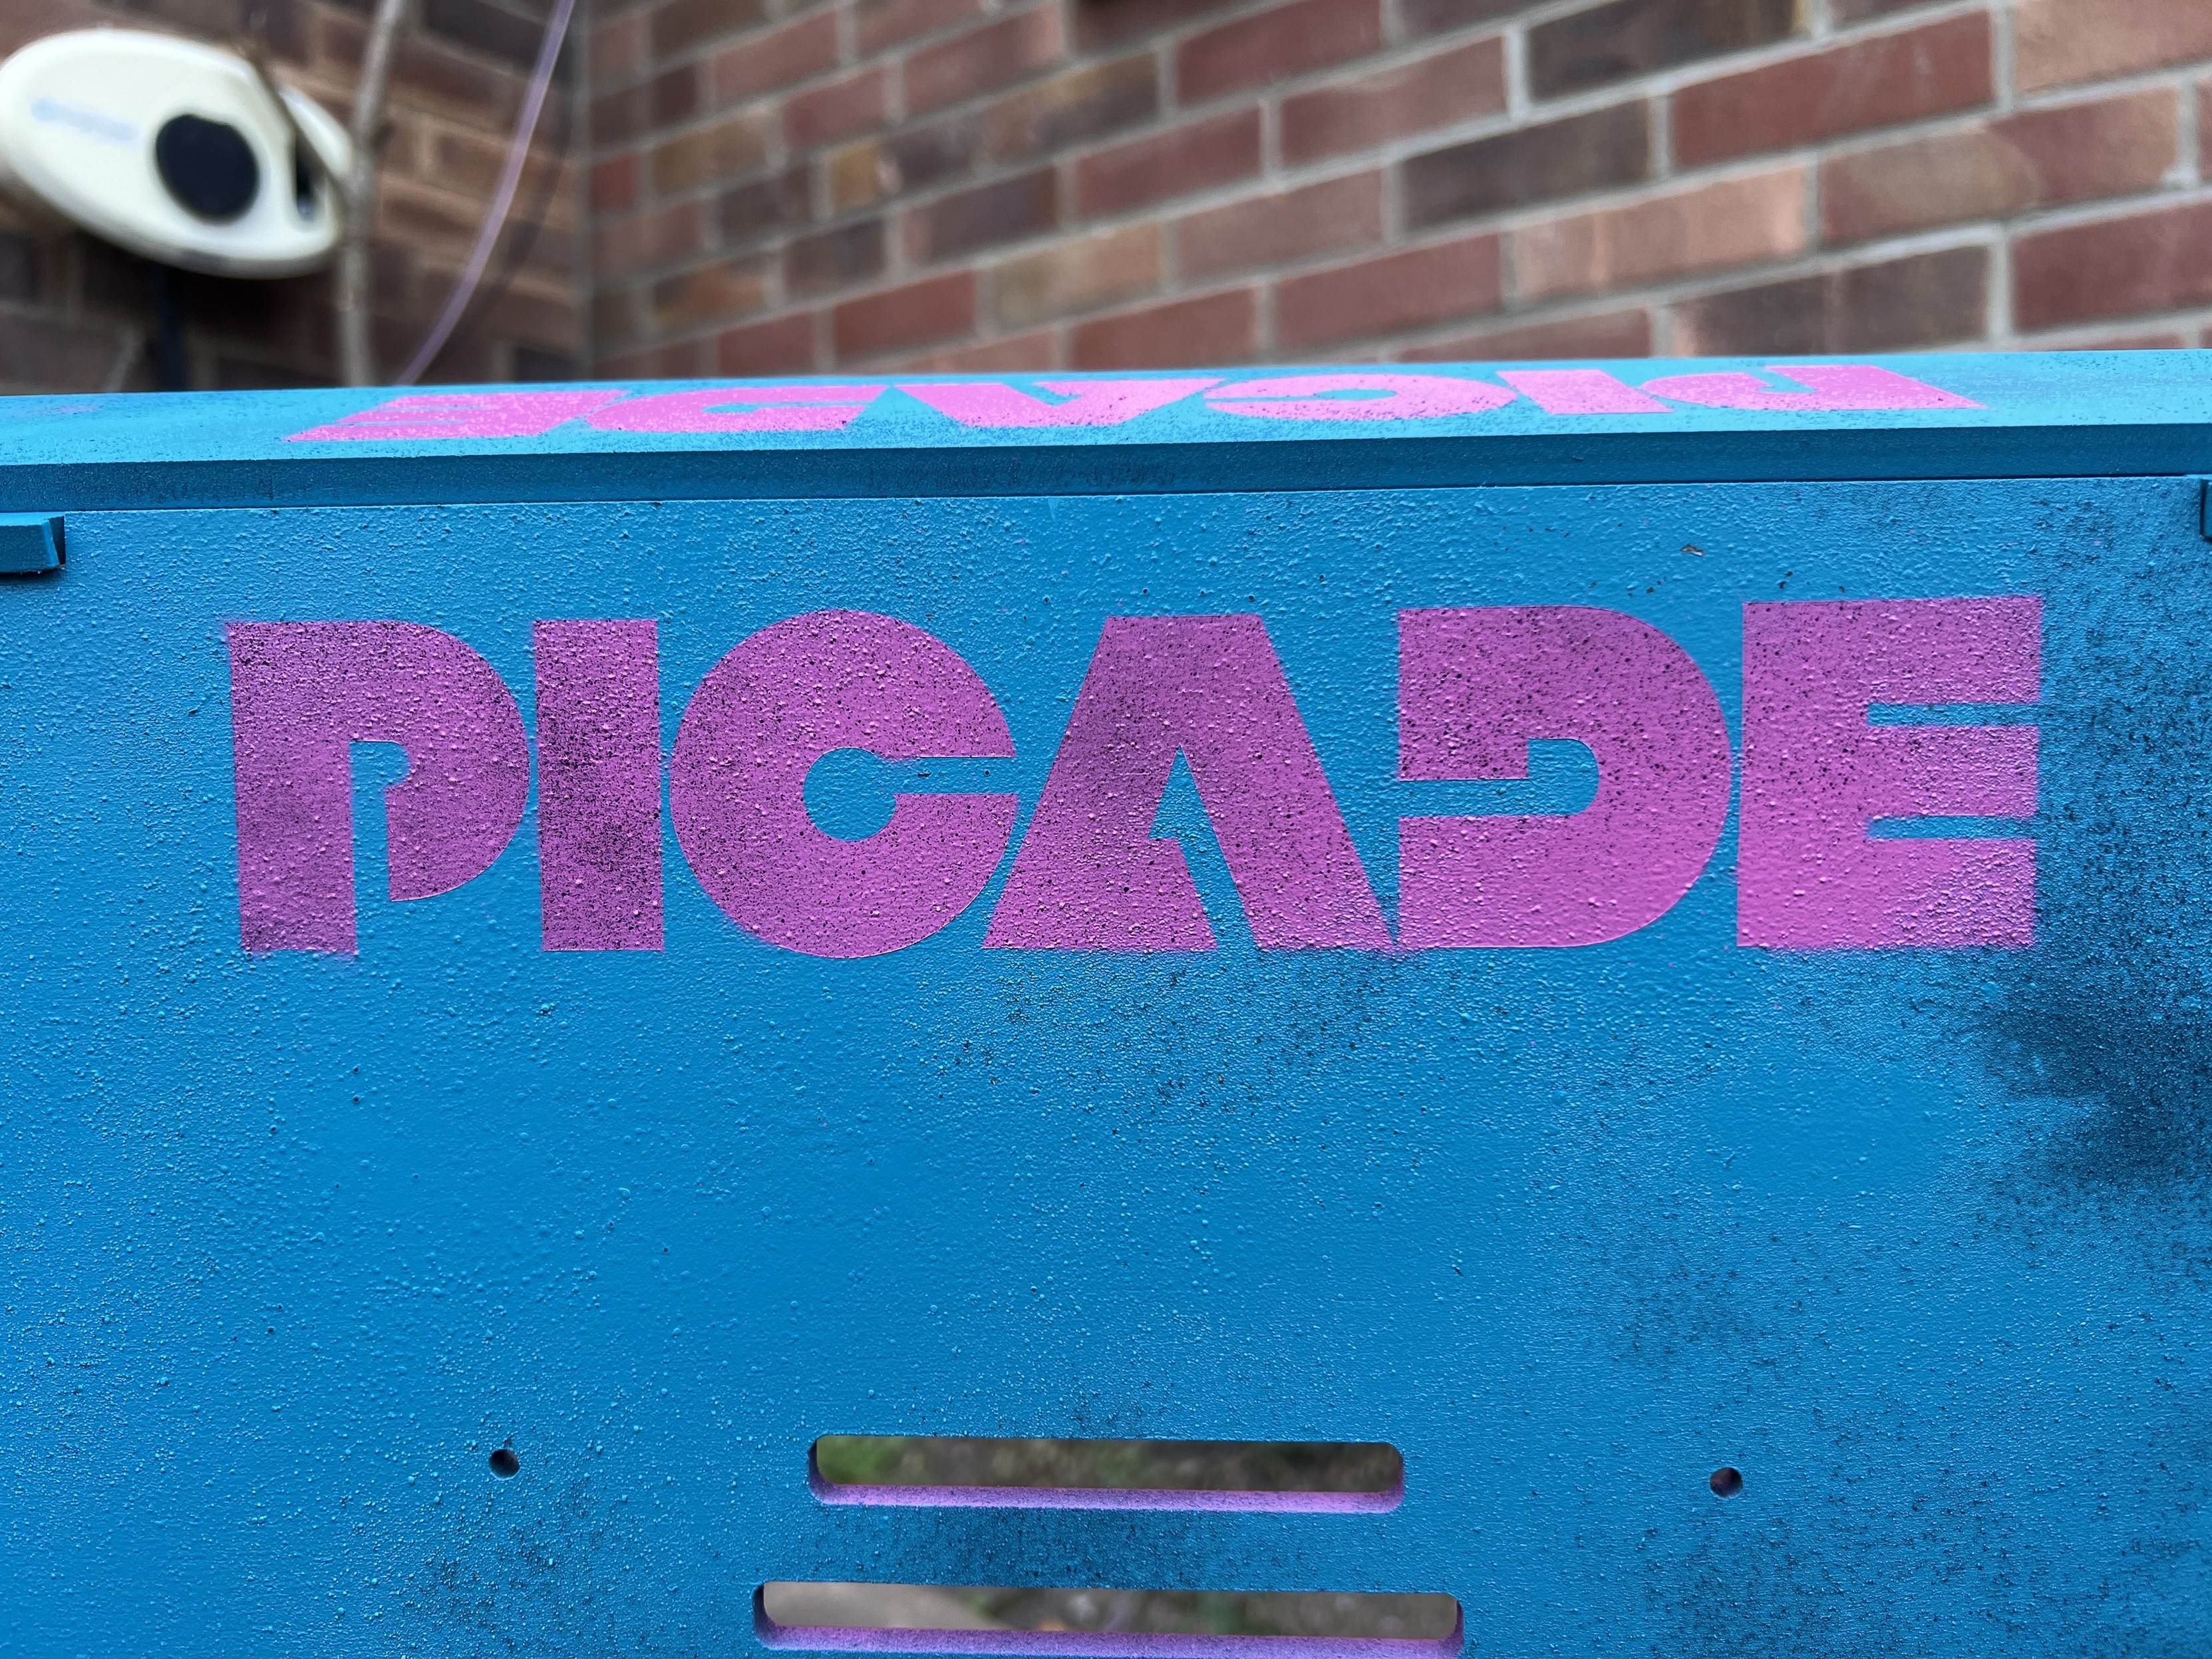
The first and most obvious decal for my Picade is the word… Picade. Fortunately we have a custom artwork guide so I simply lifted it right from that, made some minor tweaks to join everything into a single stencil (something I later realised is unnecessary with adhesive stencil film) and chucked it at the Cricut via my multi-step process.
Couldn’t really tell it’s been cut at all!
Actually I printed it twice onto a single stencil sheet, rotated 90 degrees so I could fold the result over the top of the cabinet and spray the logo in twice – once on the top, once on the back – with perfect alignment. You couldn’t tell from a glance that the film had been cut at all, though. And, indeed, lifting up the stencil with Cricut’s weeding tools (a little pointy thing) and a pair of ESD tweezers proved to be a little tricky.
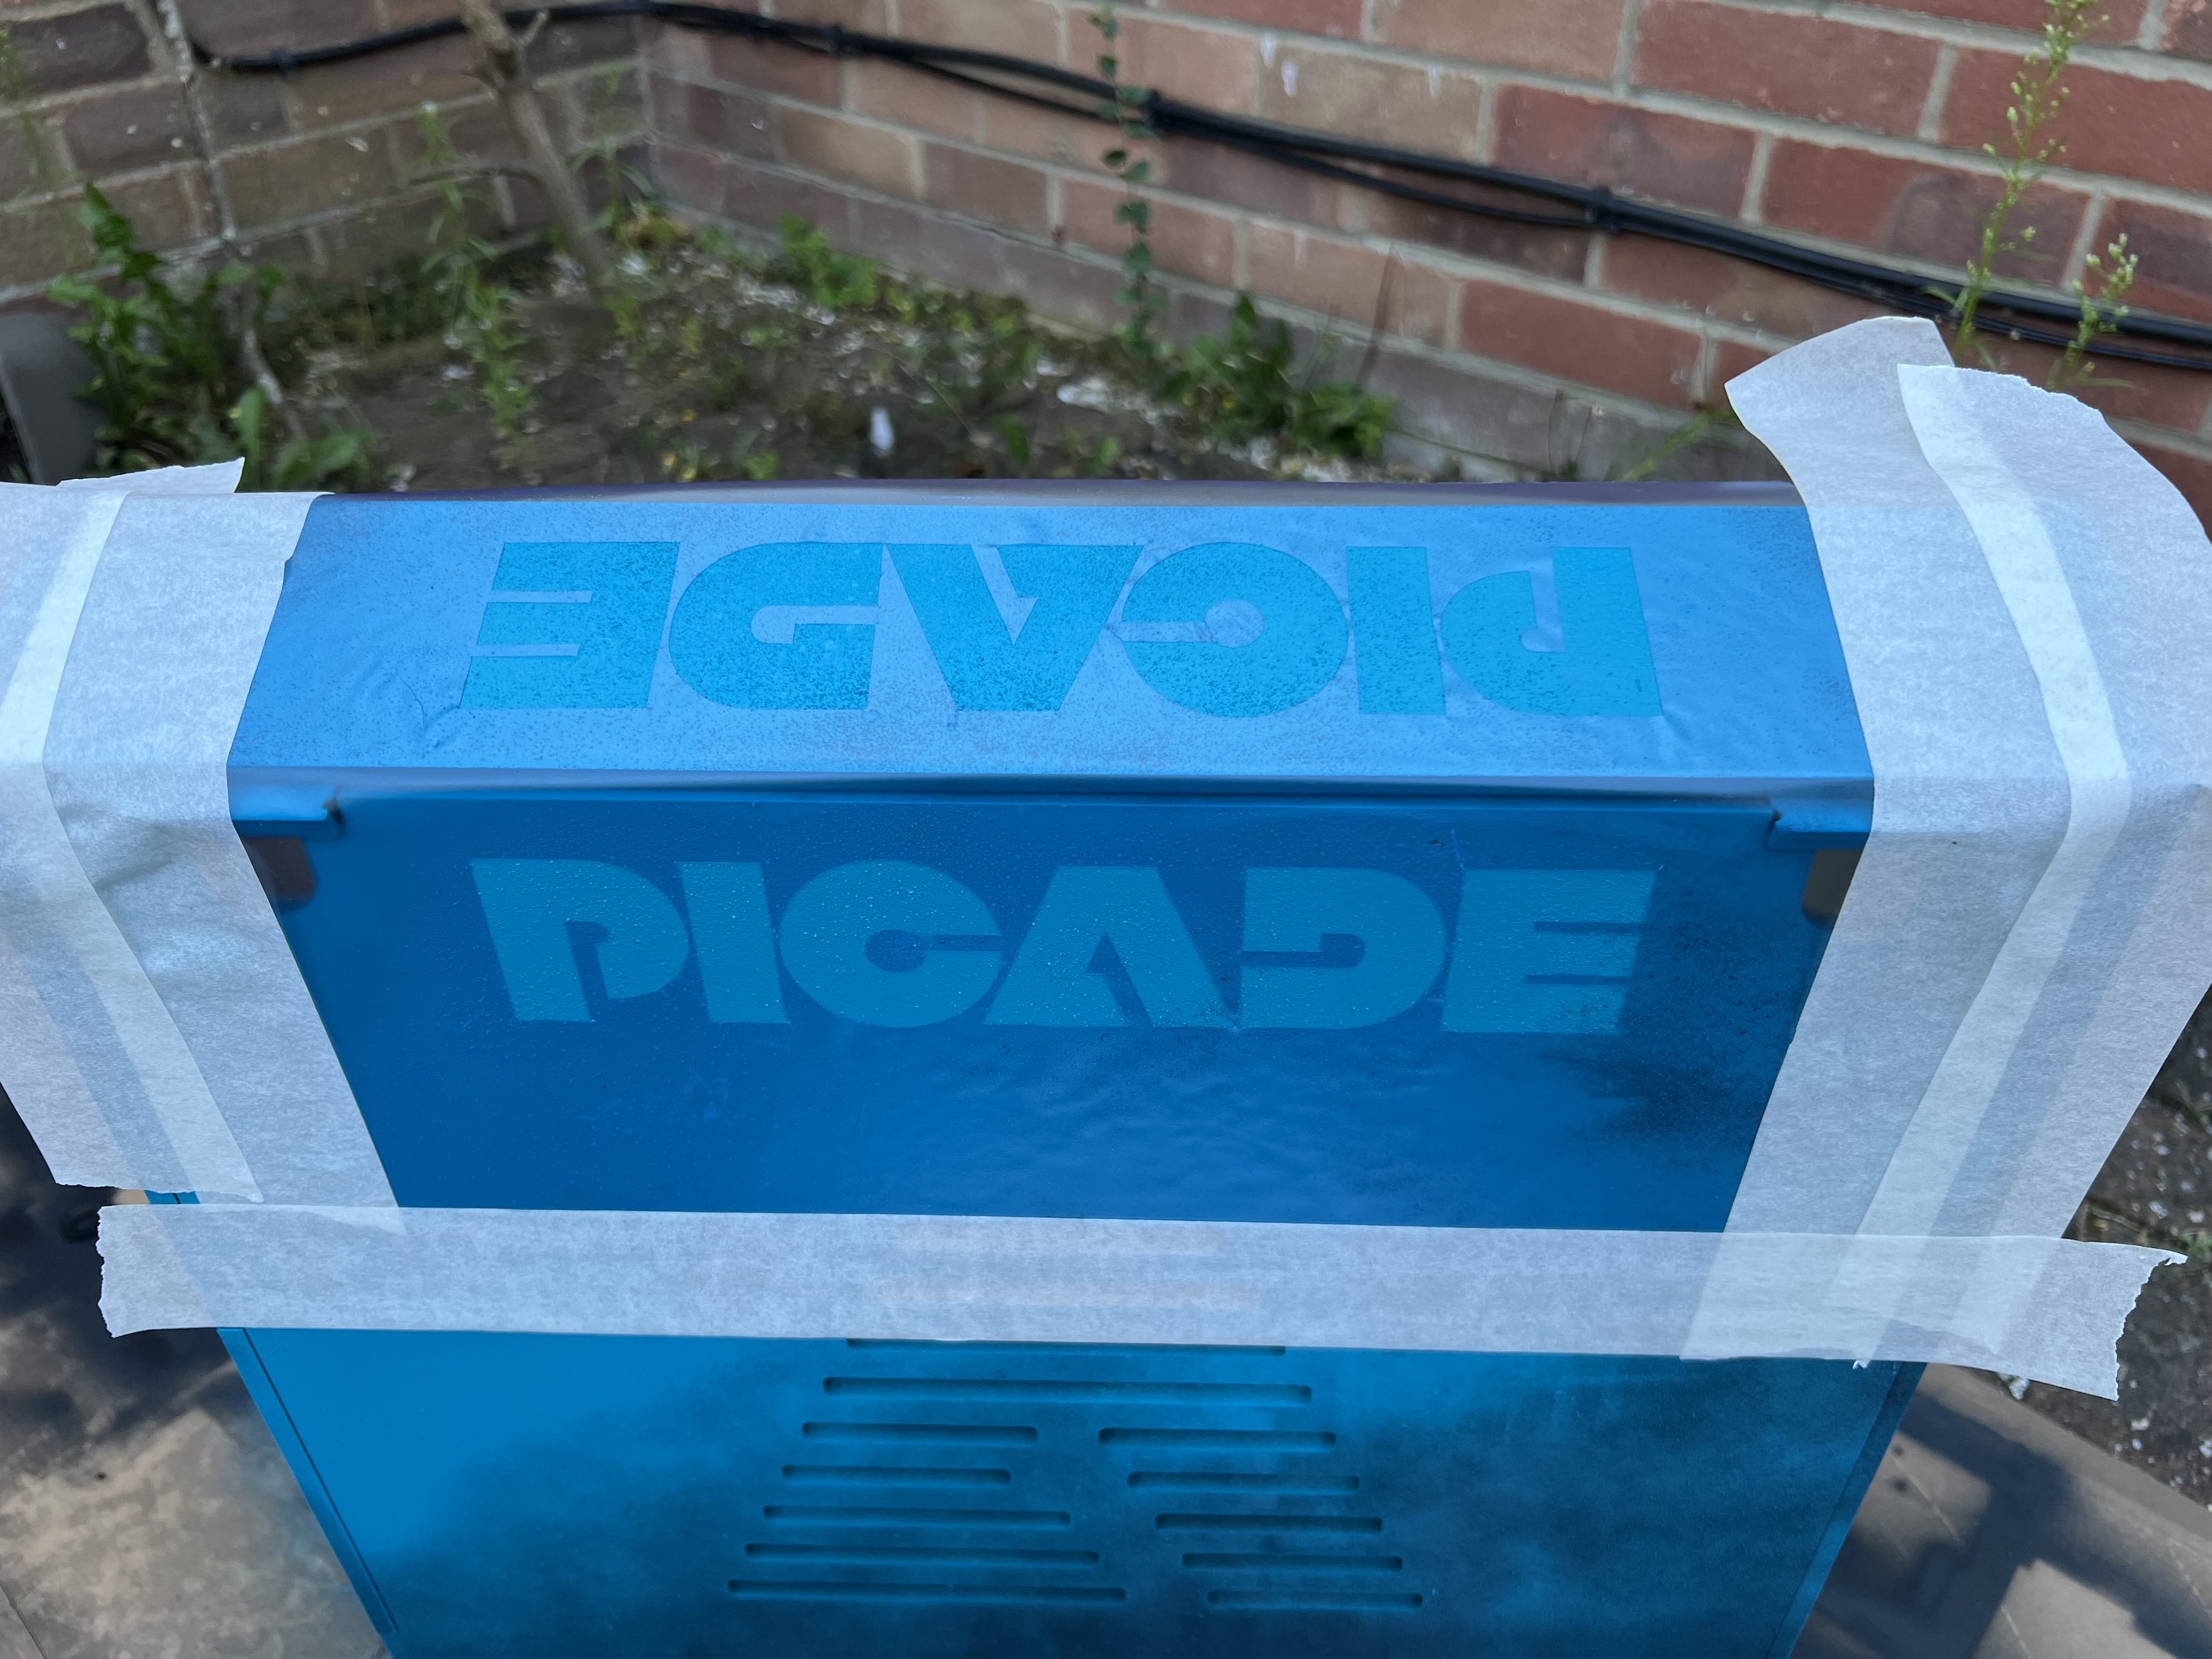
Deploy stencil! I masked off the edges to prevent myself spraying an awkward square outline.
Some careful tweezer action was needed to align the small bits.
The stencil film is quite sticky and is prone to lifting up paint if, like me, you rush and don’t let the undercoat dry completely, or rush and don’t prepare your surface, or rush and don’t let the undercoat dry at all. I did all of these things… but remember, imperfection is perfection!
With the stencil in place and the sides of the cabinet masked off to protect against overspray, I hit the pink like I was watering an apple tree.
Paint paint paint paint, deploy pink in liberal quantities!
Did I say these colours worked phenomenally well together? It bears repeating. Or I could just show you:
The pink on blue pops so damn hard, I’m so glad I ran out of black paint!
Now I had stencil cutting on the Cricut down to a refined, if somewhat contrived workflow I got a little carried away. The next job was a huge pirate face (the sort of company mascot) hidden on the bottom of the cabinet.

I’ve got a taste for spray stencilling now 🤣
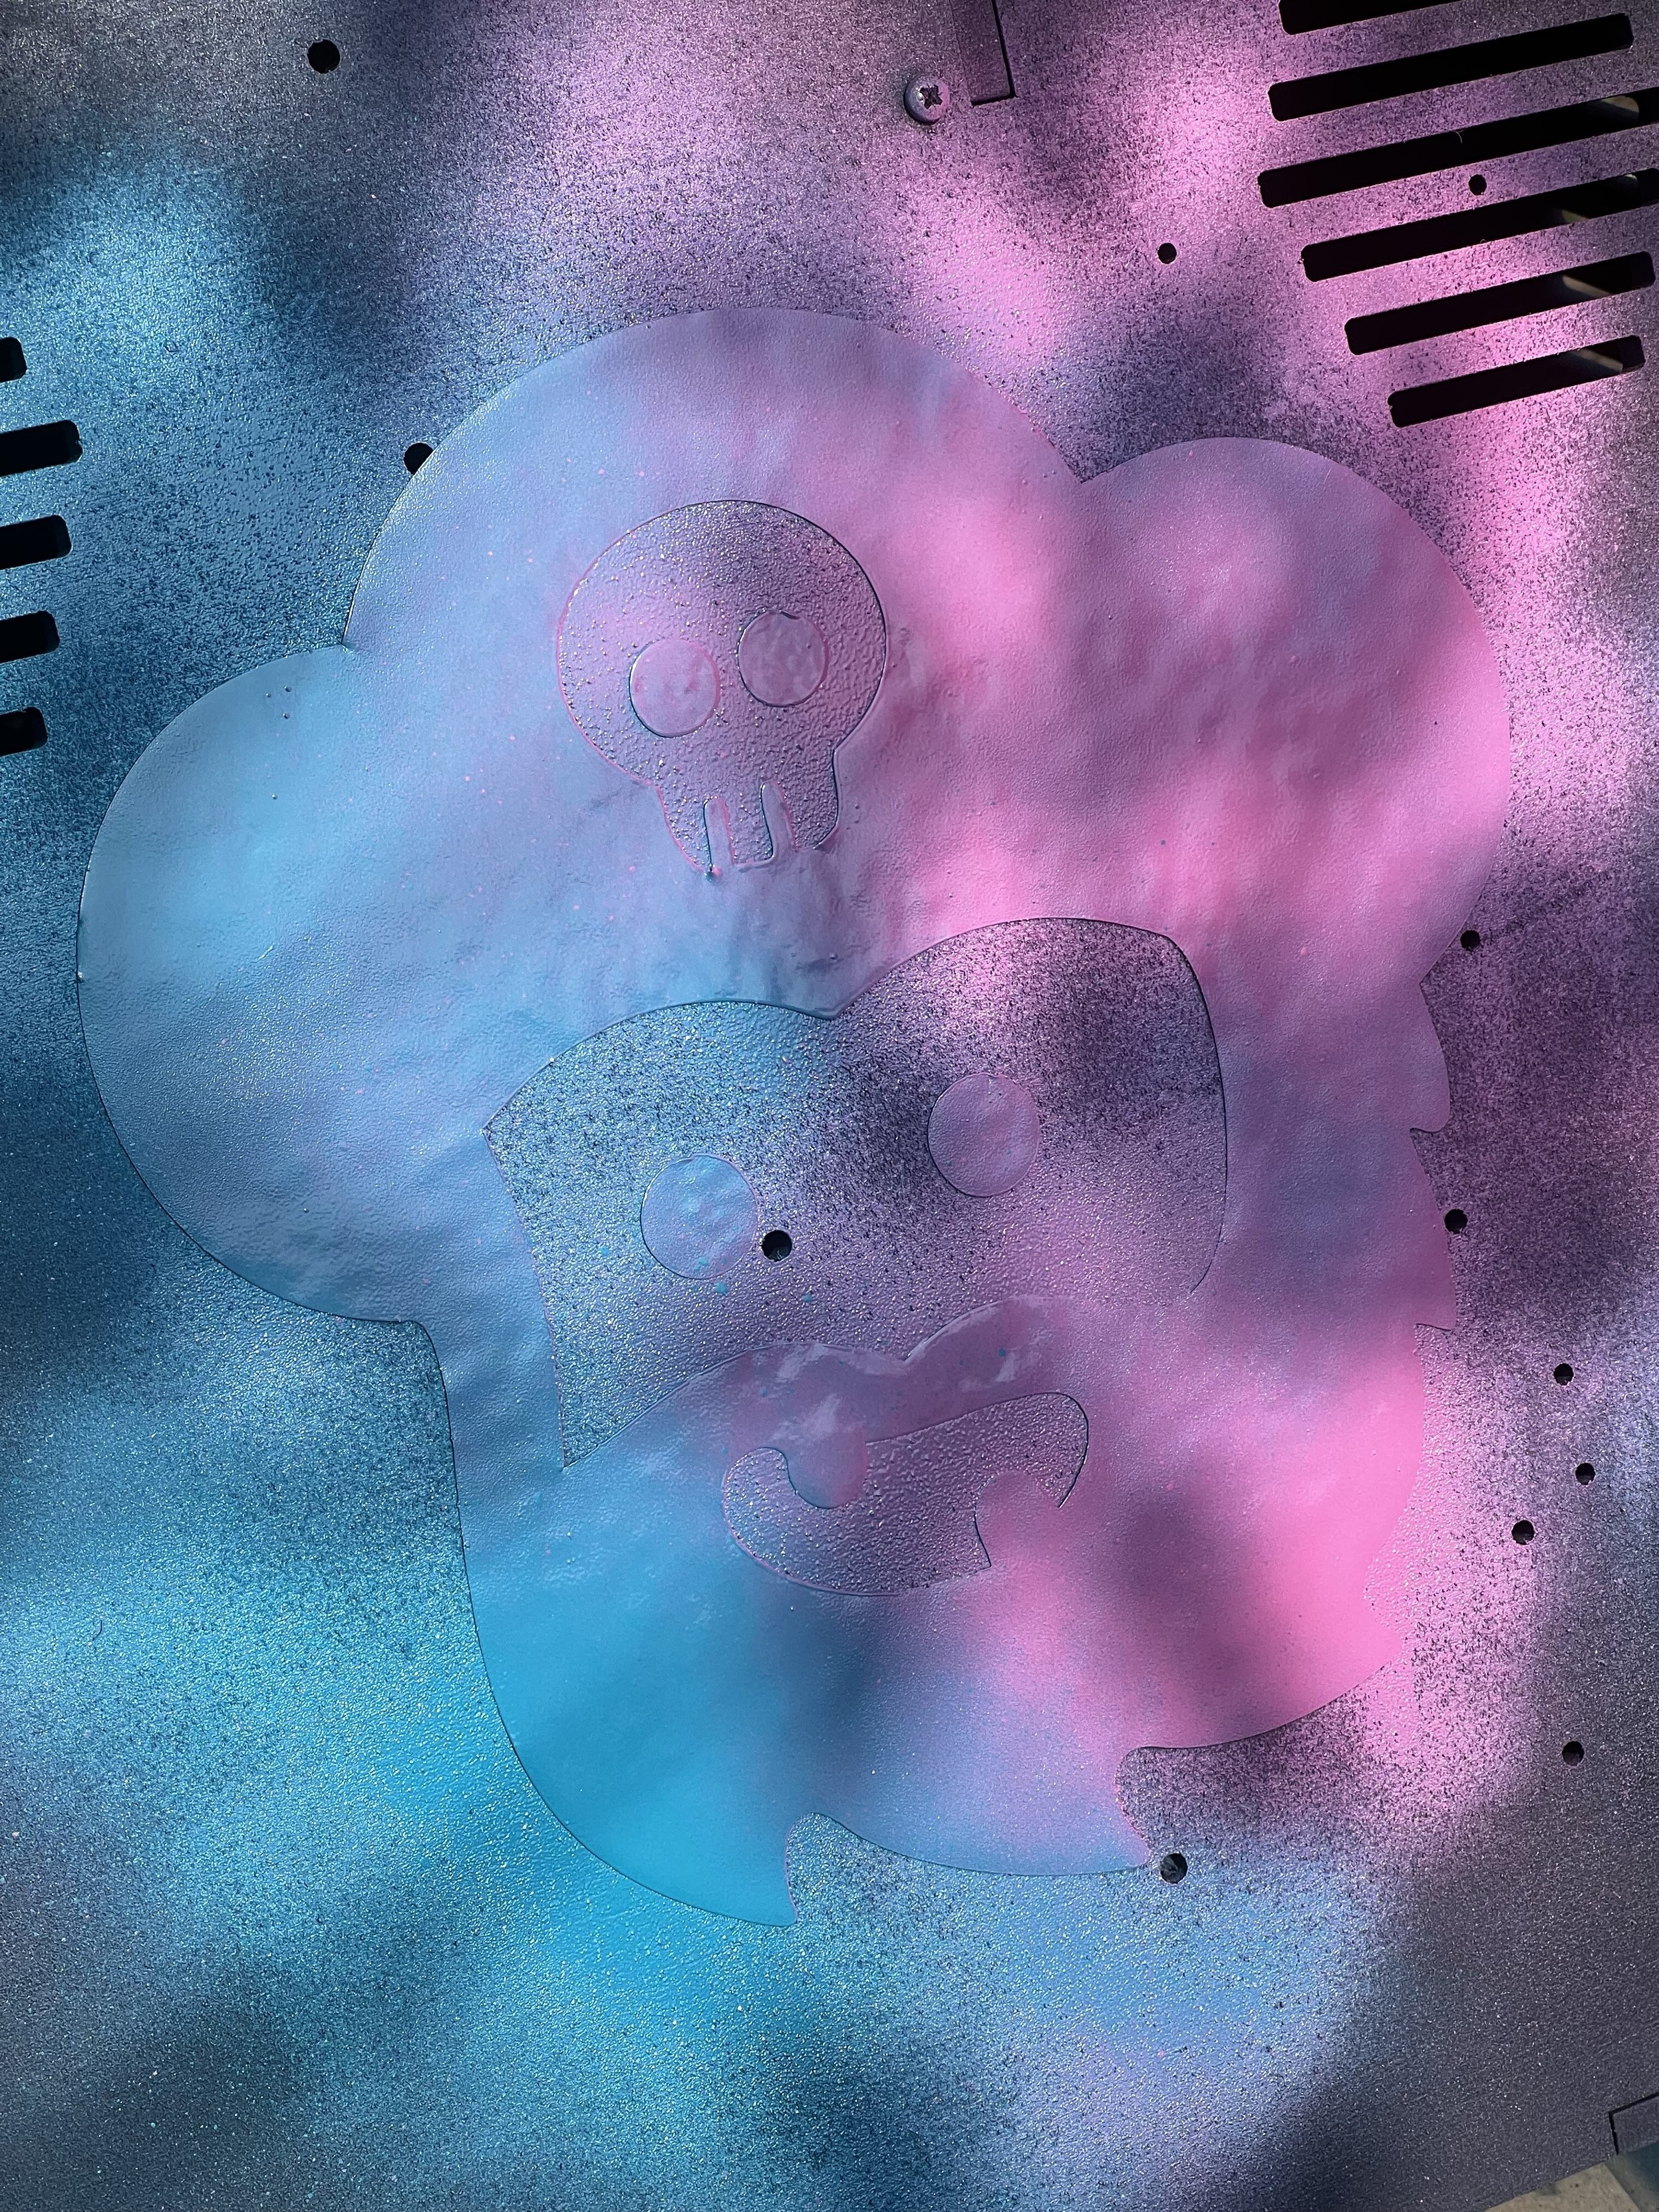
Since the cabinet was already black, I used a negative stencil to cover the bits I didn’t want to paint, and just hit it with pink and blue at random. This is a trick I would later come to exploit an awful lot, and there’s no doubt a name for it. Since stencils can be quite fiddly both to remove from the backing paper and to align and mask off, I found it a lot easier just to go with the middle bit you’d normally remove and spray through. In the case of the pirate face this also meant I only had to align four eyes, and didn’t have to join up the islands in the stencil.
Alignment is easier than it looks, just place the outer stencil, then the “face” part, then the eyes, then remove the “face” leaving the eyes in their right place. Again I’d do this a lot as I honed my stencil design and application techniques.
Not quite finished but main cabinet done and clear coated!
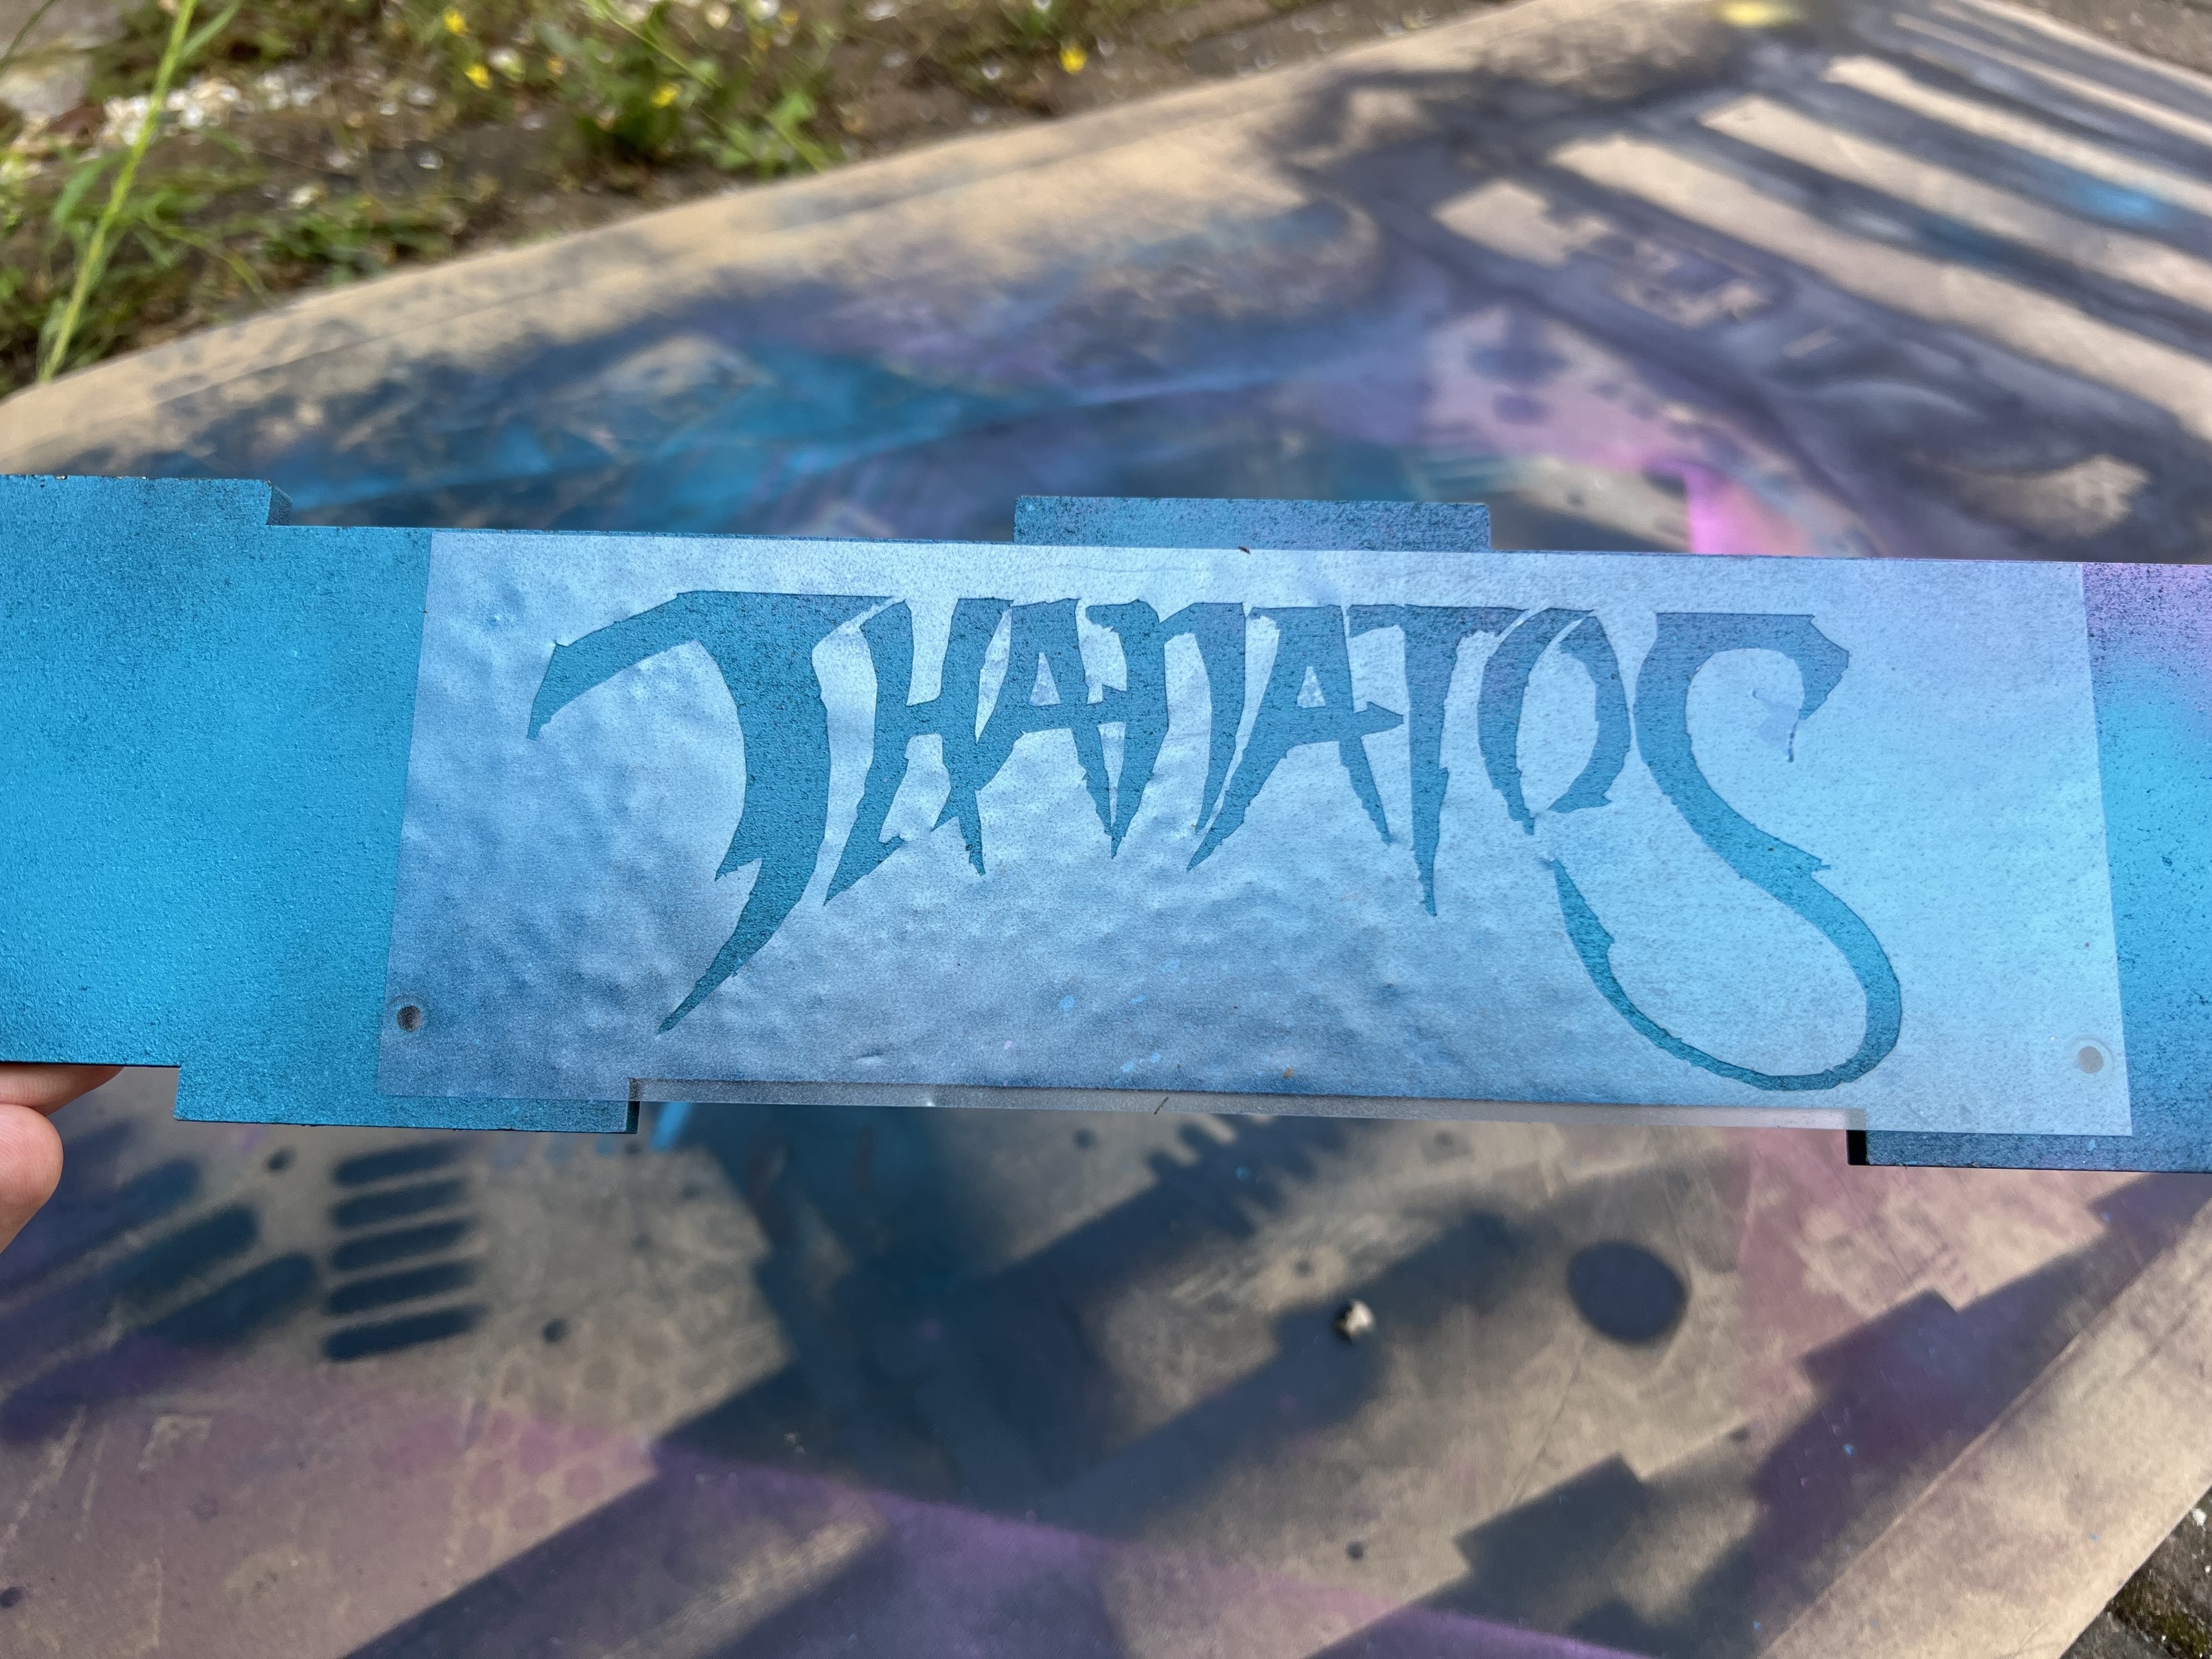
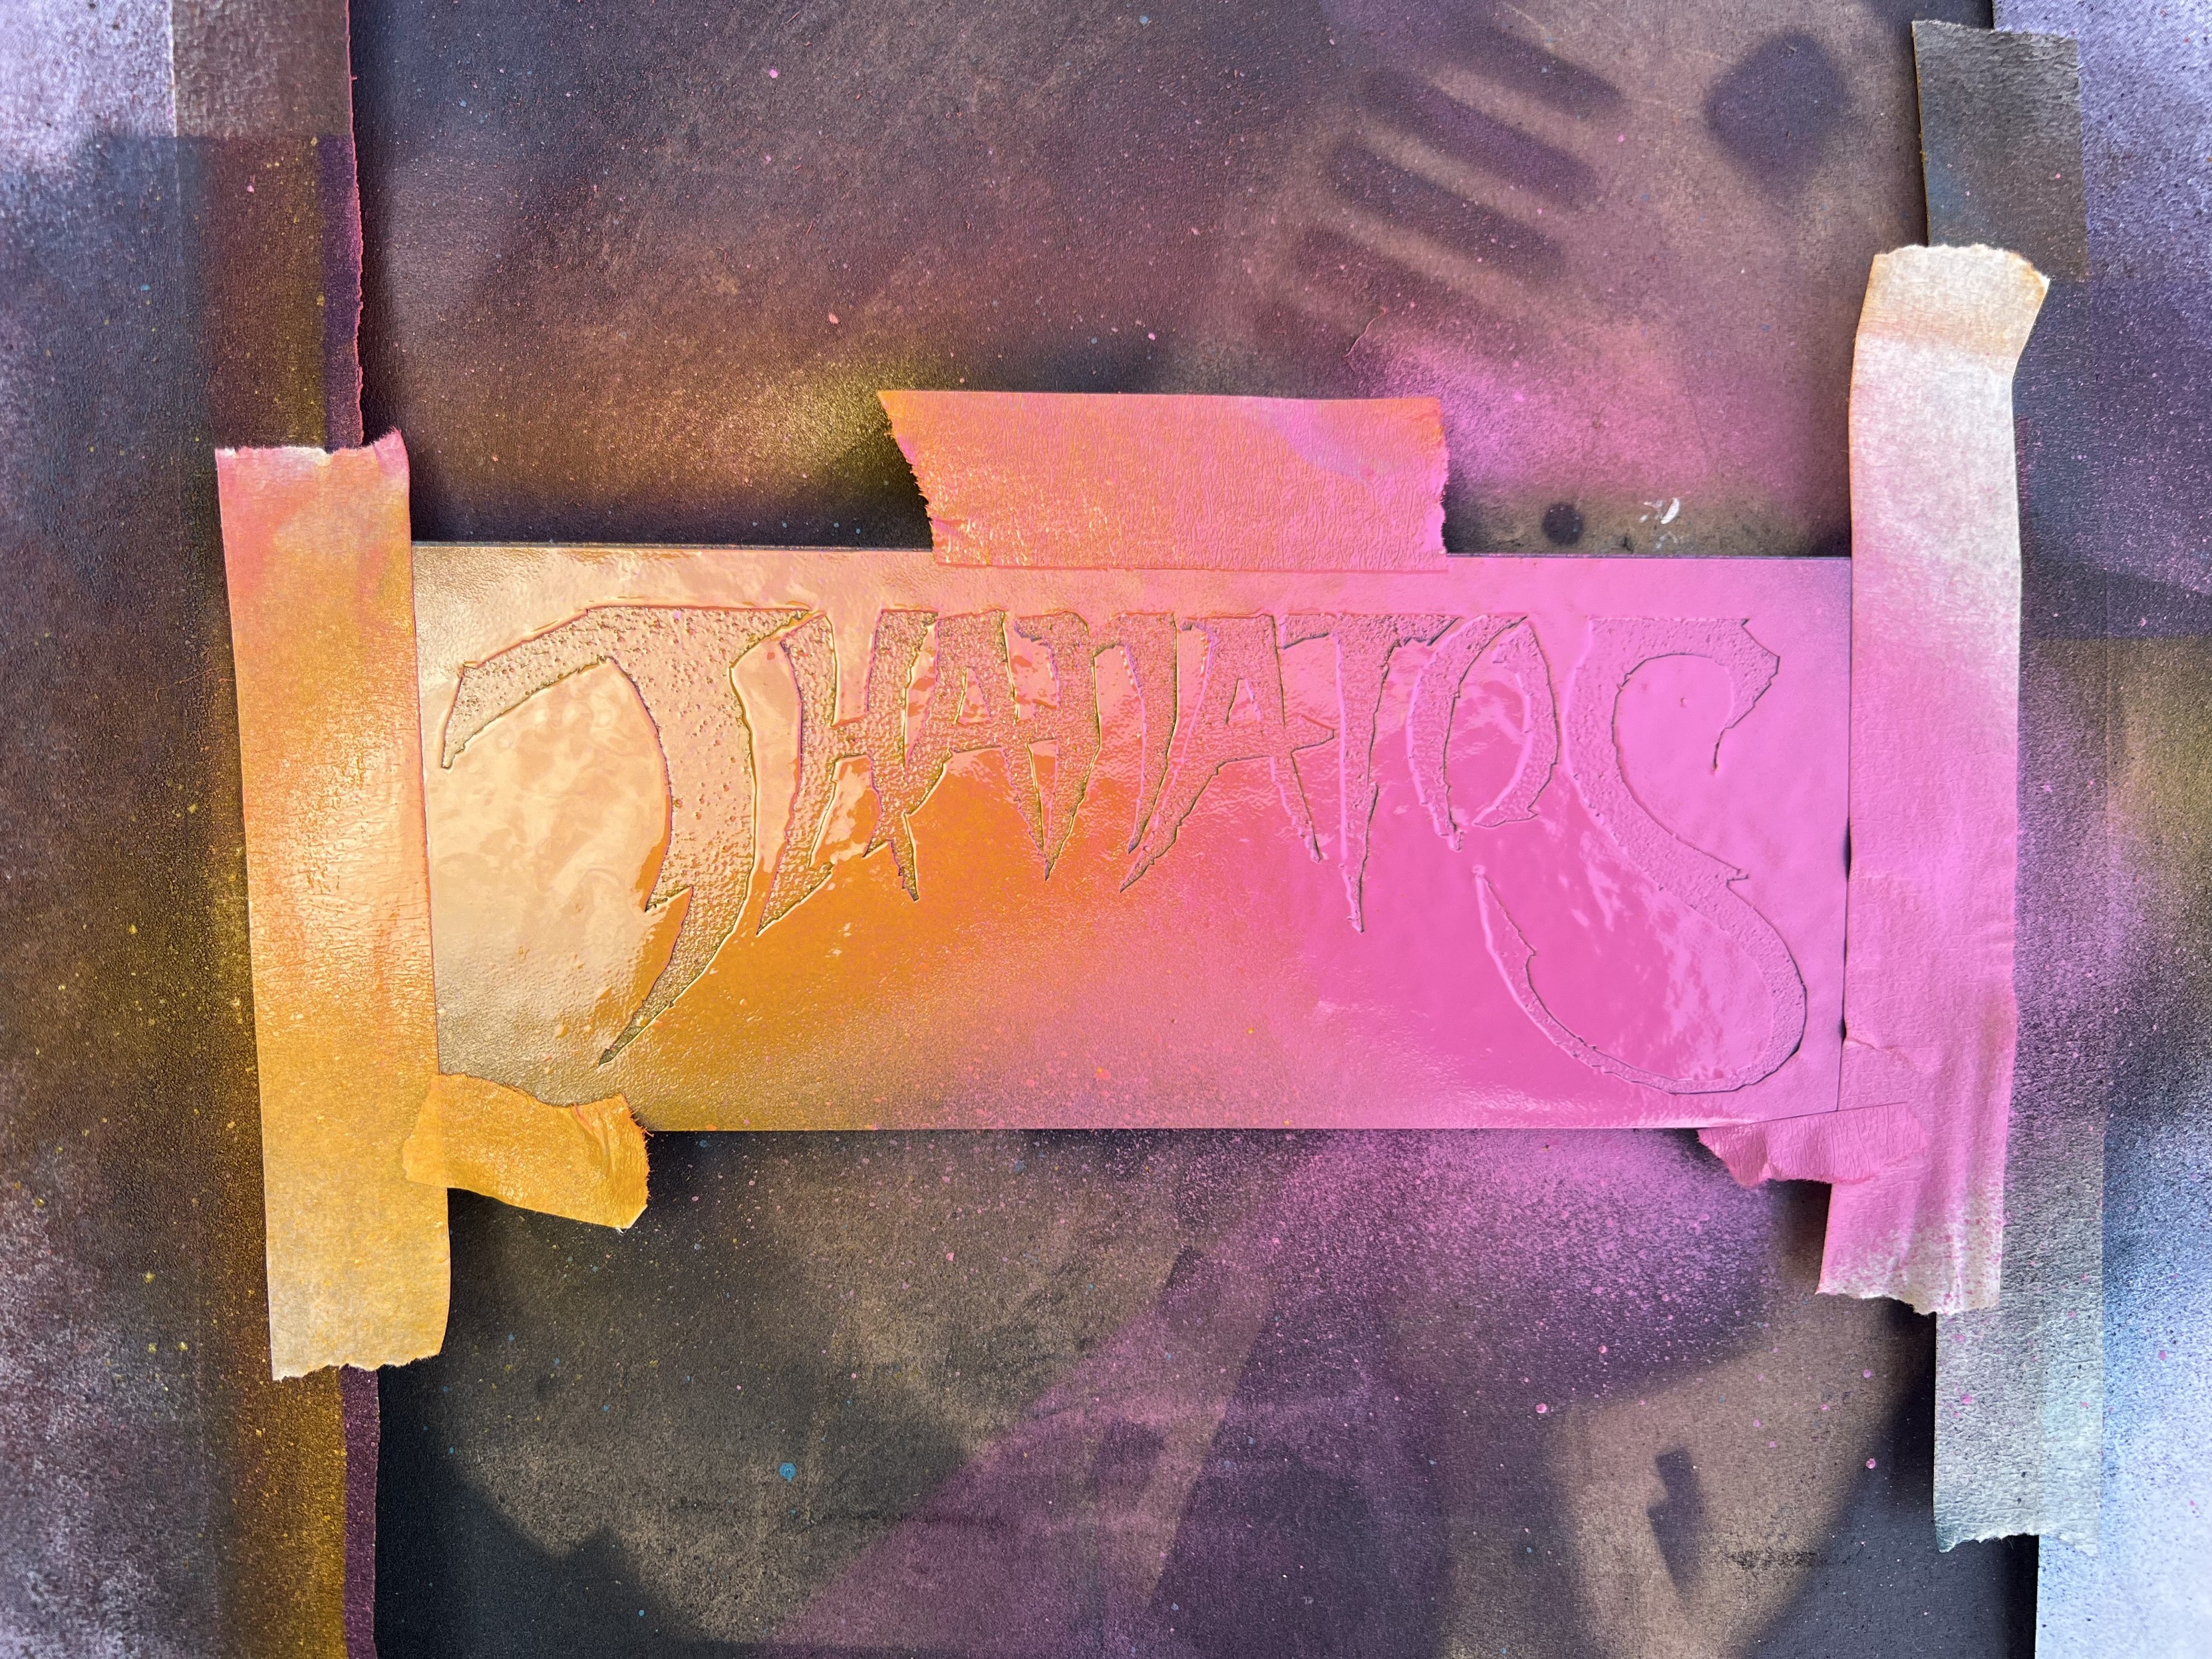
Most of my stencils were pretty coarse and crude, being easy to weed, place, spray through and remove, and even re-use once or twice. I figured I should push the Cricut, the stencil film and my skills to their limits by going with something more complex. I found a “vector” for the 1984 ZX Spectrum game Thanatos, which I had never played nor heard of. The logo looked cool as all heck, though, and I’m sure someone would recognise it and get a kick out of it. Unfortunately the Wikimedia “vector” was just a bitmap saved into an .svg file so I had to auto-trace it and do some path simplification and hand corrections to get something I was comfortable cutting. Even after all this effort I ended up with a lot of fiddly little pieces I had to carefully place with tweezers, and it was all too easy to tear the stencil film as I rushed to get it into place.
The results speak for themselves, though.

How complex can I go?
Yes.
With no prior skill other than basic graphic design experience (I was once paid to do graphics stuff, though I have never been great at it), a very small amount of patience, and the ability to point a spray can away from my face, I got crisp, detailed designs and had far too much fun.
But what if I went even more complex?
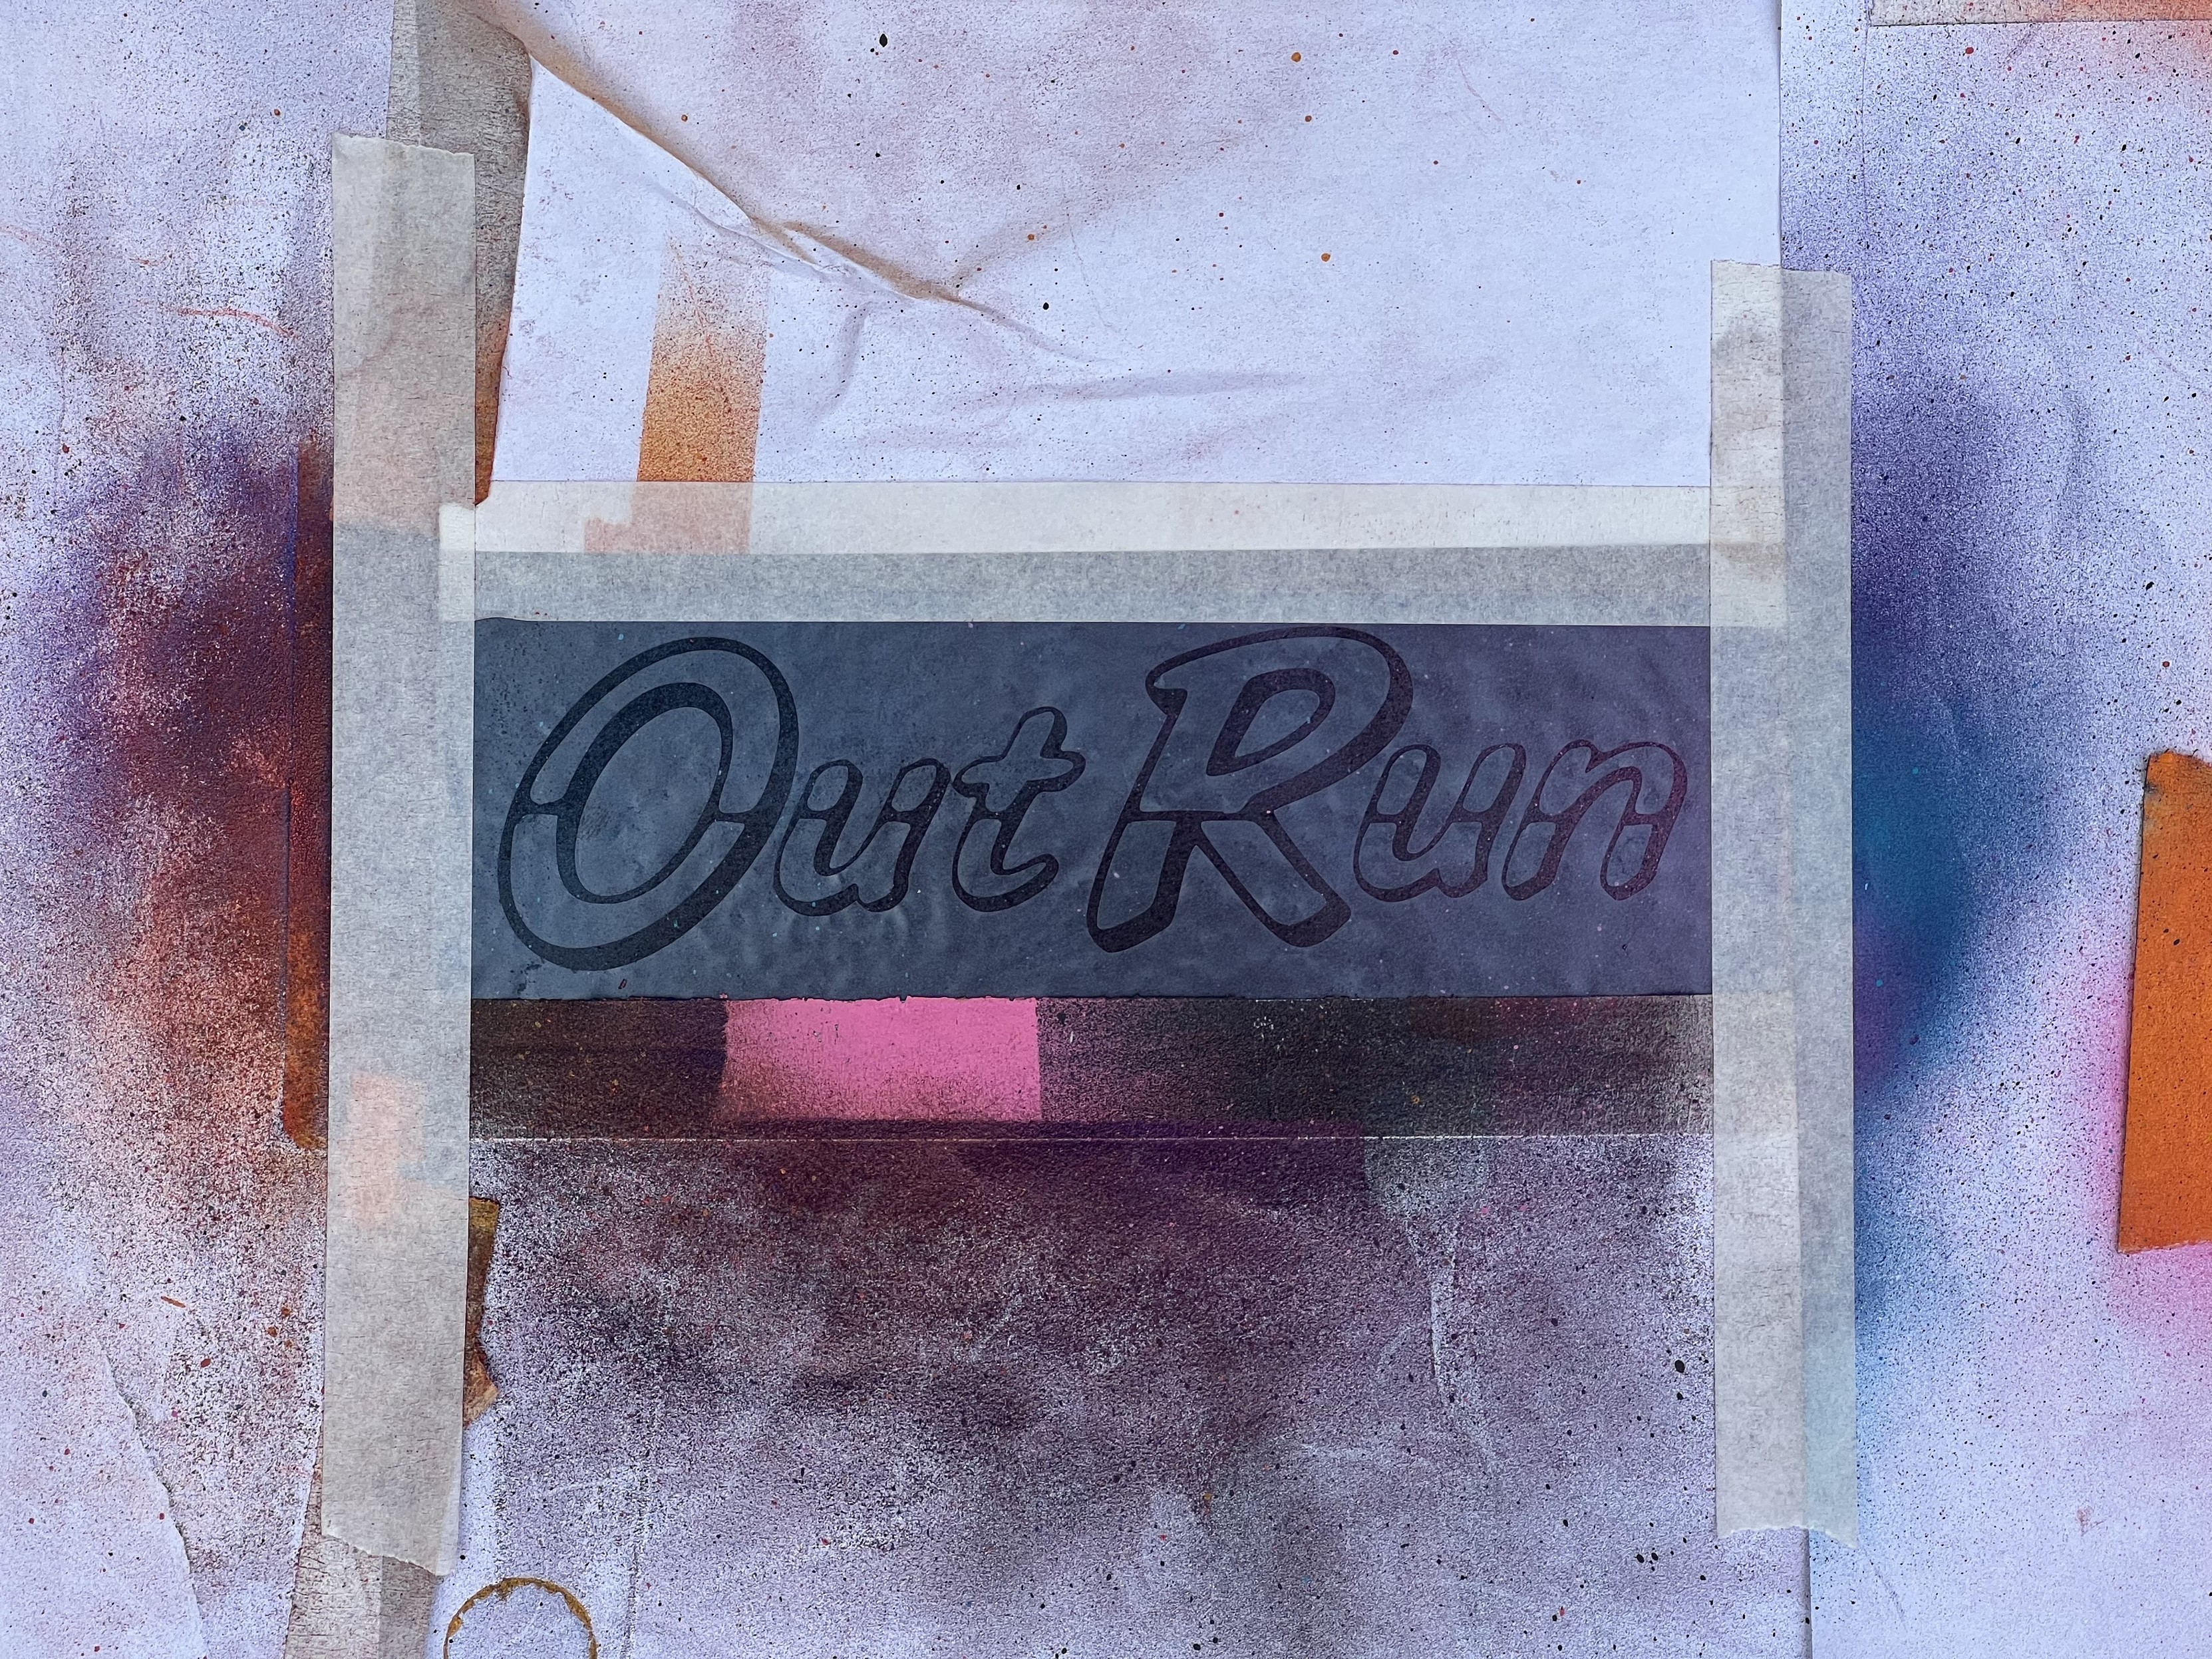
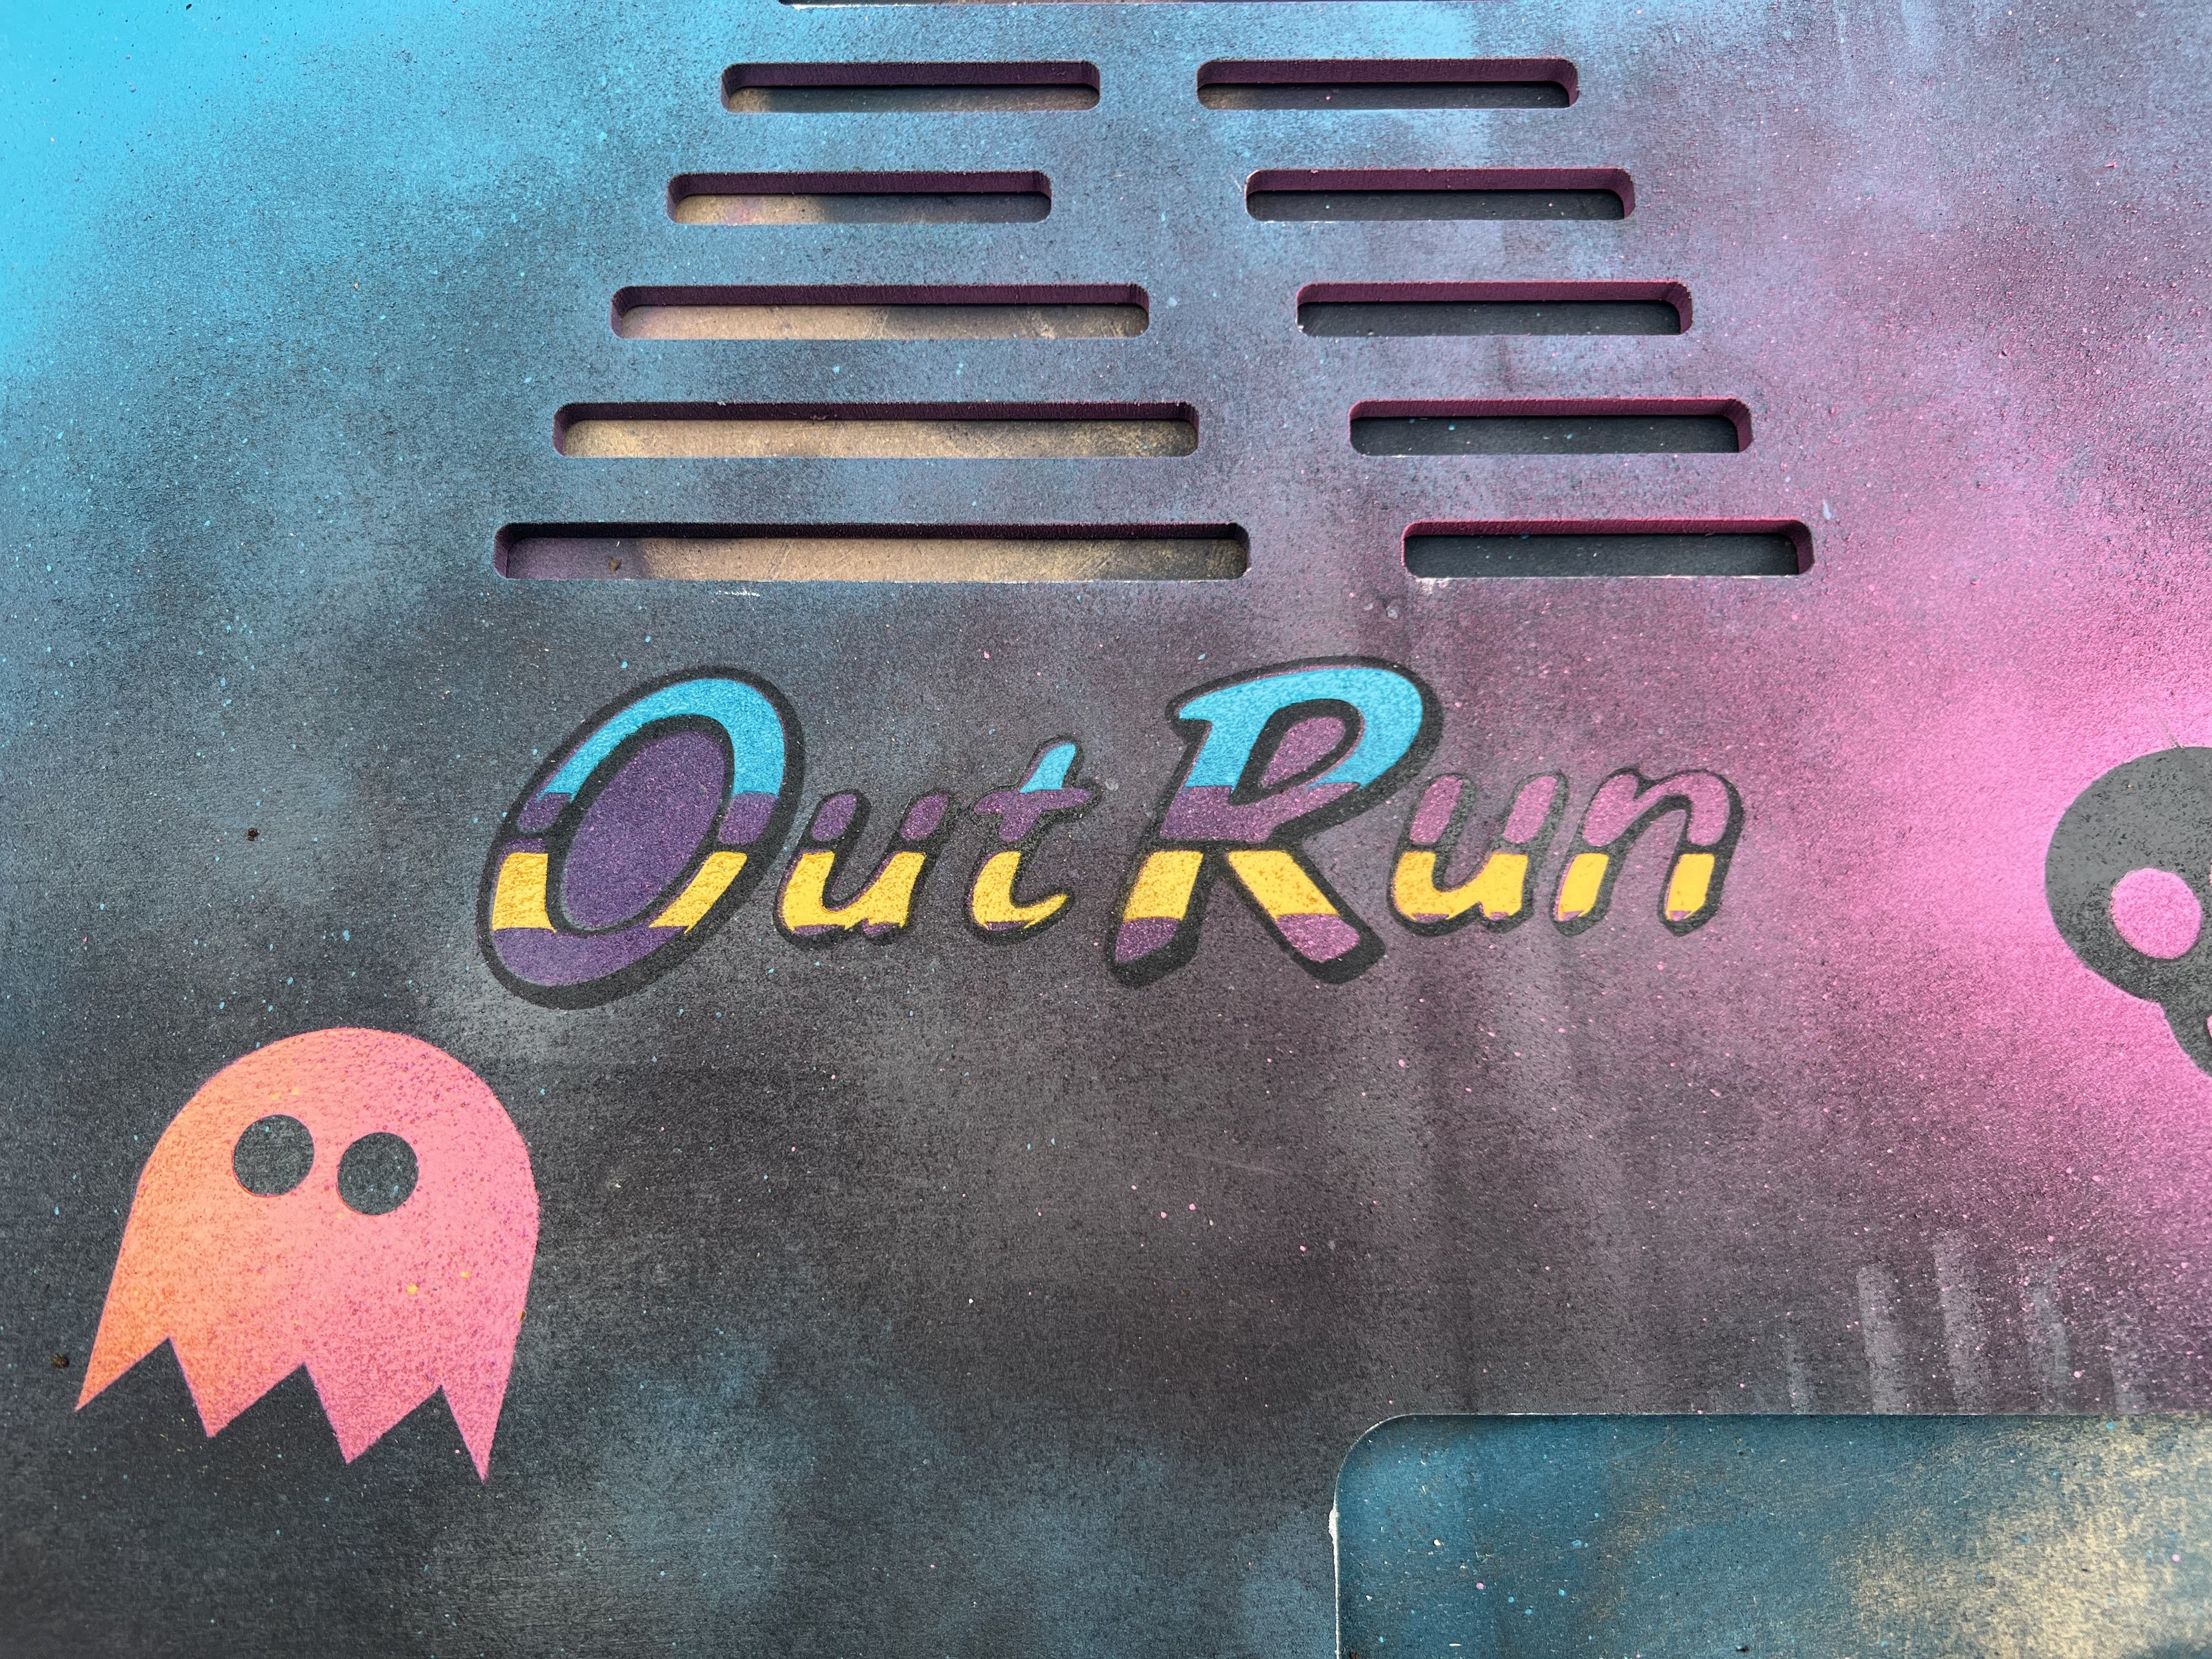
This was a challenge! Mostly because the letters had three inner sections that all had to be aligned to get the outline. Then a separate overlay stencil and some masking tape for the colour accents. Next time I might try three stencil layers instead of two.
Despite an obvious lack of white spray paint – or at least something light to form a base coat – I was able to whip up a convincing Out Run logo with a classic beach/sky reflection vibe. This involved painstakingly positioning, removing, masking and spraying, all while fighting a crippling lack of patience. The results aren’t bad, but could be better.
And that about wraps it up. All told I spent a small fortune on paints, and a smaller fortune on a roll of stencil film, but the Cricut never failed to smash out a stencil for me, even after I’d misfed the cutting mat, mangled the film, squashed it down and YOLO’d it back through again.
I got so carried away I bought a pack of canvas art boards to spray, and spent an inordinate amount of time working on a commission which I still haven’t finished. It’s here I found that, despite being compact, the Joy Xtra can easily split stencils across multiple sheets of material, you can use a guide and a cut in the same file and alternate between the two to get things sized correctly (Design Space is incredibly unhelpful about sizing when importing .svg files). Lining up stencils by hand isn’t exactly fun, but it’s doable and I did it, and the results are awesome.
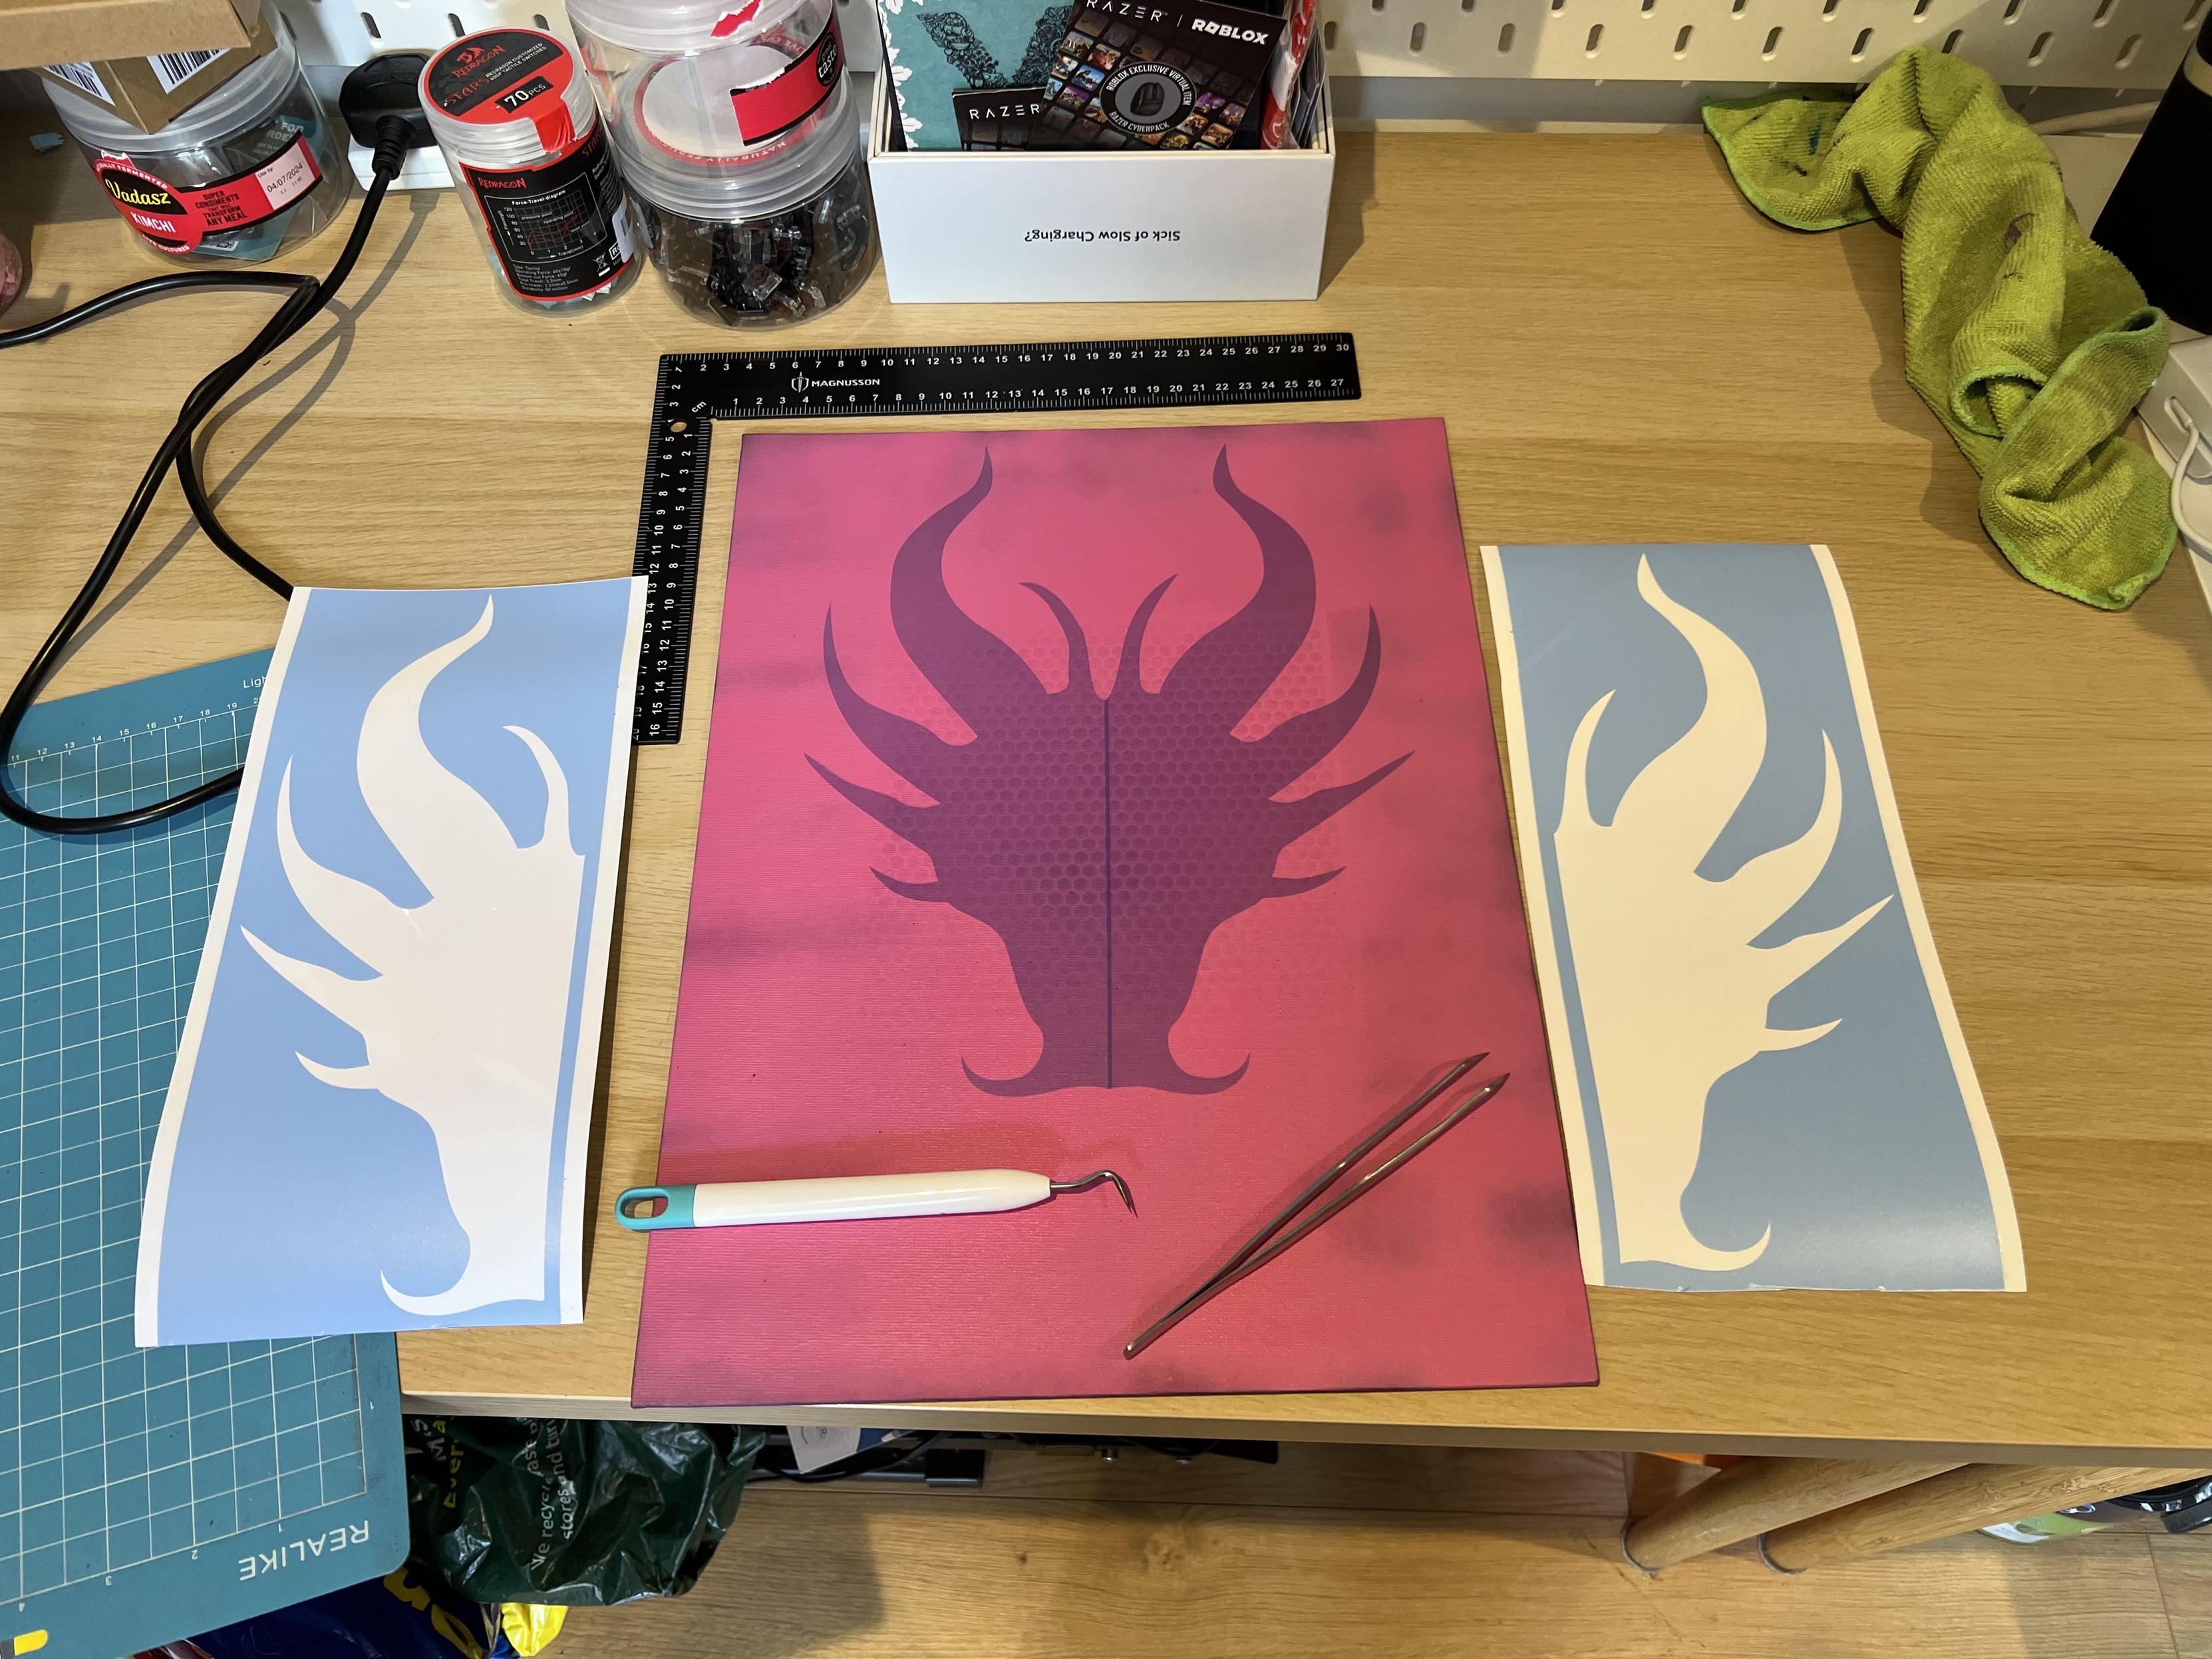
I’ve been reluctant to show any progress on this piece, but this is a good example of being actually productive with less than perfect mobile phone app based cutting software… I managed to split a design between two stencil sheets with some overlap and get it lined up!
If you’re looking for a cutter that works well, but requires a somewhat locked-down app that constantly nags you to subscribe… the Joy Xtra is pretty good. There’s a starter bundle currently on Hobbycraft for £219, though it’s missing the weeding tools that are absolutely necessary. You can pick these up for about £8 on Amazon though, and I suspect there aren’t many ways to get a pointy stick wrong. Cricut sent me their expensive (£16.50!) weeding tool set, and it’s nicely made and takes a lot of misuse (I mostly use the scraper for my 3D printer bed) but I’m not sure I would have dropped that means beans on them otherwise. Perhaps I am sheltered from the cost of art supplies, but it does feel like they are taking some liberties with their pricing.