Keychron Q1 HE ISO UK Reviewed
Given my proclivity toward teal it should come as no surprise that I loved the ANSI Shell White Q1 version of Keychron’s Q1 HE.. Sadly it’s yet-another-ANSI keyboard and I am based in the UK where we have big, giant enter keys and darn-it we’ll stick by ‘em!
Fortunately Keychron offer their Q1 hall-effect keyboard in a UK ISO edition. Unfortunately it’s only available in “Carbon Black.” Nonetheless I set aside my yearning for yet more teal, made the compromise in service of our almighty ISO standard, and Keychron were happy to supply one for review.
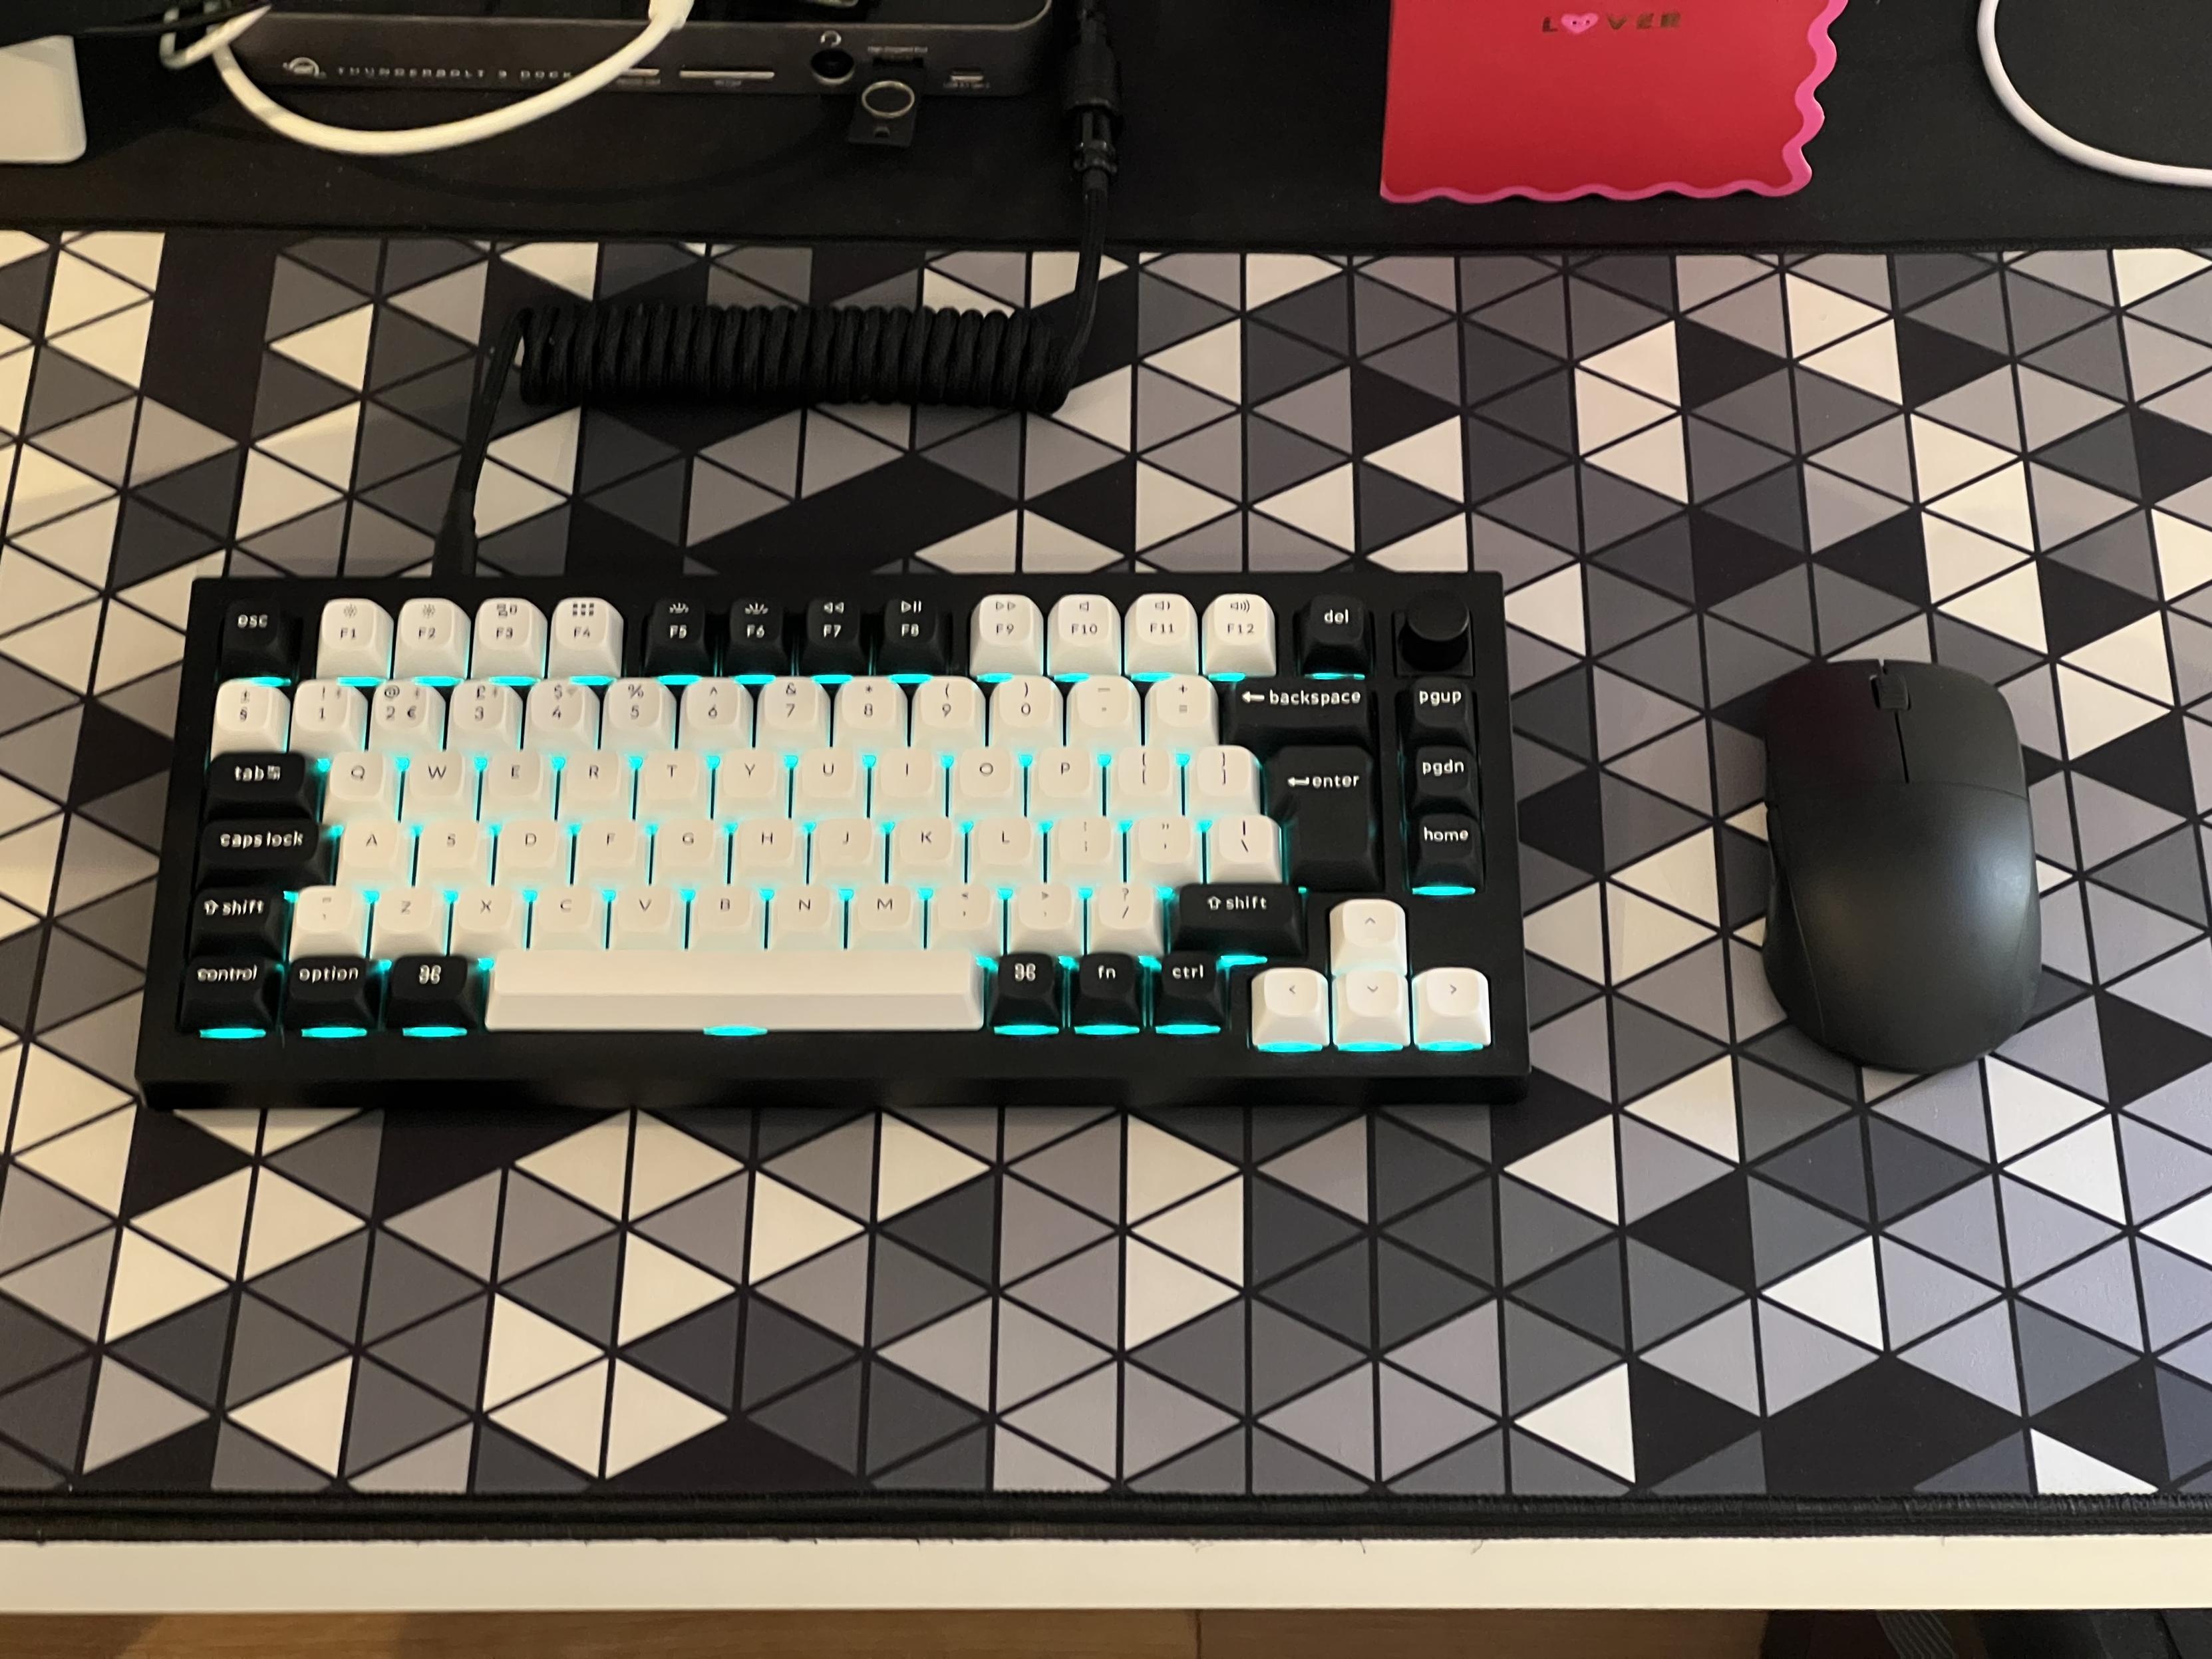
Finally got a keyboard that goes well with one of my Prototypist lucky dip desk mats- the Keychron Q1 HE. Yes the HE stands for Hall effect.
And, you know what? The bold, contrasting black and white keys of the Carbon Black version have only gone and grown on me, really quickly. In an “Oh, actually, I really like this” way, to be clear, they haven’t become some kind of infection. Though this review is a couple of weeks later than I’d have liked, since I did have one of those too. Anyone care to join me campaigning for winter hibernation?
Looks looks looks
As I slowly progress up the ranks of keyboards I tend to react with more and more excitement and hyperbole. I’m afraid I’m going to have to do that with the Q1 HE, too. While I’ve already experienced hall-effect switches with the KB65HE, the 65% size of EndgameGear’s offering made it less than ideal for my function-key-heavy programmers workflow. It’s also – let’s face it – not the most exciting of keyboards visually.
Keychron’s Q1 HE really steps things up a notch, or two. The Carbon Black version strikes just the right balance of clean, professional looks – if bright, colourful and obnoxious aren’t your cup of tea – and impeccable style. This is helped in no small part by the OSA profile keycaps which also balance fun and functionality with a very soft, rounded look without going full-on MOA. As a lover of KAM and, admittedly, MOA, the OSA profile caps speak to these same sensibilities and – in the immortal words of keyboard enthusiasts – make happy chemicals. Keychron have a range of OSA keycaps compatible with Q1, though none are as nice as the crisp, two-tone black and white set that ship with the HE.
While the keyboard ships with a signature (well, at least it’s the right sort of colour, they never can seem to dial in a specific shade) red Escape key there’s a replacement black one in the box, to really lean into the clean, monochromatic style. There’s also a set of Windows modifier keys (macOS ones are installed by default, an interesting choice) and some sundry replacement keys to dial in your specific layout preferences.
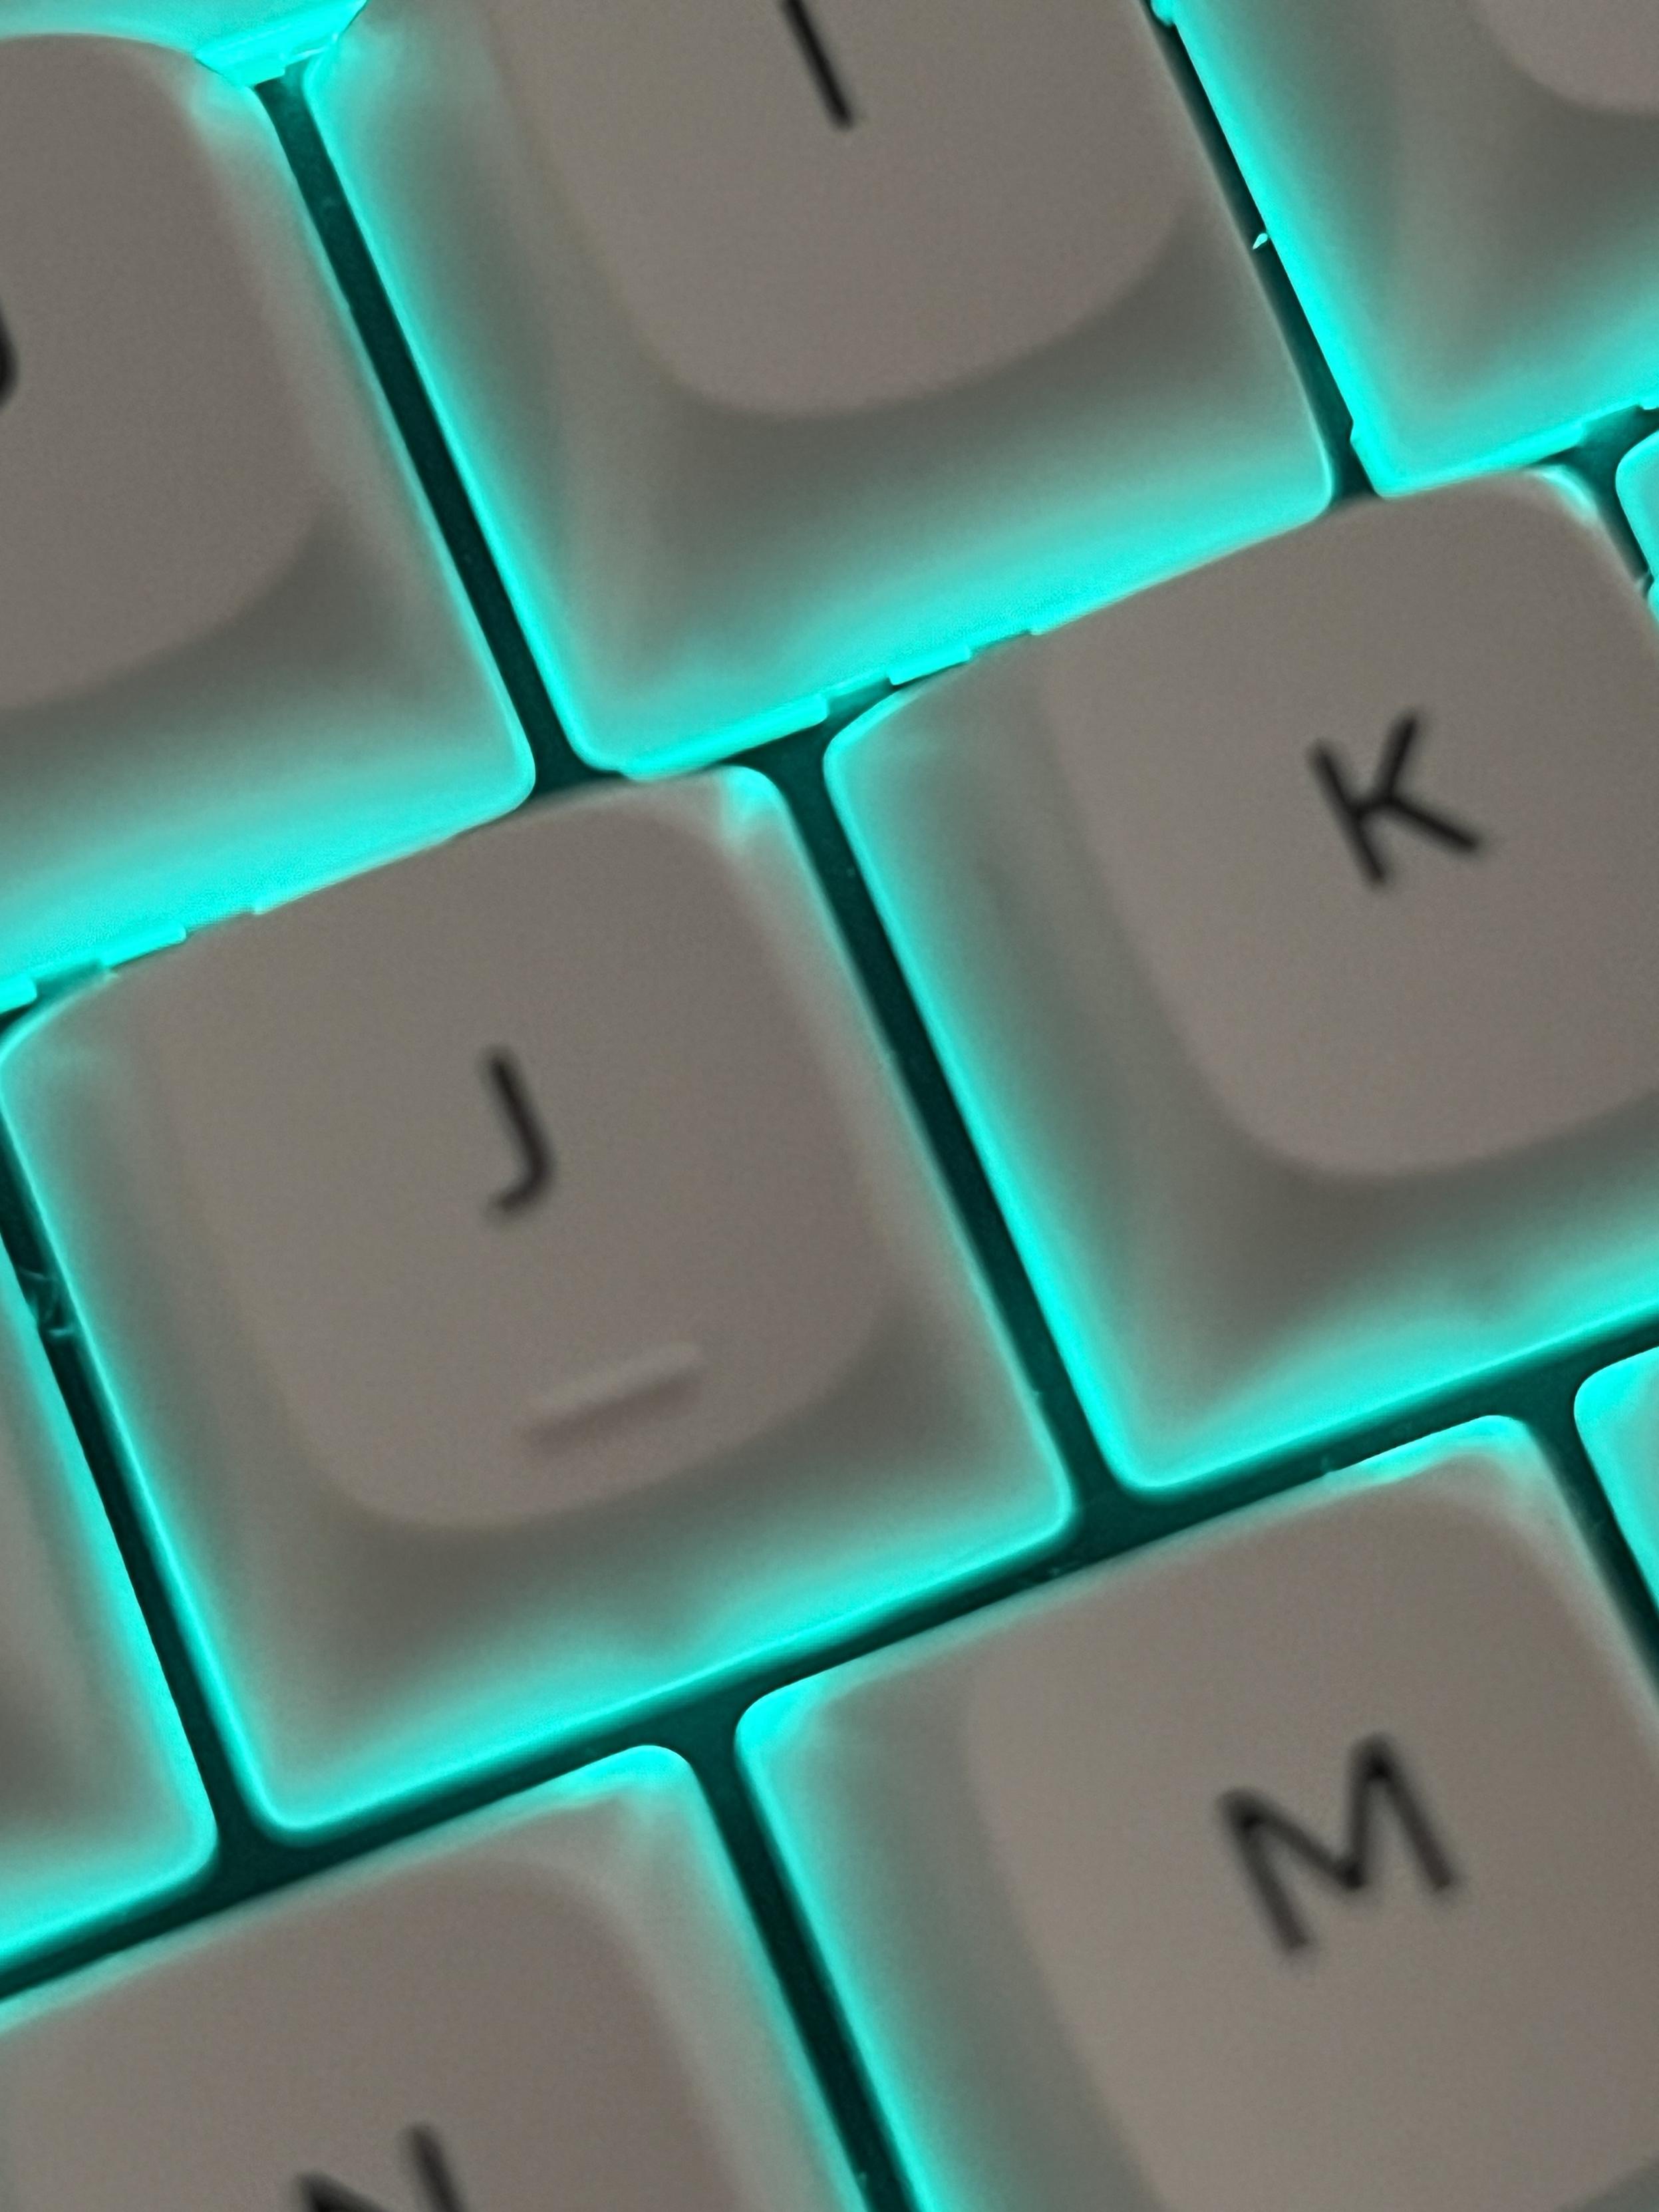
The effect of the underglow gently diffused between white keys is just glorious.
While the caps are not shine-through (IE: the backlight does not illuminate the lettering) I can readily forgive this, since a coloured underlight with the monochrome white/black keys looks phenomenal. I wouldn’t begrudge most professional/shared office users simply turning the lighting off (easy enough via keyboard shortcuts), but I’ve seen a lot of backlights and a lot of underlights but never quite seen them look like this.
Finally the lettering on the keys still suffers some process and typesetting issues. The former manifests as very subtle variations in the lettering on the more wordier keys – backspace being the canonical example – but isn’t anywhere near as pronounced as the newspaper-ransom-note I found on the Keychron K3 Max. As for typesetting, a few keys seem to ignore ascenders and descenders – the pointy up and pointy down bits of letters – and in particular pgup, pgdn and home feel inconsistently aligned. This isn’t something I think most people would ever notice (I had to grab Calipers and I’m still not totally sure I’m seeing what I think), but if you have the slightest sensitivity toward this kind of thing (ie: you spent any time as a graphic designer) then you might. Particularly now I have pointed it out. There’s also an apparent kerning issue in “caps lock” (or that’s a space?) and the legends on keys like shift and control cut a little close to the right-hand edge.
Despite this, the Q1 HE’s keycaps are among the best I’ve seen outside of expensive group buys or artisan keycaps. I spend time picking at the details because I see how good they could be and want to see them improve. Also, I’ve got to find something bad to say about this board, right? Y’know I’m just going to love basically everything else.
Build
It’s an aluminium keyboard so as you might expect it’s chunky, heavy and built well. To keep things simple it’s a single-angle wedge-shaped design with some fixed, anti-slip silicone feet on the bottom. There is, of course, absolutely no flex or give in the keyboard body and – for a gasket mounted keyboard – the keybed itself is also remarkably firm with virtually no spring or give. This makes the whole thing feel solid while somehow still having a very muted bottom-out sound for the keys.
A slot is cut out of the back edge of the top case and covered with a plastic “window” to accommodate the wireless antenna. The back edge includes a USB Type-C port, Win/Mac switch and mode switch (for the Tri-mode 2.4GHz, Bluetooth or Wired.) The tri-mode switch has a habit of slipping past the wired option in the middle and can be a little fiddly, it’s not widely out of whack with other boards I’ve tested though.
There is, unfortunately, no storage for the supplied 2.4GHz dongle. No magnetised slot or fancy sliding compartment, a shame considering it could have tucked right up at the top edge next to the wireless window.
The knob seems to be a jacket of knurled aluminium over a plastic central piece, it looks and feels much better than it has any business doing.
Hall Effect
Of course what you’re really here for is the HE, Hall-Effect, feature, otherwise there’s no real reason to pick the Q1 HE over the regular Q1… well, nice colours aside.
The hall-effect is, in very brief and crude terms, simply a means of measuring, electronically, how close a magnet is to a sensor. In order to turn this information into a keystroke you just pick a threshold distance and trigger whenever it’s passed. Because this threshold is almost entirely arbitrary you, the user, can change it. Keys are too hard, or too slow to actuate? No problem, dial the threshold right up to the minimum distance and suddenly you can tickle your keybed and a wandering ant could type a novel. Prone to spurious presses, no problem, crank the actuation depth right down and you’ll need to bottom-out your keys to register a stroke.
But this configurability comes at a cost and that cost is: you gotta be linear, sorry. If you’re a fan of tactile feedback or clicky keys you’ll understand that the tactile feedback, for the most part, denotes when a keystroke has been registered. If you put tactile switches on a hall-effect keybed you’ve suddenly limited yourself to only one actuation depth that makes sense. You could argue that magnetic switches might last longer, but that’s scarcely a concern with hot-swappable switches.
The non-sensedness of tactile or clicky switches on hall-effect boards means you’ll struggle to even find any options should you ever want them. To compound this, Keychron claim the Q1 HE is *only* compatible with Gateron’s “Double Rail” magnetic switches and explicitly states it does not support KS-20. The trouble is KS-20 are named “Dual Rail” by Gateron, which is somewhat confusing. If you want to be sure a particular switch will work, you’re limited to the Dawn, Nebula and Aurora options stocked by Keychron themselves.
But, of course, I’m not going to take no darn orders from words on a website. I have the KB65HE with Gateron KS-37B so the logical thing to do was try to swap over a switch and see if it worked. So I tried. And I failed at the first hurdle.
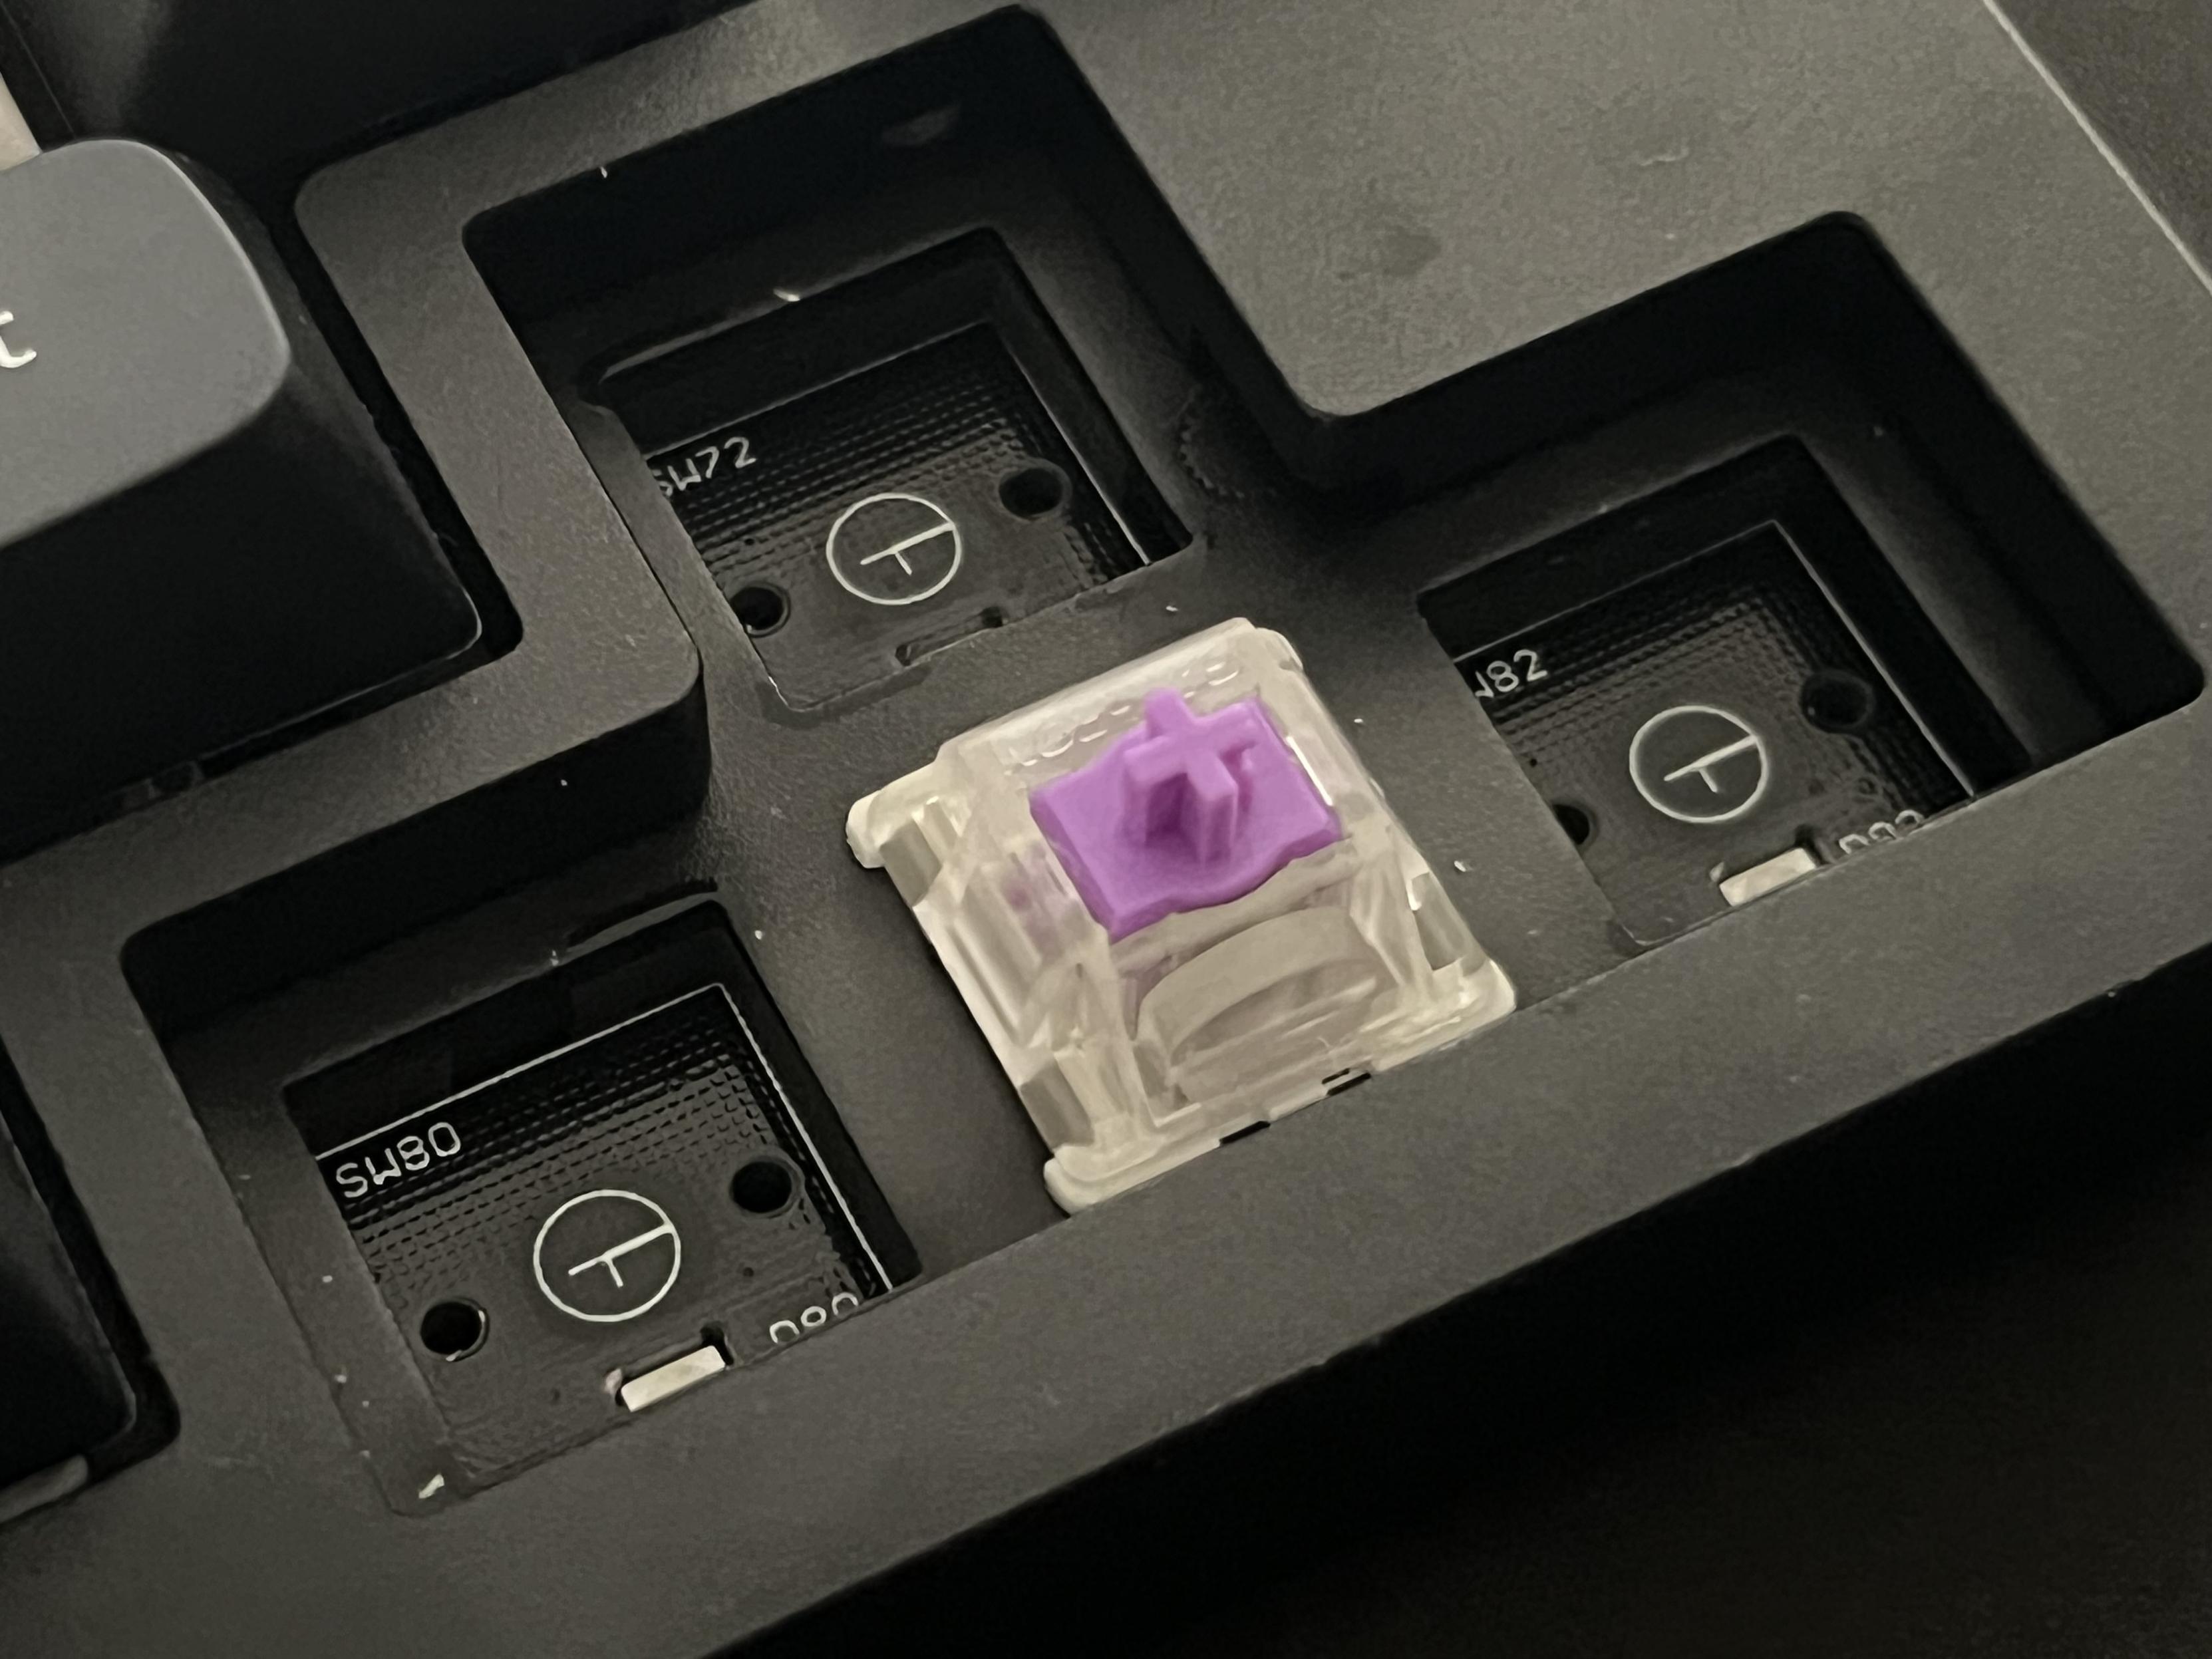
Hole versus no hole, these magnetic keyboard switches are clearly not created equal. Keychron’s Q1 HE uses the pink “Nebula” Double-Rail magnetic switch from Gateron, with a noticeably different construction to the KB65HE’s Gateron KS-37B.
The KS-37B switches have an extended post, protruding through a hole in the PCB that’s present on the KB64HE but absent on Keychron’s Q1 HE- far from any kind of magnetic incompatibility, the switch simply won’t fit, at all. I did, however, manage to swap the KS-37B switch over to the Q1 HE where, with some encouragement, it would register a keypress. I remain at a loss to why there’s a physical difference and what difference it makes. Presumably the hole might allow for a greater range of travel, or the same travel in a lower profile, but it doesn’t seem to be the case here. I’m also forced to confront that the “sensor” I pointed to on the KB65HE is actually very obviously just a regular capacitor and now I’m left with even more magical hall-effect mystery- I guess the sensor itself is internal to the PCB.
Aside from the configurable actuation depth, Keychron advertise “Dynamic Rapid Trigger” and make the very reasonable claim that a configurable actuation and release threshold effectively mean the key can re-trigger at any point in the range of its motion. IE: If the key is moving down it’s being pressed, if it’s moving up it’s being released. Contrast this to a mechanical switch, which has an immutable actuation point which cannot move, much less be changed on the fly with software. The practical benefits of this are a very, very high repeat rate on keys since you don’t have to cycle the physical switch on/off or keep your key depressed just right to trigger it. Users who are familiar with the term “hypertapping” might understand what this means for certain types of gaming. In practice it’s a little tricky to dial in the settings, but with an actuation distance of 2mm and a Rapid Trigger sensitivity of 0.3mm I could very obviously vibrate my finger on the key with pretty minimal precision and receive a stream of repeated input events.
Software
The Q1 HE is yet another VIA / QMK keyboard, effectively giving you full control of key bindings, macros and more. And even fuller control if you want to try compiling the firmware for yourself. Granted that firmware lives in a dusty corner of Keychron’s QMK fork entitled “hall_effect_playground” make of that what you will.
As is typical of QMK, it’s not a particularly friendly or welcoming interface and unless you’re prepared to spend real time dispelling baffling terminology for keys and special functions. For instance NUBS, NUHS are “Non-US Backlash” and “Non-US Hash” and since this is an ISO board you’ll need to know these more arcane quirks.
What’s unique about the HE is that it’s the first Keychron board that has led me to discover Keychron’s own keyboard config web app – www.launcher.keychron.com. In this app you’ll find all the usual suspects for QMK keyboards, including the typical configuration of Layers 0 and 1 being for macOS and layers 2 and 3 being reserved for Windows – switching the Win/Mac switch will switch to 0 and 2 for macOS and Windows respectively, with the Fn key then switching to layers 1 and 3 for each of these.
On top of layers, Keychron have added “HE Mode” profiles. There are three available profiles which are bound to Fn + P + (Z, X or C) by default. You can find these in Keymap under Custom as PROF1, PROF2 and PROF3. I figured I’d only need a couple of profiles, so I bound PROF1 and PROF2 to Fn + PgUp and Fn + PgDn where they’d be a little less awkward to remember.
HE profiles allow you to assign “hall-effect” (read: analog) functions to keys including gamepad emulation (of questionable utility) and the ability to trigger multiple key-presses as a key is depressed/released. The “One Key Multiple Commands” interface is an awkward detachment from the normal keymap tweaking, with a matrix of key press to actuation distance mappings giving four possible trigger points. The limited palette of available keys for these mappings mean you only get alphanumeric, lowercase characters, function keys, a sprinkling of modifiers and some other sundry marks. In practice you can pull things off like triggering the same input four times with every keystroke, affording you some control over speed with a careful downstroke and upstroke. This might be useful for gaming, or you might have a better imagination than me and have a use already.
If you want uppercase characters, or anything with a shift or modified state you’ll need to use one of the command slots to include the relevant modifier key. This would reduce the number of keys you can trigger in one stroke by two, not ideal. You cannot, therefore, use four slots to type and correctly capitalise something like: “Argh”. I’m not sure why you’d want to, but in essence this is an analog-input driven controllable macro so there must be some use-cases out there. Keychron’s website claims that “Ctrl+C” is a valid key combination for a single phase and they’re not wrong, but they do gloss over the fact that this requires at least one of the other phases to contain Ctrl, or C or simply be unbound.
Gamepad emulation function is interesting, and allows you to use the hall-effect keys to map to analog inputs such as left/right joystick and even Left/Right triggers. A quick leap into a gamepad tester shows that, in theory, these work though I think perhaps you’d struggle to use them effectively in gameplay. Noticeably absent, too, are Left/Right bumpers and Left/Right stick click buttons, so you cannot bind a fully-functional gamepad to your keyboard.
The left/right joystick controls are also mutually exclusive, so if you’re holding both left and right then rather than get a blend of the two keys you get… nothing. They effectively ghost each other and cancel the input which would translate quite erratically to strafing in an FPS game. This is a software quirk, however, so perhaps Keychron will read this and add analog direction blending, left and right bumpers and stick clicks.
Actuation distance is by far the most useful feature, though setting it right down to 0.2mm resulted in a wealth of spurious keypresses which I could only tame with calibration and a quick switch back to 1mm. Suffice to say, be careful. Tuning the actuation distance down low allows me to type with a gentler touch, useful when I’m researching or taking notes during a meeting and I don’t want the rattle of mechanical keys picking up on my microphone.
Teardown
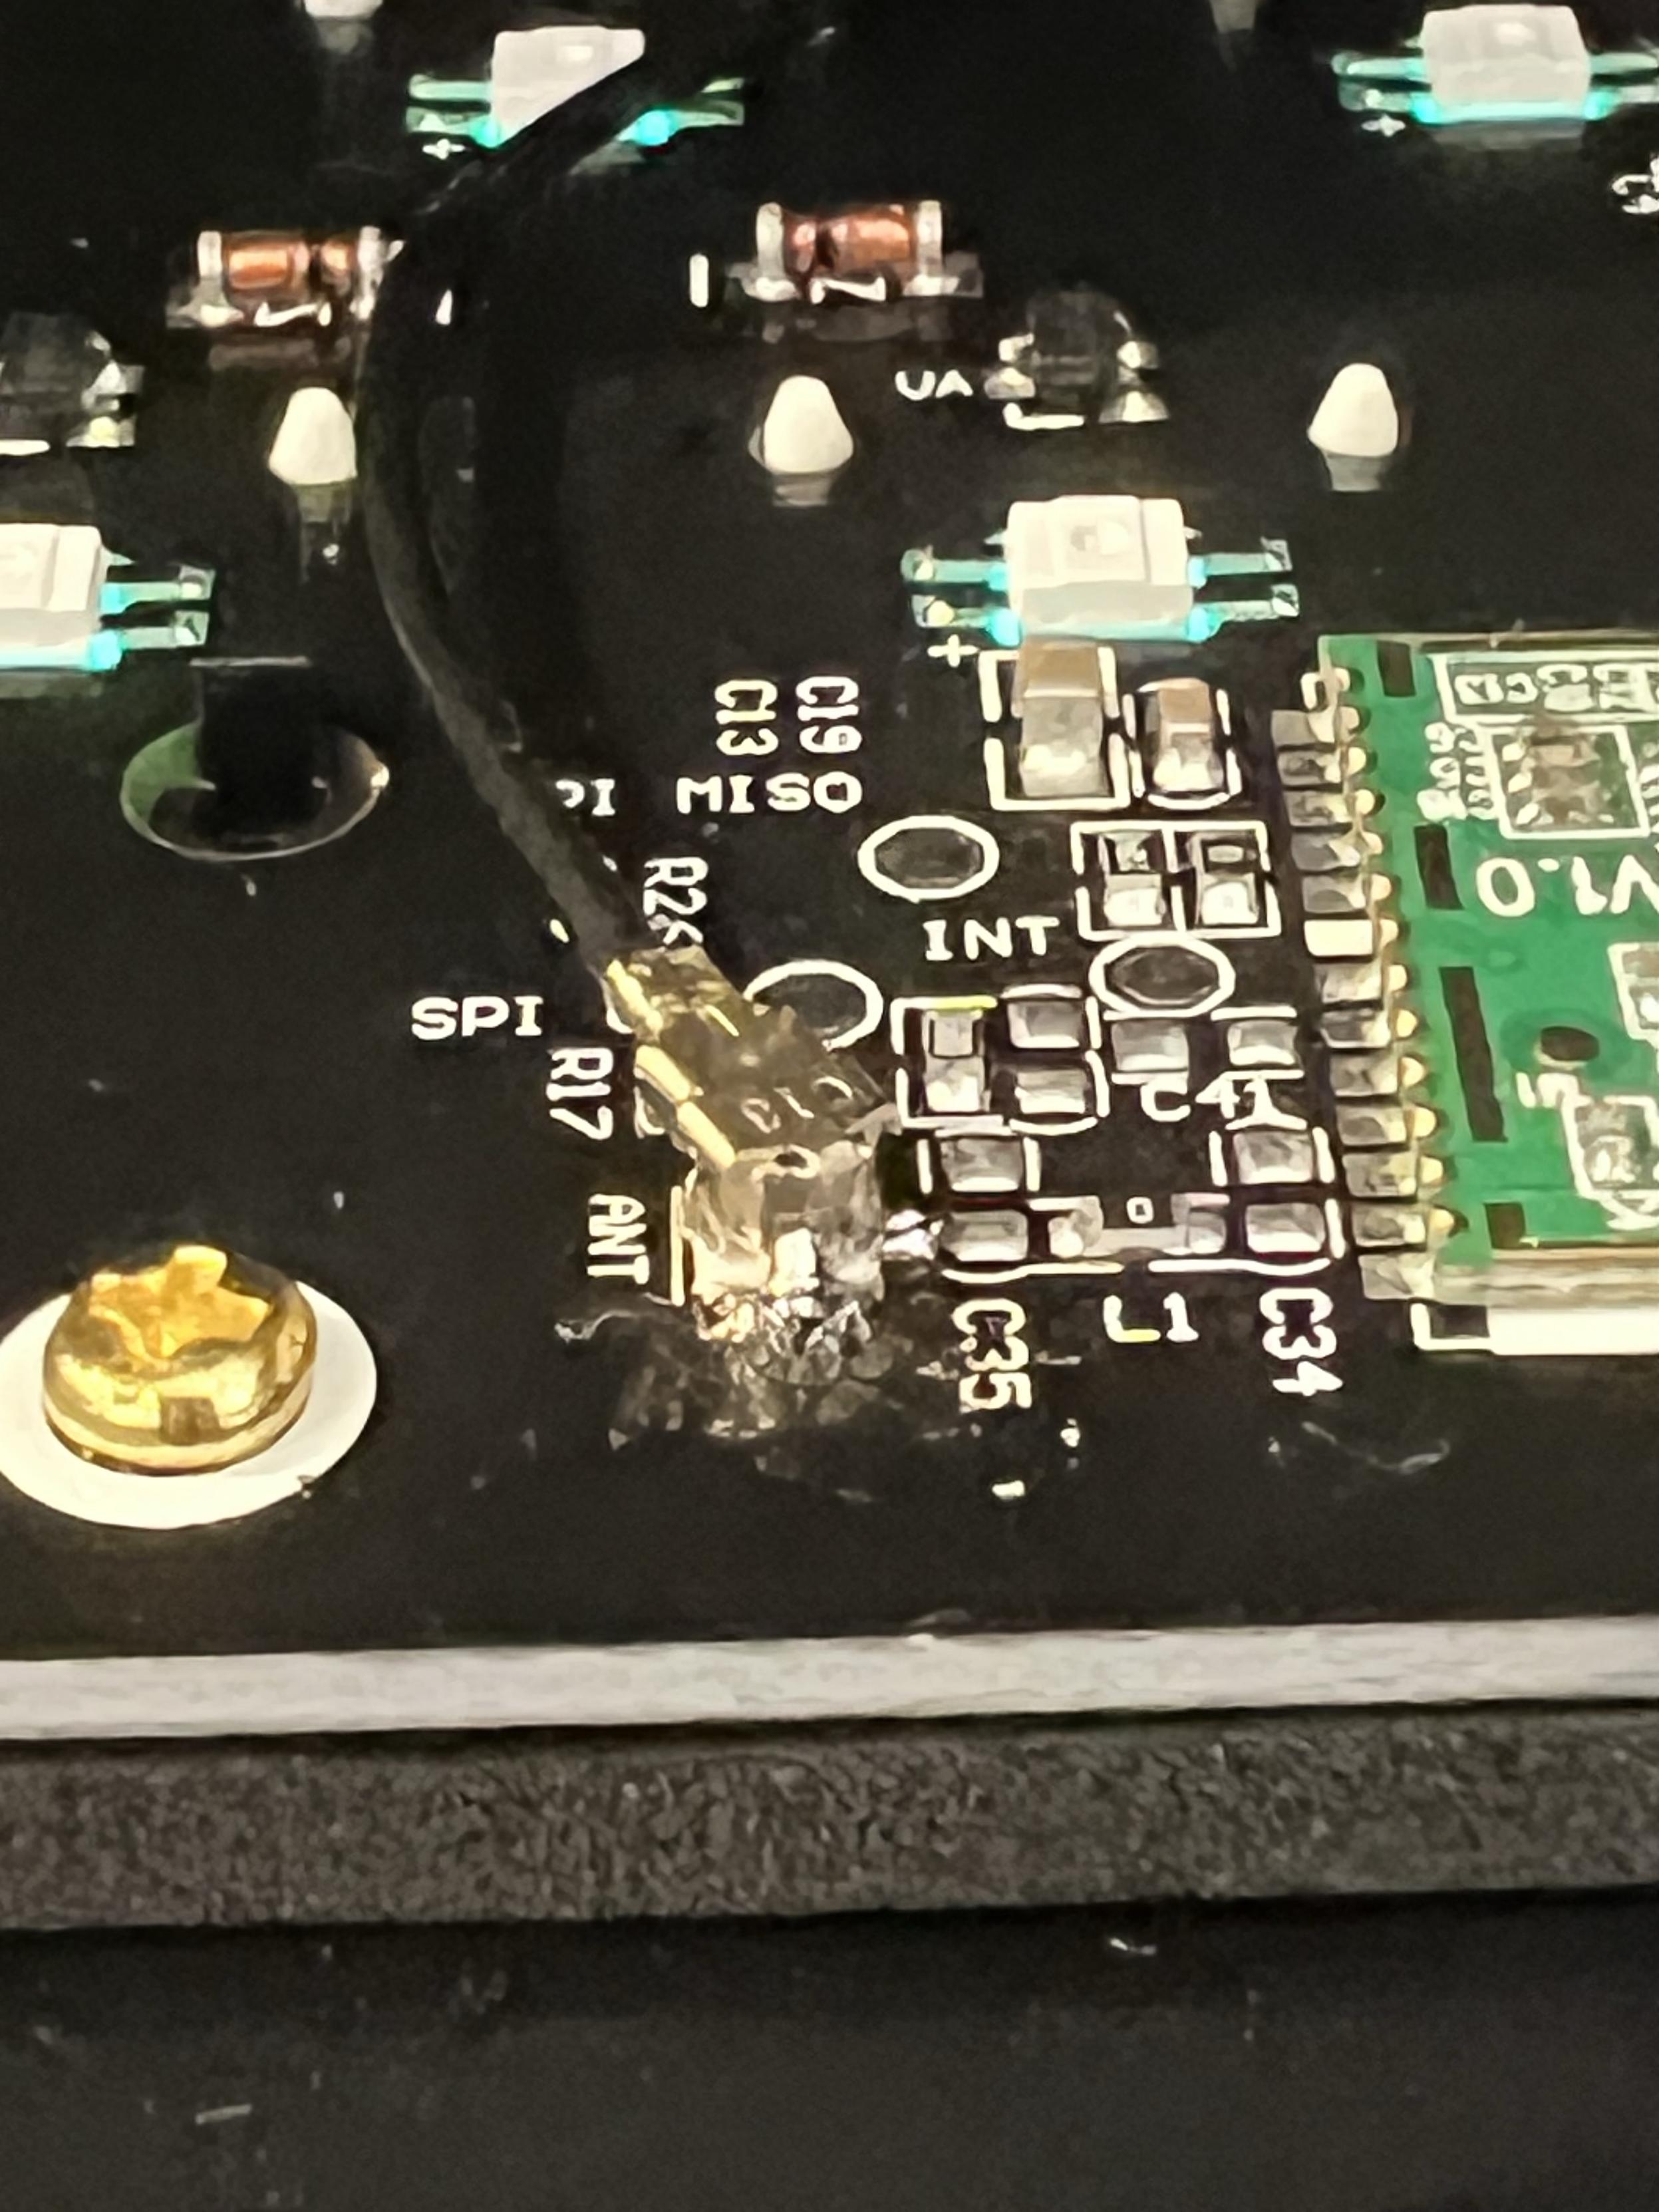
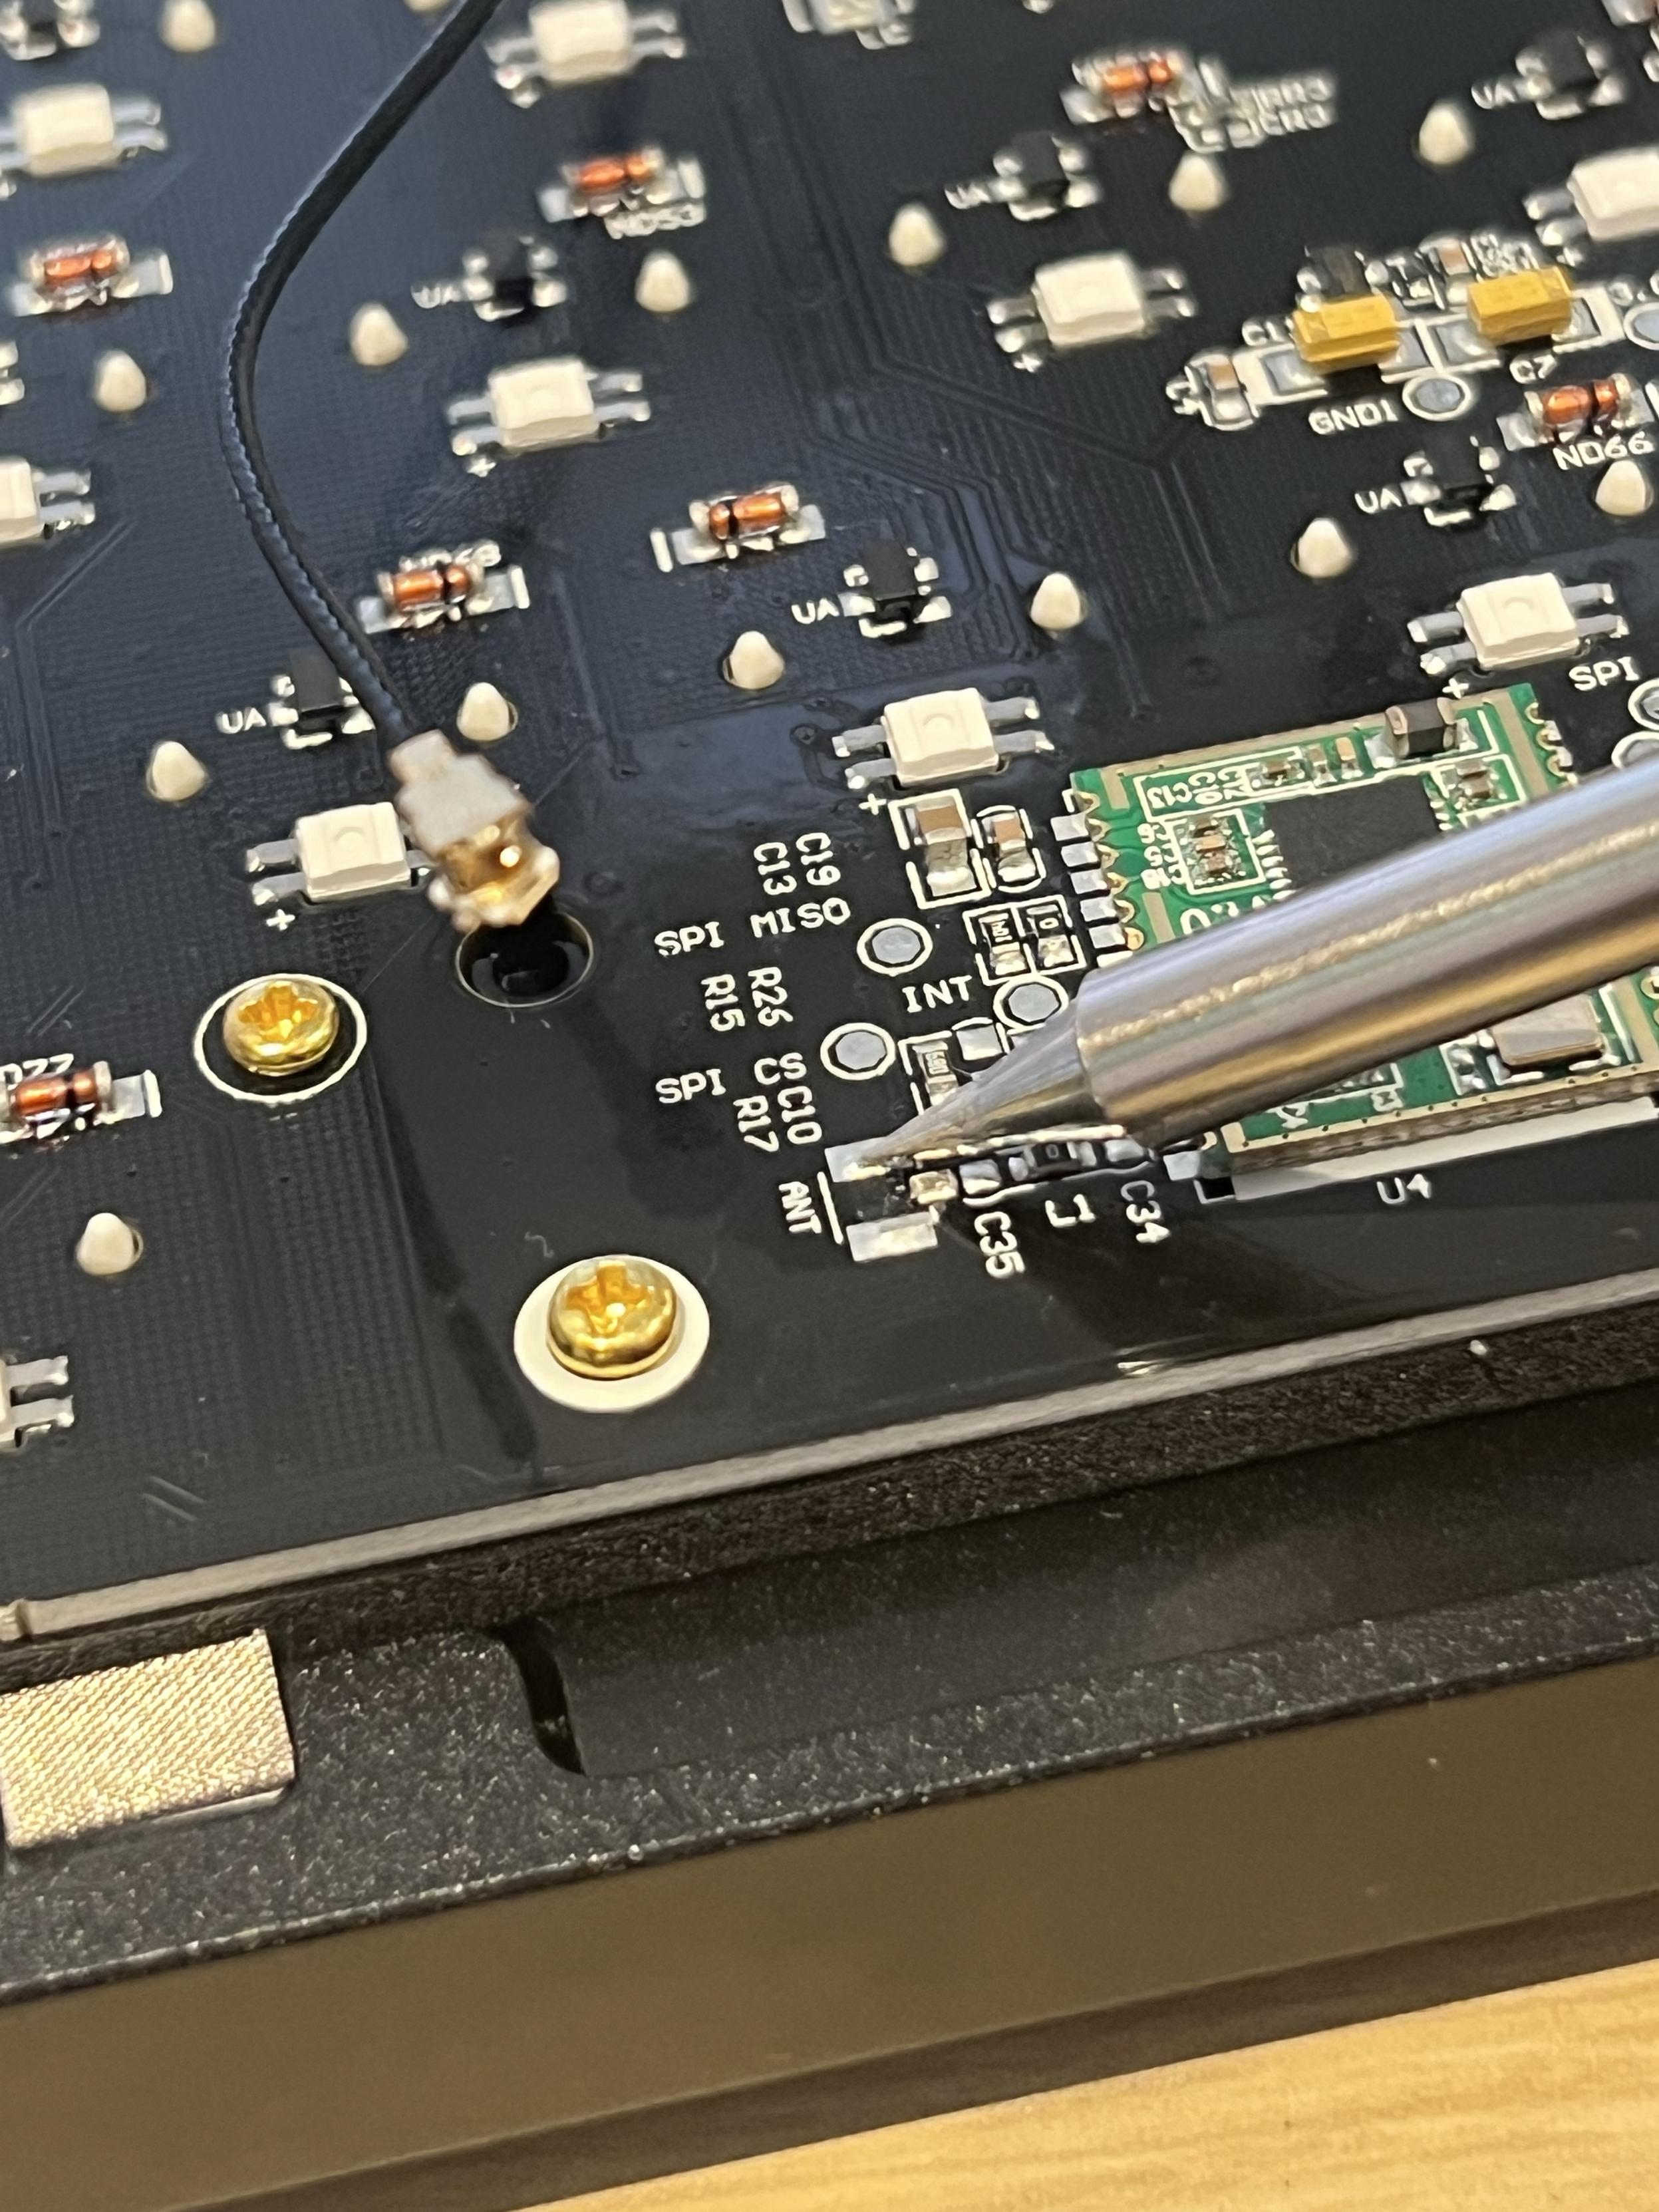
While Keychron supply all the tools – including an allen wrench, a screwdriver, and replacement/additional gaskets (foam pads) – for tearing down, repairing or customising your keyboard I would strongly caution against opening it up. Why? The SMA connector. That’s the tiny little connector that the wireless antenna connects to. In service of science, I tried to remove my wireless antenna so I could fully teardown the Q1 HE. Instead I pulled the SMA connector right off the PCB. This is surprisingly easy to do, yet it requires some fiddly soldering to “fix” it (I’ll be honest, I don’t know if it’s fixed or just not absolutely essential but BT and 2.4GHz connections still work).
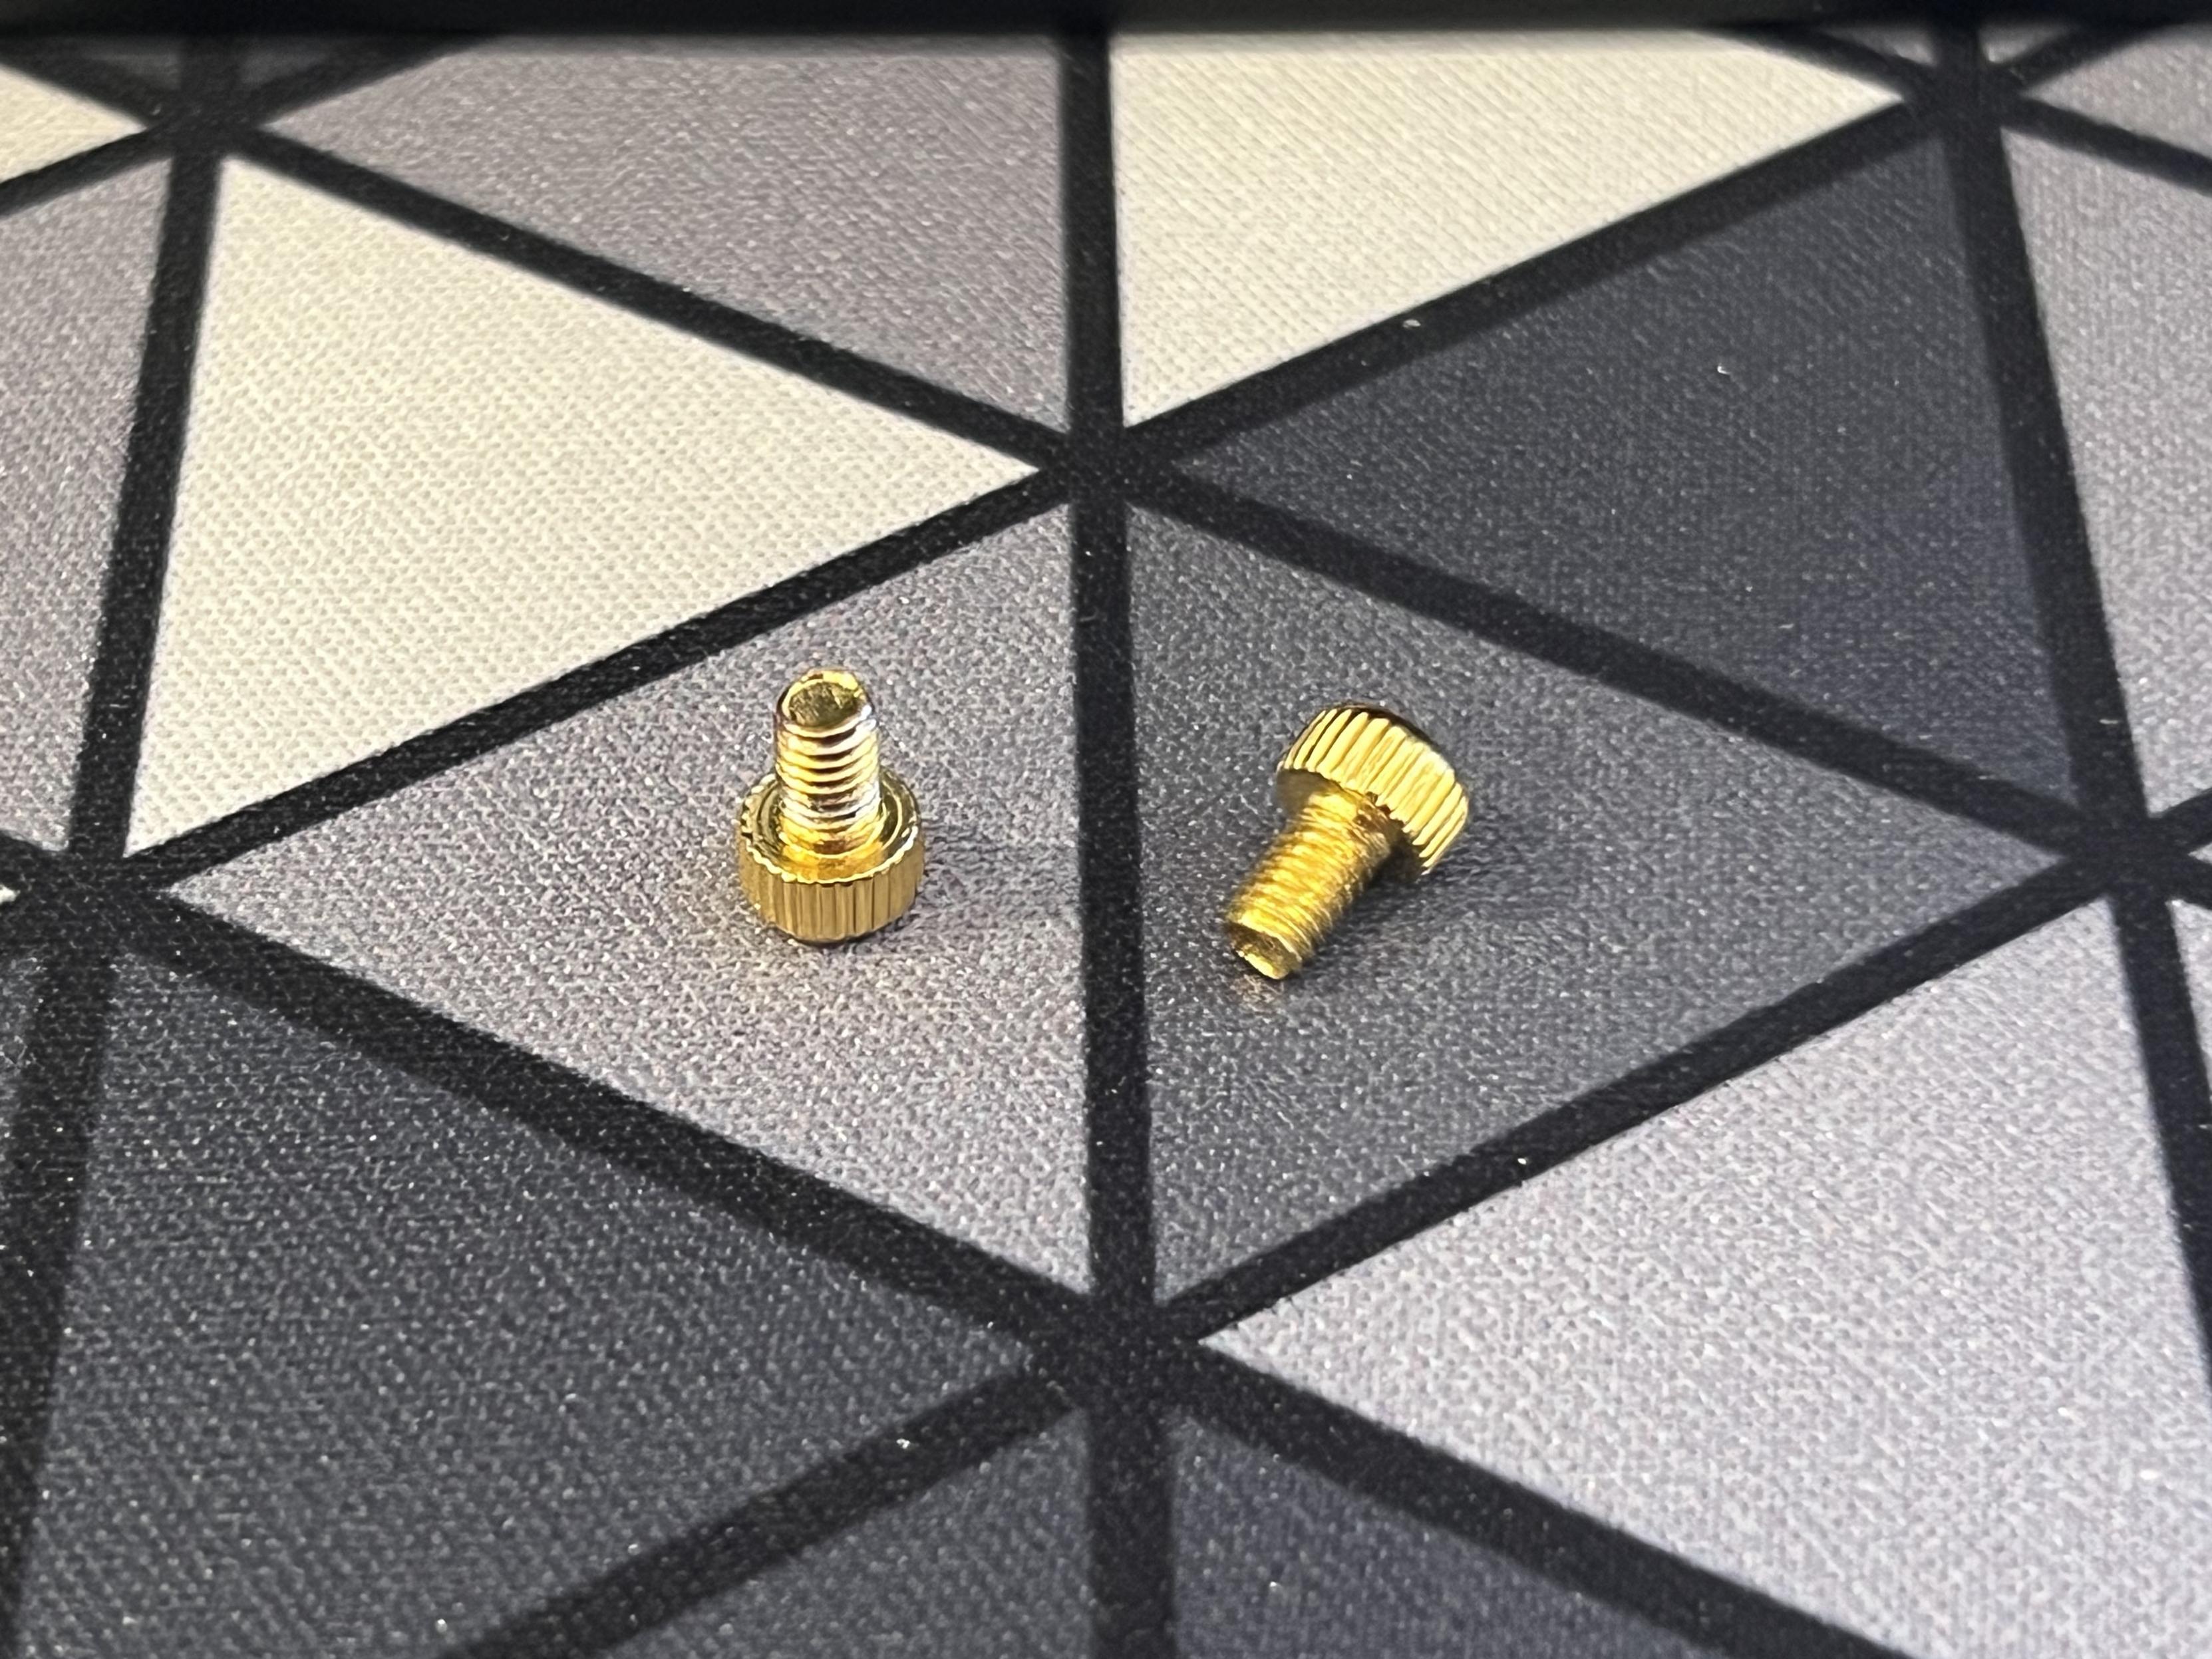
Knurled brass screws hold the Q1 HE together, they’re a nice if little superfluous touch- at least easy to pick up and handle!
Anyway the Q1 HE is secured by eight brass hex bolts, with nice but pointlessly knurled heads. Removing these allows the bottom to be lifted cleanly away from the top and PCB, with only the LiPo battery connector joining the two. Fortunately the battery connector is easy enough to pull out.
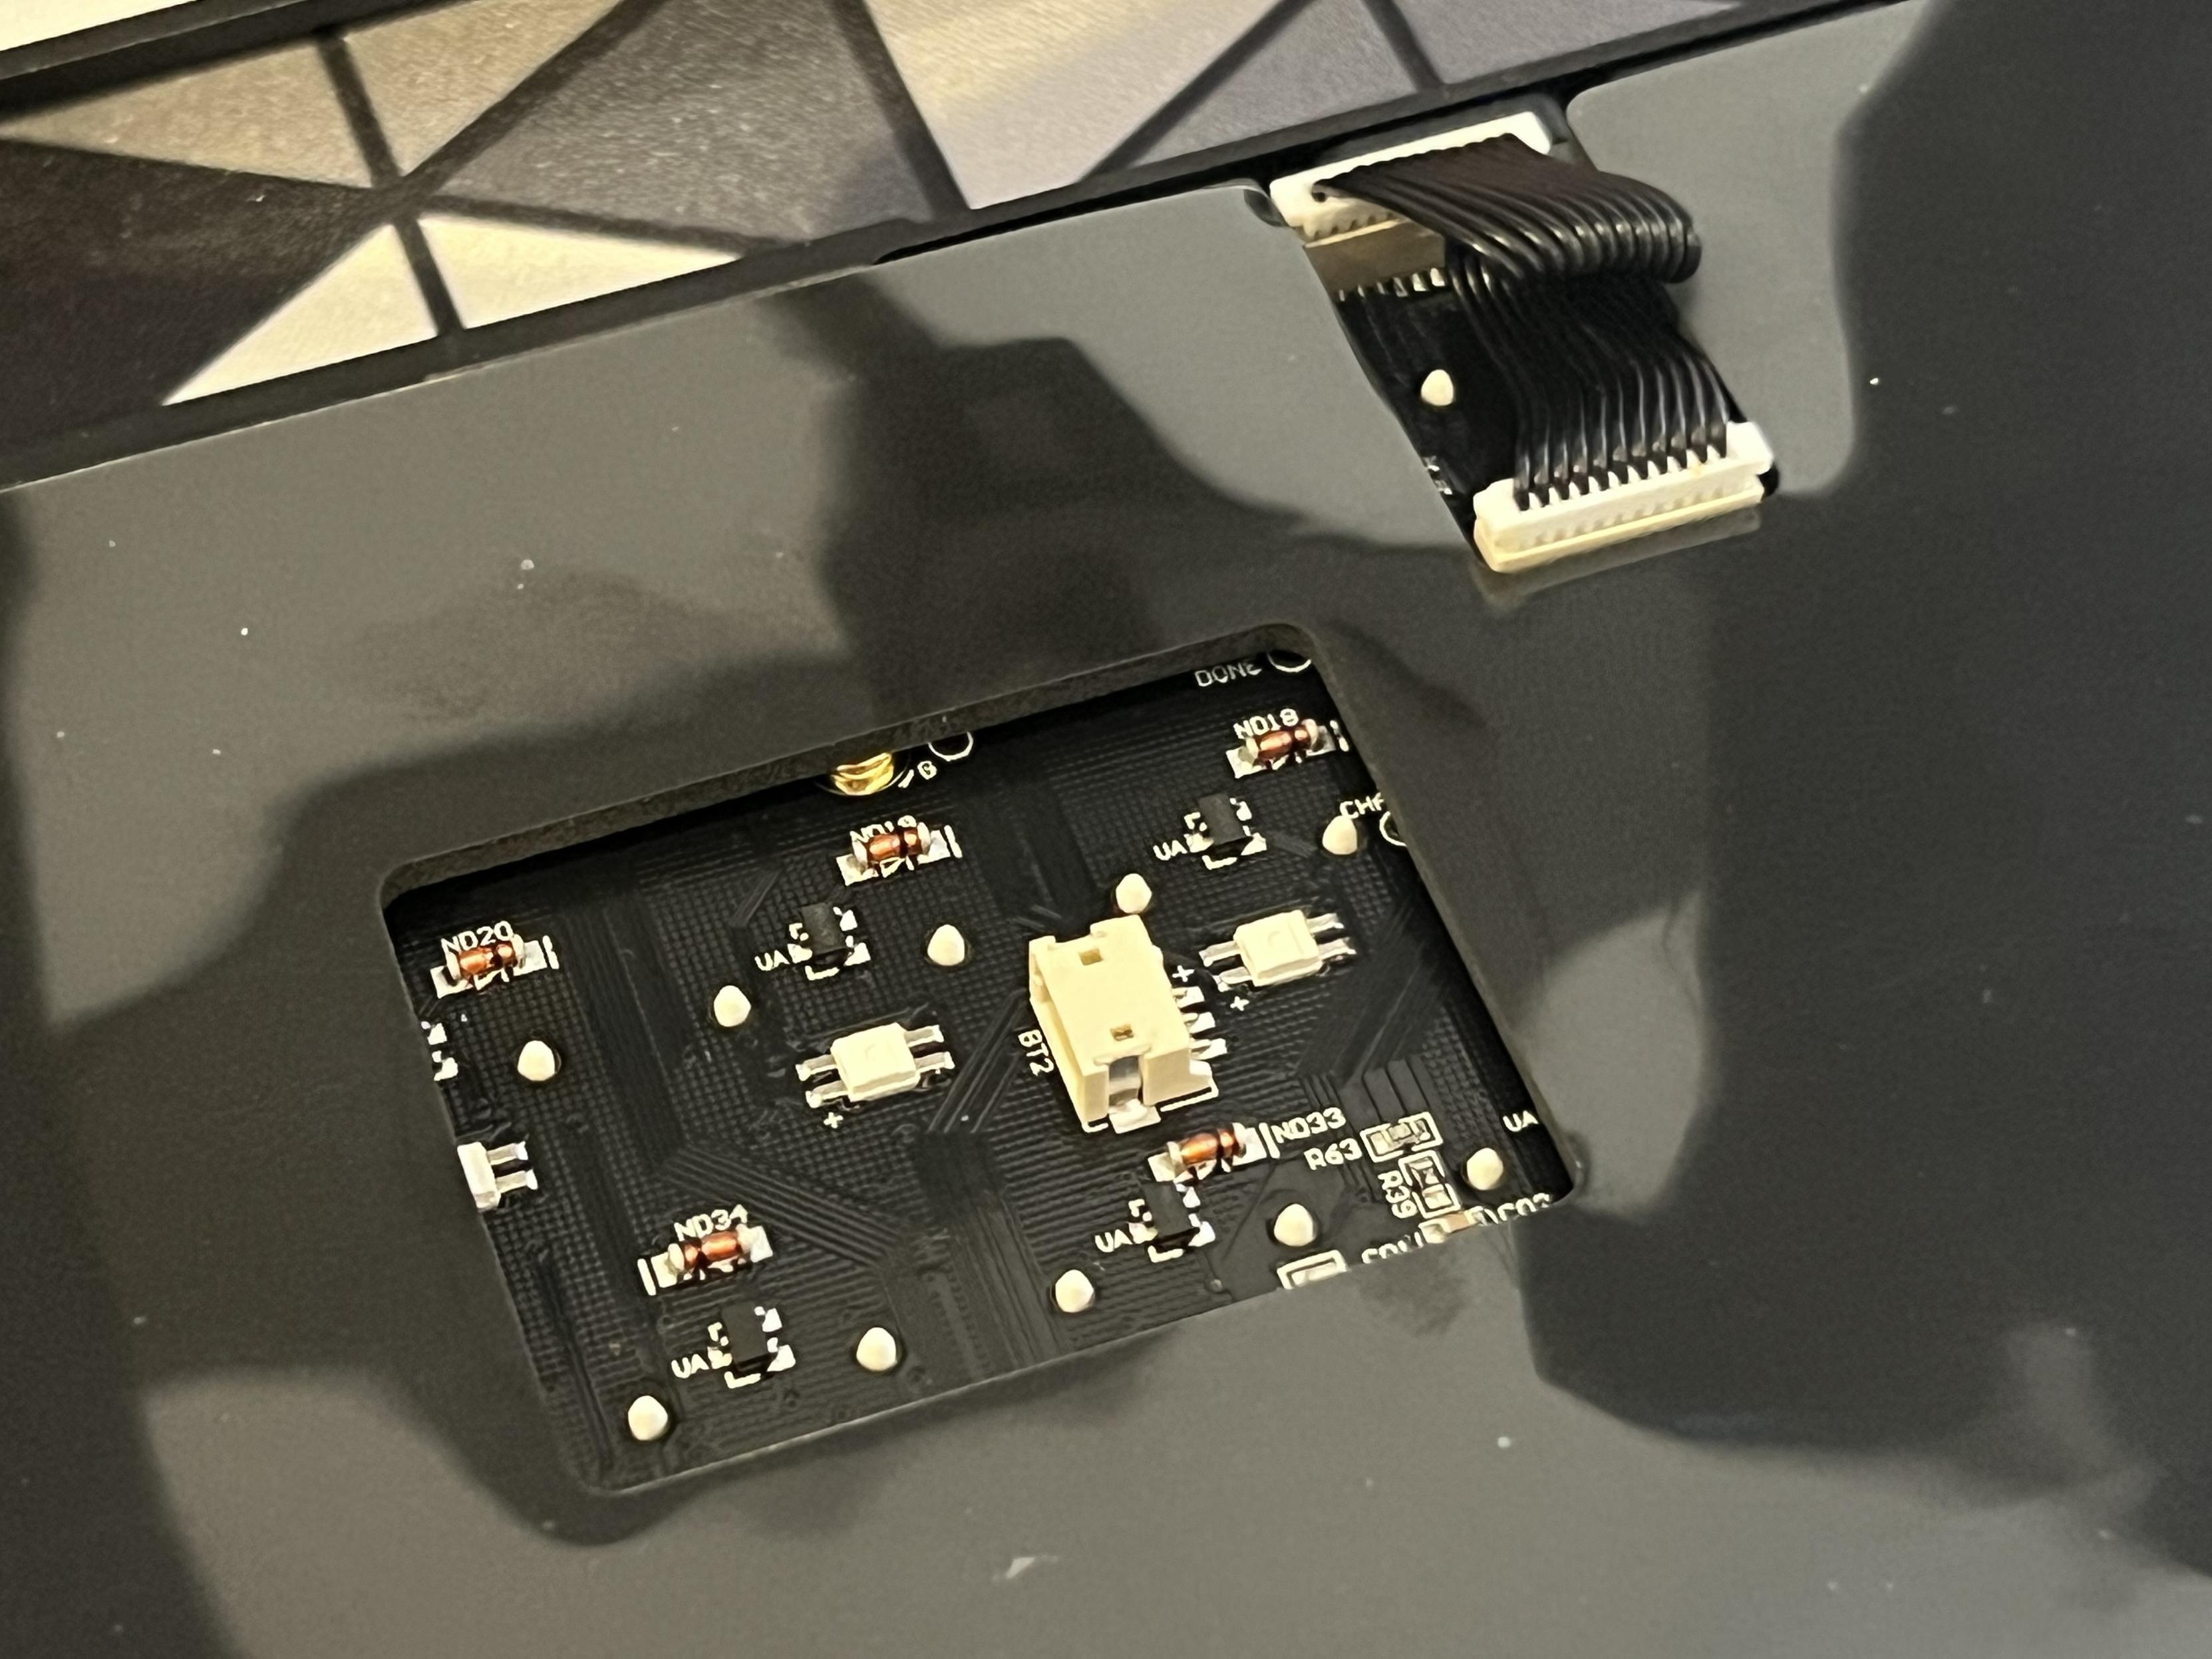
While the USB connector and switches are mounted in the top half of the keyboard, they’re still on a daughter PCB to allow the main PCB to bounce freely on its gaskets. This is connected via its own ribbon cable, which was also remarkably easy to remove.
Keychron Q1 HE sports a wifi antenna cable routed through SMD clips and some very easy to unplug JST connectors. Shame I broke the SMA connector off the board…
The wireless antenna routes from the back of the top half, where it has its own window in the aluminium case (to improve range and reliability). It’s really neatly routed through some SMD (surface mount) metal clips. Do not be tempted to unplug it, all the care in the world isn’t likely to yield better results than my small disaster!
Fixing it went about as well as you might expect, given how thoroughly out of practise and poorly equipped I am!
Between the PCB and battery is a layer of latex padding, a layer of acoustic foam and a layer of PET (plastic) film. Silicone gaskets provide dampening between the top and bottom case shells, avoiding any rattle that might be otherwise caused by loose screws, and preventing the need to torque the screws quite so much.
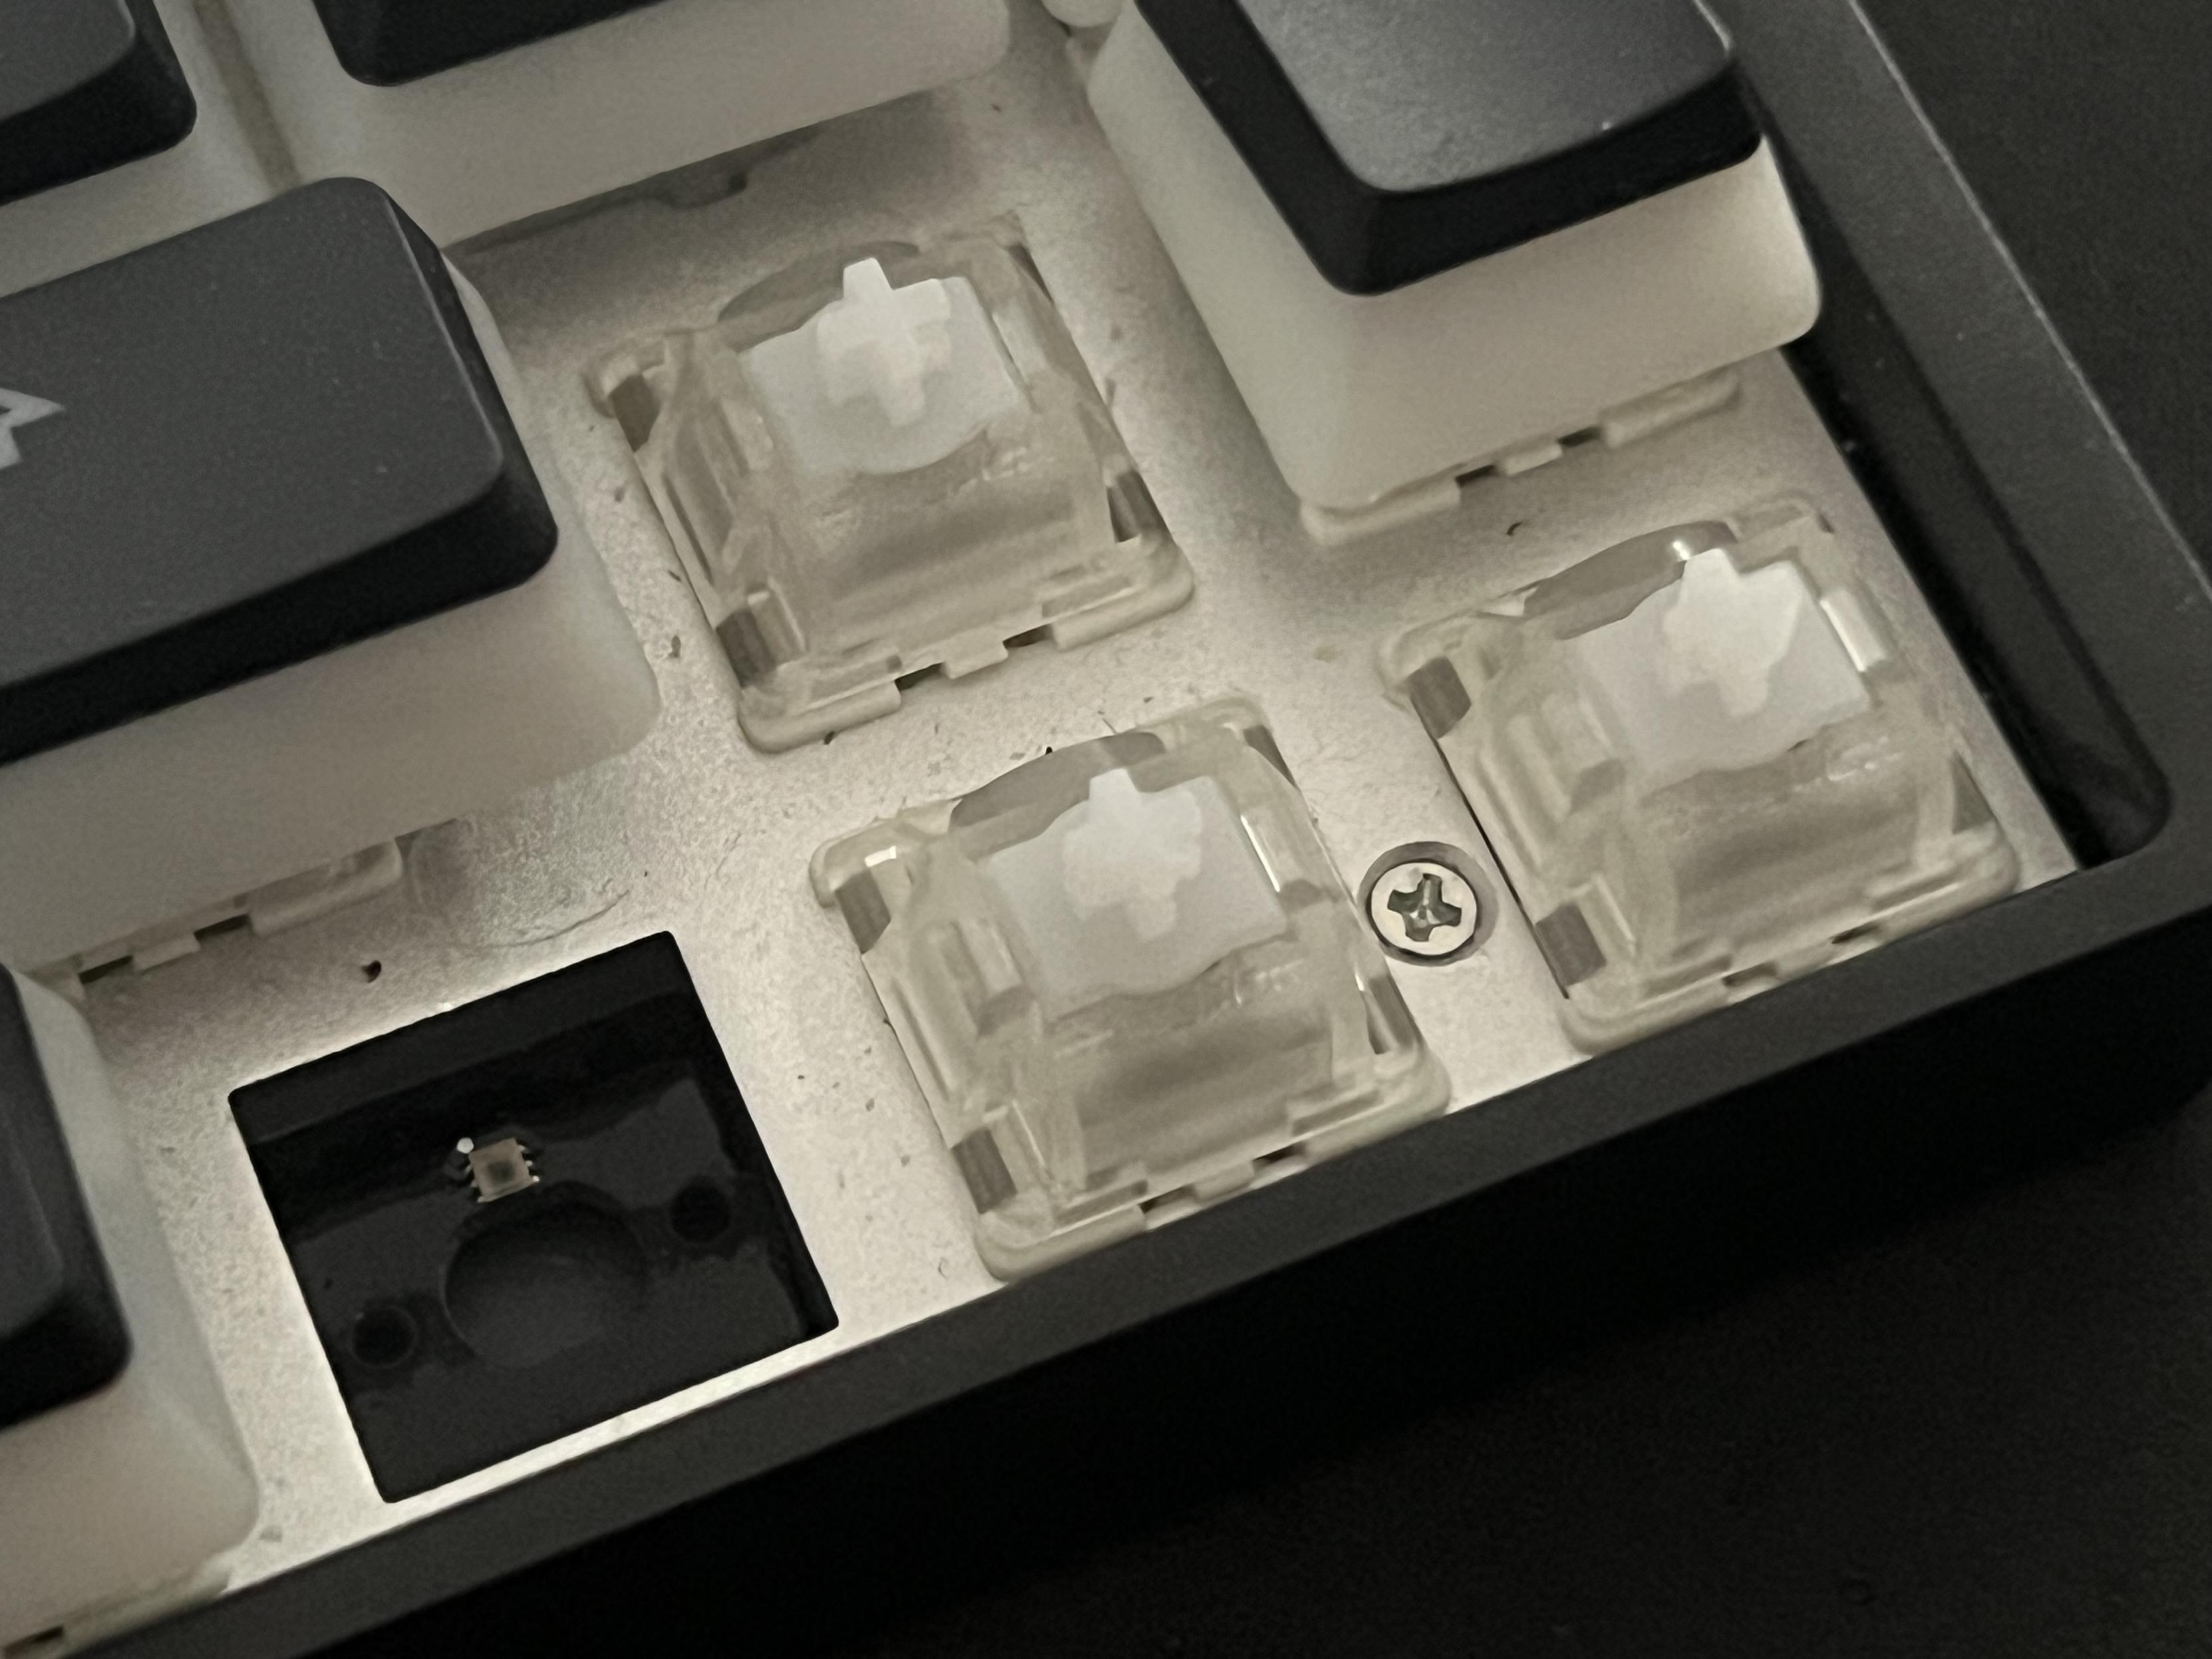
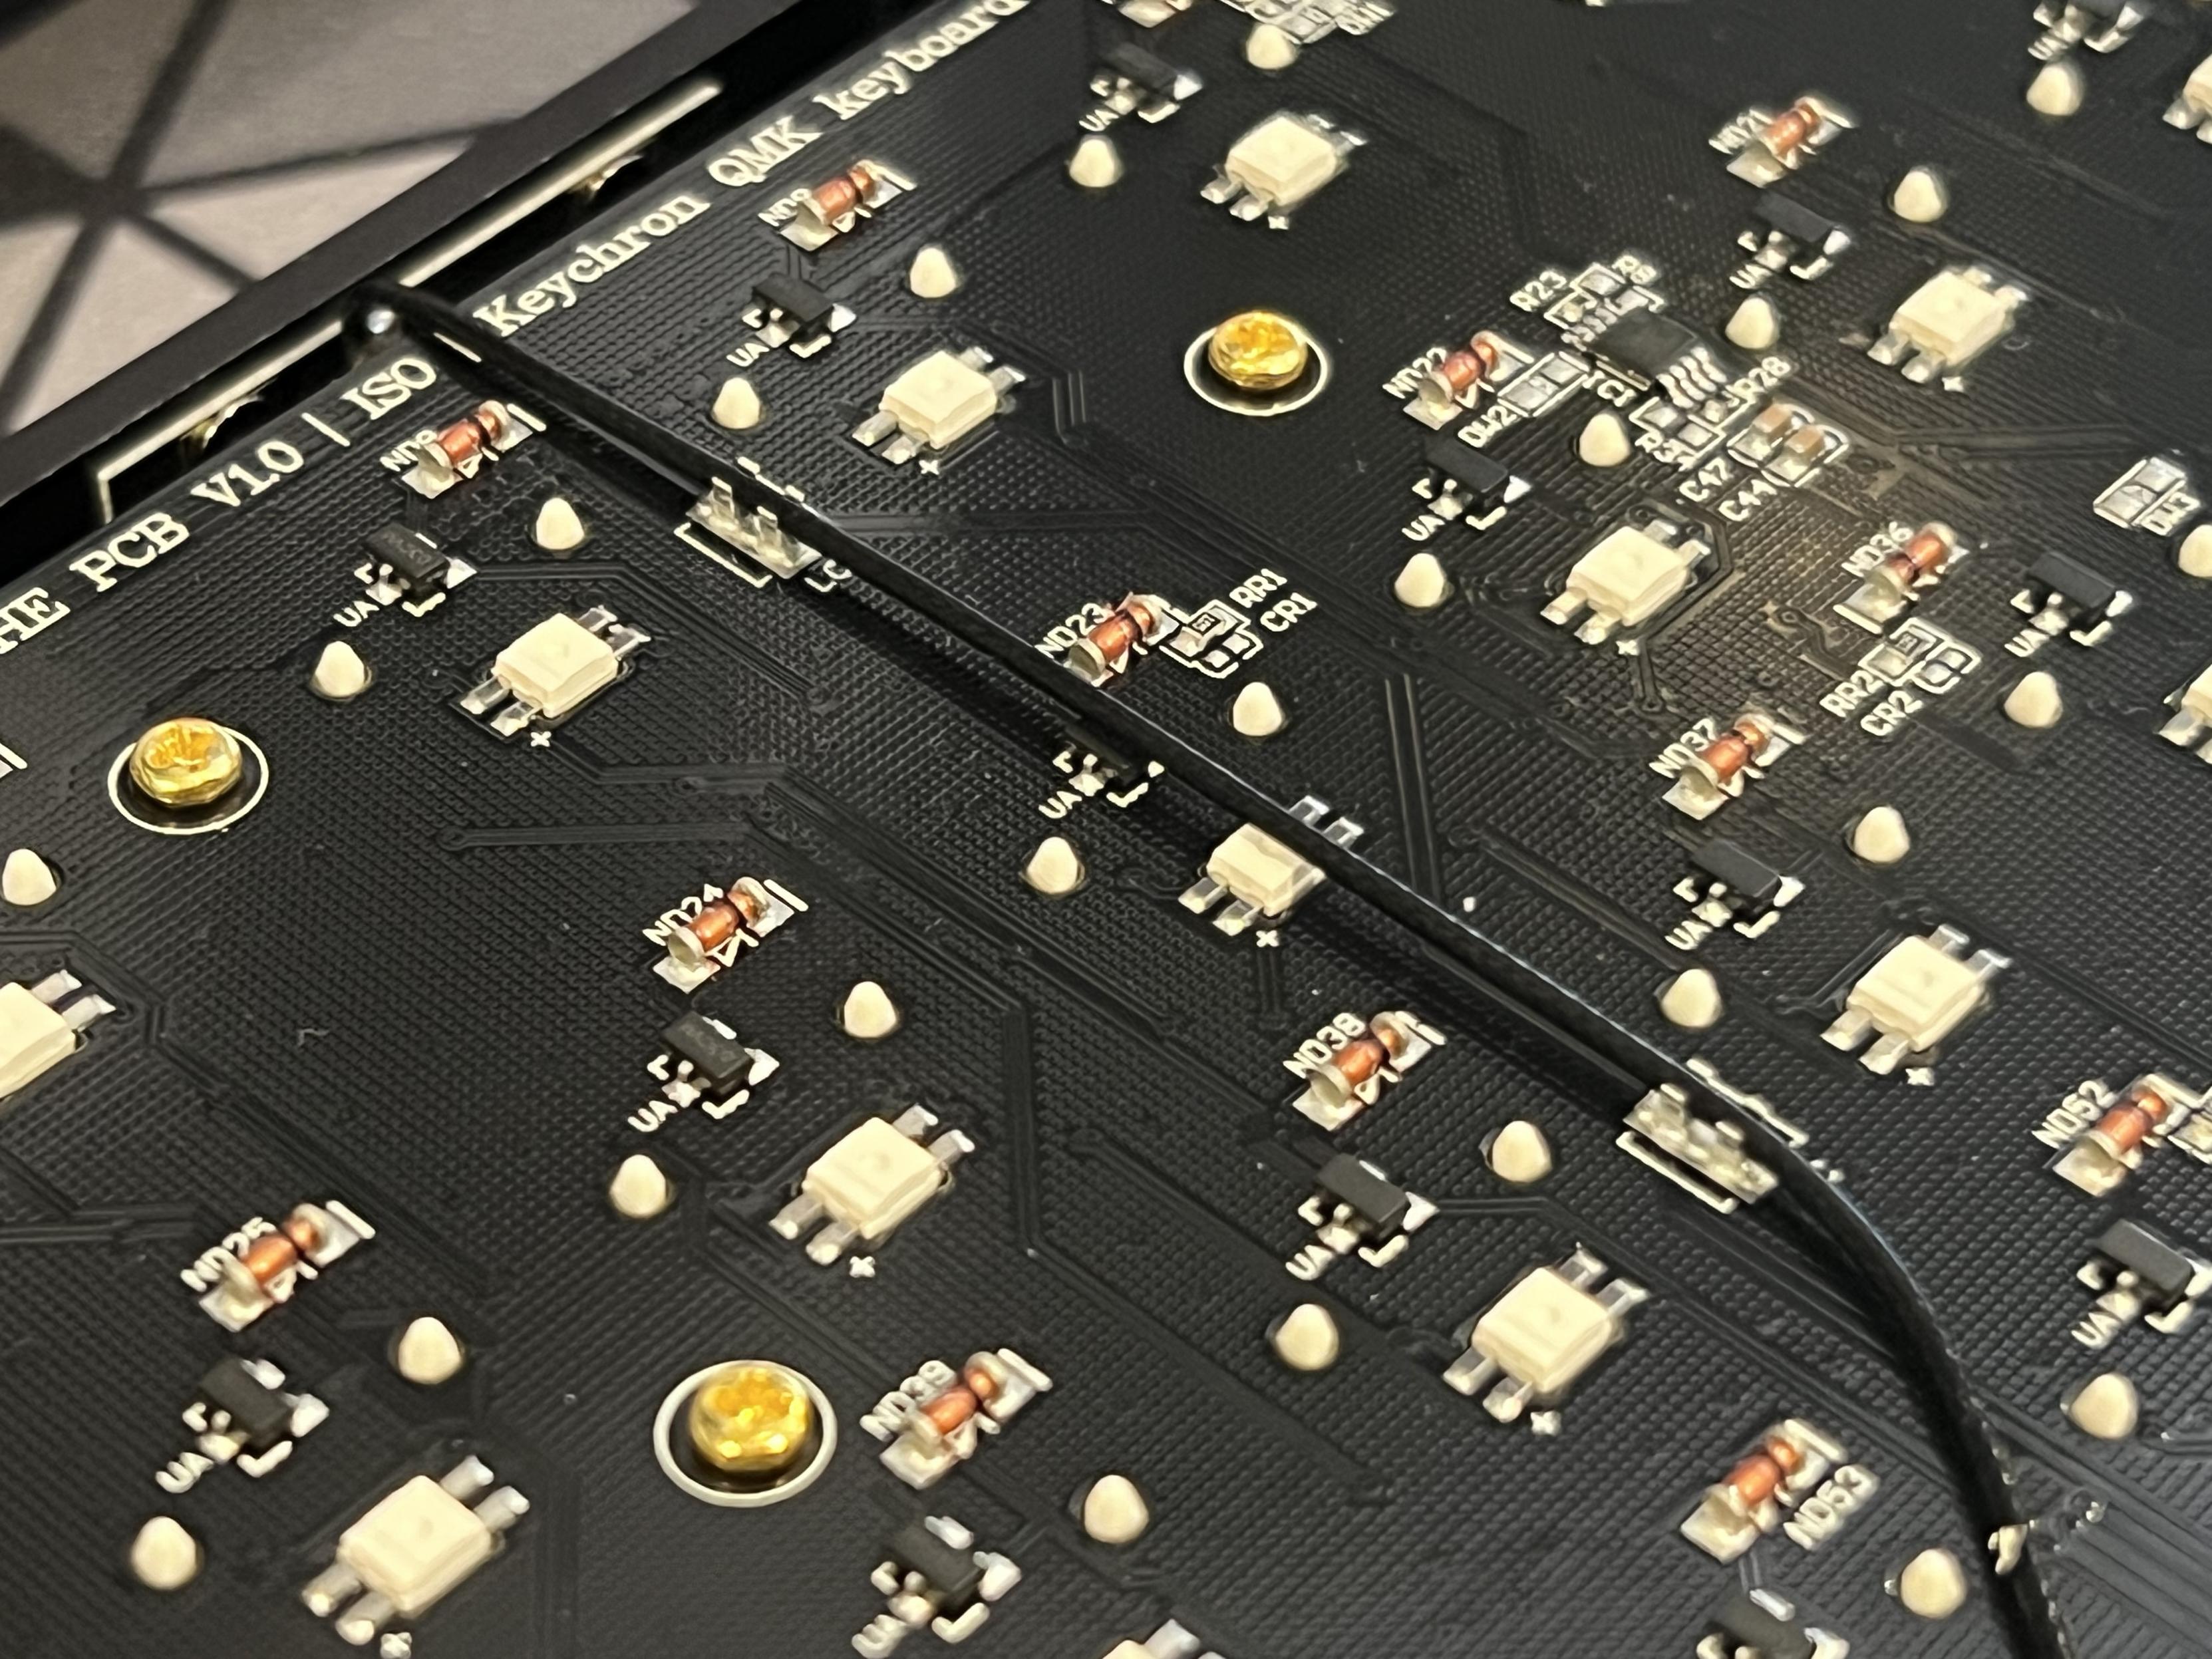
Snags aside, pulling apart the Q1 HE reveals a PCB of dizzying complexity, with discrete SOT23 hall-effect sensors for every key. This is a far cry from the KB65HE in which I misidentified a capacitor as the hall-effect sensor, and I still can’t figure out where the hall-effect sensor actually is in that board!
Overall
Despite wanting the glorious shell white version of this keyboard very much, the clean black and white keycaps with their gentle, rounded and uncomplicated profiles have very much won me over. Since there’s no colour to clash, they look cracking with a subtle underlight. The keyboard itself is rock solid, or at least it was before I broke off the wireless antenna while taking it apart.
For a ready to go ISO mechanical keyboard the Q1 HE is awesome and will no doubt be my go-to for a while. There are downsides, though. The relatively steep £213 price for starters. While it’s relatively in-keeping with EndgameGear’s 65%, £140 KB65HE, it stands at about double one of my other firm favourites- the Epomaker Galaxy 80. In my experience you can expect better attention to detail and more consistent quality from Keychron and, of course, this is a hall-effect board.
And that brings me back to the hall-effect features. Tuning the sensitivity of your keys is a great feature, but the gamepad functions aren’t quite there, and one-key-multiple-functions could use some work too. You’re also stuck with linear switches of various weights, so if tactile or clicky are your thing then this board is a dead end. At least for now.
Buy Q1 HE if you’re interested in hall-effect, love linear switches, and want a rock solid, beautiful, ISO!!! mechanical keyboard. Or buy if you want a board like the Q1 Max ISO in the awesome black/white only available to the HE version.
While configurable sensitivity and rapid trigger both work well, perhaps wait if you’re keen on using hall-effect for gamepad emulation- Q1 HE has potential, but there are still some quirks to work out.
You can grab Q1 HE in delicious ISO UK flavour from Keychron for £213.