Gravastar Mercury X Gaming Mouse – Review & Repaint
Two things struck me as I opened Gravastar’s new Mercury X– the weight, or lack thereof, and an overwhelming urge to paint it. I must paint it!
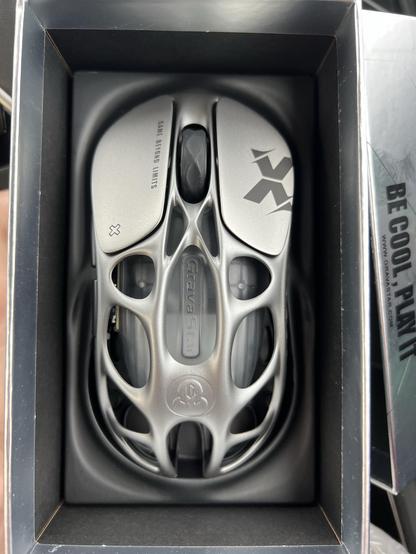
Who dis! New ultralight mouse.
In hindsight the weight should have been expected, but counter-intuitively when I handle something like the Mercury X – which looks quite substantial despite being clearly engineered to be ultralight – I expect it to have some heft. The top of the mouse is very clearly metal, cold to the touch with no give whatsoever. Yet the lack of heft was still surprising. It turns out that Gravatar’s organic, sweeping metal design is all somewhere between artifice and ingenious.
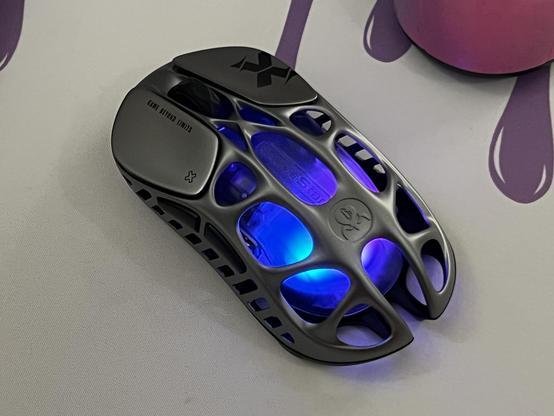
Glowy!
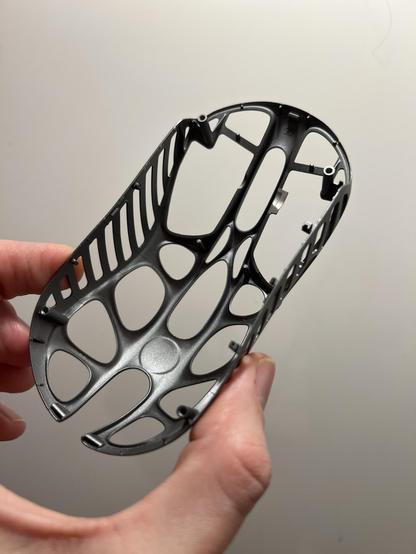
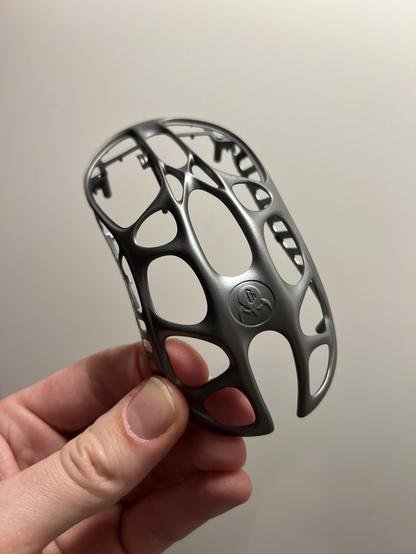
Why? It wasn’t until I took it apart (for painting, obviously) that the tricks revealed themselves. The whole top half of the Mercury X seems to be stamped out of 0.8mm sheet magnesium alloy. Any appearance of thickness from above is simply that metal forming a C-shaped curve, allowing it to be incredibly strong while contributing laughably little to the weight of the mouse. When separated (via eight screws, albeit two of them are securing the plastic inner shell!) from the plastic base of the mouse, it loses some of its rigidity making it clear how the whole is greater than the sum of its parts.
Removing the outer shell reveals it to be stamped out of flat sheet material to give all the impression of thickness with none of the weight.
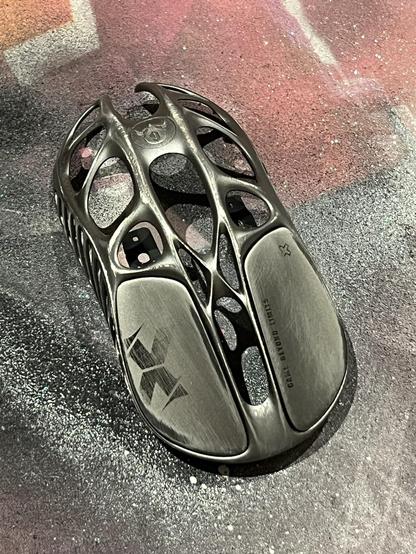
Out of the box the Mercury X was a really nice matte silver dubbed “Interstellar Silver” (also available in Galaxy Black), but this is marred by no less than two different X designs on the mouse buttons, some text and an embossed Gravastar logo. The internal plastic shell- which hides all the gooey innards- has another Gravastar text logo across the top, and then there’s a weirdly misaligned logo on the bottom. With three different styles of X on display there’s definitely a problem with brand cohesion, though it could be argued that one of those X’s is a plus since it shows up on the previous Mercury M range. Either way… I have paint… I can fix this!
Making it custom, because yolo
I know, I know, customising an embargoed review sample – Gravastar graciously supplied it to me for review, not to repaint – is madness, but I couldn’t stop myself!
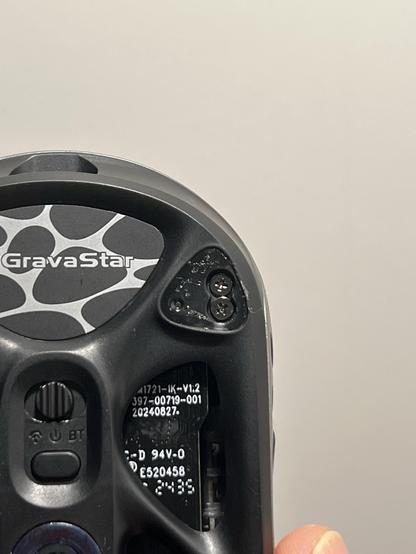
The screws are under the glides and these are so small they’re easy to lever off and replace without totally ruining them.
Disassembly, for once, was easy enough. The small glides on the Mercury X were easy to lever away with a fingernail and came off without being damaged, and stick back on – if you’re careful to keep them clean – without any hassle. Underneath the glides were six screws with two each under the rear glides. All of these must be removed to get the top off, in addition to two screws under the label which can also be peeled away pretty easily (and thrown away… I don’t think the serial number will do much good if you’ve painted it!). The screws fix into both plastic and metal with different threads – slightly larger threads for plastic, and much tighter threads for metal – but the screws otherwise look the same so be careful!
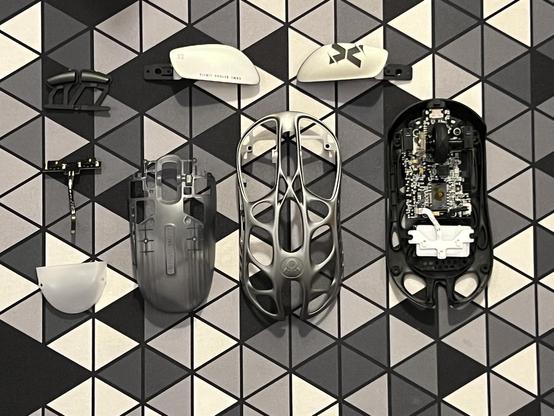
Complete disassembly! This was refreshingly straight forward, despite the eight screws.
Once removed the metal top shell comes off along with an inner plastic shell, pinned to the top by the buttons. Two more screws release the buttons and removing a flat-flex ribbon cable for the side button board releases the top shell fully from the base. I opted to remove the buttons and separate the inner and outer shells so I could paint them both separately.
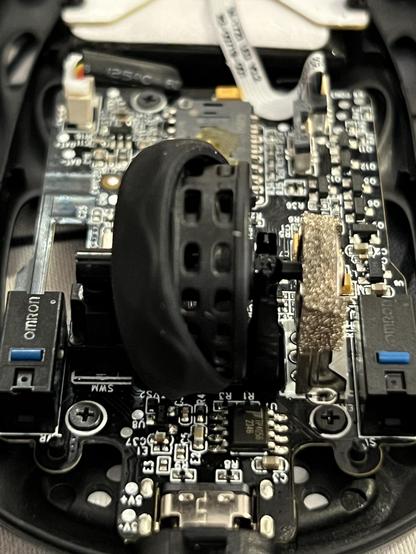
Even the mouse wheel is optimised for lightness!
Inside the PCB isn’t small, but relatively snug to its components. The mouse wheel is also optimised for lightness, peeking under the rubber grip reveals holes all around its circumference. Nonetheless the base, which also houses the battery, makes up a majority of the weight. Some small weight optimisations could be made, if you’re really going for lightness, by removing the RGB board (three RGB LEDs on a little white daughter-board) and the diffuser that sits above it. Though the LEDs supply a variety of status information, from Bluetooth state to different colours indicating the mouse DPI setting so you’ll probably want them.
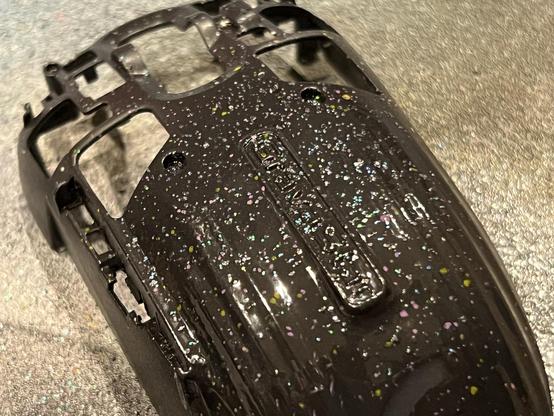
Paint attempt one did not go to plan, I rushed the job and dented some of the paintwork. I also hand cut a G stencil out of masking tape. It looks trash!
The glitter shine through effect is awesome though.
I opted to remove the diffuser and instead black out the outer shell with acrylic spraypaint, save for a stencilled G (for Gadgetoid not Gravastar but… well maybe both) logo which would light up. By some happy accident (read: I decided to add glitter for a basic galaxy effect on the blackout interior) I ended up with tiny pin-pricks of illumination where the bright internal lights shine through the glitter specks in the black paint. It’s a great look and prompted me to remove the (really badly stencilled with hand-cut masking tape because my Cricut login vanished?) G in favour of keeping the inside as black as possible. What light leaks through looks like the glow of an insect and fits well with the painted outer shell.
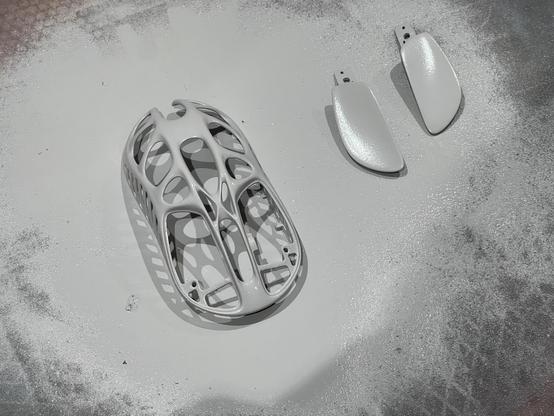
For my second shot I filled buffed out the embossed logo on the back, resprayed and left it overnight to partially cure.
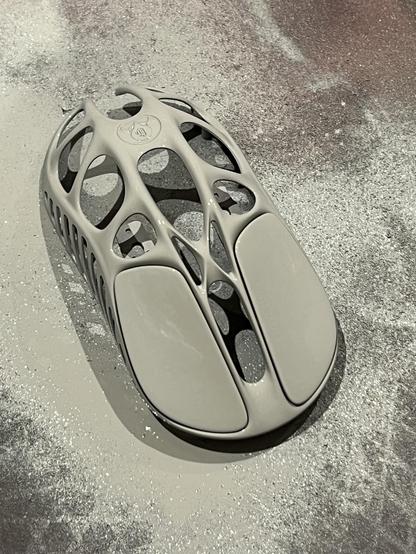
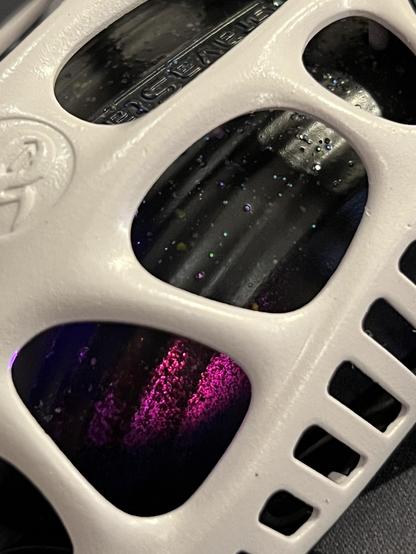
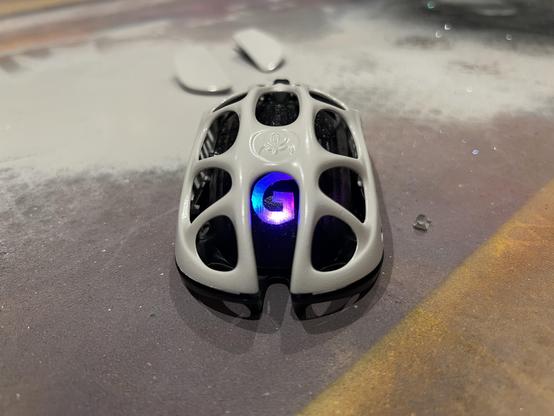
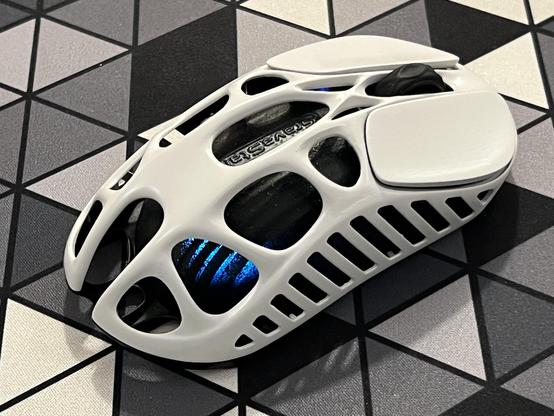
For the outer shell I hit it with “marble” Montana Gold spraypaint, which is a very pleasing white with pretty decent coverage. I rushed my first spray efforts and found my fingernails made dents in the soft, uncured acrylic paint. For my second attempt I sanded as liberally as I could, and also buffed out the Gravastar robot logo to preserve the organic look of the mouse. I hit it with white – again – and let it cure overnight. The results are absolutely stunning. While there are imperfections (and some dust and nonsense that got in from resting the mouse directly on my messy, overused painting cardboard) they are far more visible on camera than to the naked eye.
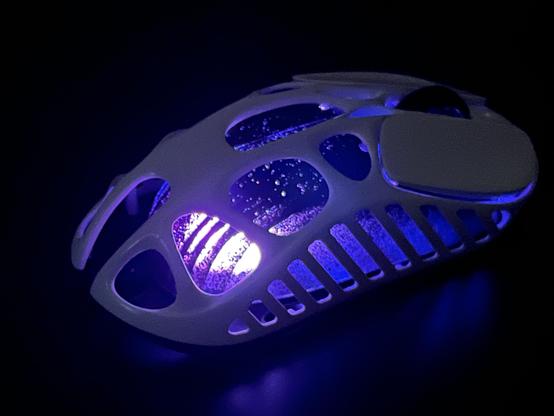
The final paint looks amazing, pristine white, branding toned right down, and a subtle glow-through of the inner shell like some kind of alien creature or insect.
Reassembling the mouse is a little tricky since the order of operations is easy to mess up- I did so twice. The side button PCB must be installed into the inner shell, the side buttons into the outer shell, and the two shells carefully nestled together – there are some locating pegs to help. The mouse buttons go in next, hooking through both shells and securing with a screw each. Finally the bottom fits on and very careful attention must be paid to which screws go where. The outer-most screw holes are the metal shell, and need the finer thread screws, and the inner-most ones (including the ones that were under the label) need the coarser plastic screws. You’ll know if you’ve put a metal screw into a plastic hole since it’ll keep turning and never quite tighten. I re-used the slides I peeled off- I actually removed and replaced them a couple of times – and they’re absolutely fine. Apart from a little complexity this is definitely a very forgiving mouse to disassemble and I’d love to customise some more (assuming this paint holds up).
And the final spray in the dark showing the much reduced glow through, quite tricky to catch on camera!
So, uh, what about the actual mouse?
Despite multiple disassembly and reassembly efforts the Mercury X is still great. The ventilated metal top keeps it cool to the touch, though it isn’t the most comfortable thing to hold. As it happens, I was having trouble with an EndgameGear mouse which had become frustratingly tacky, sticking to the palm of my hand in an unpleasant way- that’s what prompted me to paint the EndgameGear (which I’ve now sanded down for a repaint) and led to my escapades with this mouse, too. Suffice to say, it’s a godsend to have a mouse that’s not only not sticky but doesn’t have enough surface area to ever be sticky.
The diminutive design also means it has few contact points with a desk, and little weight to exacerbate friction, so even with the “Remove Film” coating over the slides I could blow it across my desk mat with ease.
By default the Mercury X is configured with a whopping 6 DPI stages: 800, 1200, 1600, 2400, 3200 and 6400. These flash the internal LEDs either Red, Blue, Green, Yellow, Teal or Magenta to indicate which mode has been selected and you’ll probably be hard pressed to remember so many. I prefer switching this down to two modes – easy even on macOS via controlhub.top – the web-based configuration software – with a modest 800 and 1600 DPI options.
Speaking of the software, it’s hit and miss. There are a few untranslated parts of the UI, and you will need Chrome or Chromium to use it, but it does give a zero-install means to configure the mouse buttons, DPI settings, macros and lights. You can even reduce the mouse-button debounce time and dropping down from 8ms to 1ms seems – at least from a quick test – fine. If you prefer just a single DPI option you can even rebind the DPI loop button to something else… though you’ll have to upend your mouse to use it, so that would be of rather limited utility. You cannot rebind the mouse wheel, though Left/Right/Middle click and the side buttons are all fair game.
The lights have six modes – Rainbow, Single Colour Breath, Fixed Colour, Neon, Rainbow Breath and Fixed Rainbow. Most of these are self explanatory but I’m not entirely sure what Neon does and Fixed Rainbow (albeit I’ve now repainted the mouse which messes things up) does not look very rainbowy. You can also opt to turn off the lights while the mouse is moving, preserving battery life but giving a little pulse of light when the mouse is not in use. Lights and overall mouse sleep also have timeout options from 10 seconds up to 15 minutes – 10sec, 30sec, 1min, 2min, 5min, 10min and 15min – but default to the most (battery) conservative setting.
Lift-off-distance (height the mouse works above a surface) can be changed to either .7mm, 1mm or 2mm with 1mm being the default. There’s also an angle snap option, which quantizes your mouse movements to straight lines. Turning it on makes a noticeable difference when painting quick, horizontal lines in Affinity Photo.
It should be noted that I’m doing all this on macOS and it’s refreshing to have a “gaming” mouse with software that I don’t have to run in Qemu using UTM.
On the downside… The Mercury X – despite being largely hollow – has nowhere to store the 2.4Ghz dongle.
Overall
The Mercury X is the mouse I’ve been looking for, lightweight, Bluetooth, compatible with macOS and – more importantly – cool to the touch for long sessions of… regrettably… work, not gaming. It’s also much easier to disassemble and modify than mice with larger, easy to damage glides and as an added bonus even comes with a spare set of glides in the box. It also comes with grip tape, but I’ve never had a problem with slippery mice and so it remains in the box.
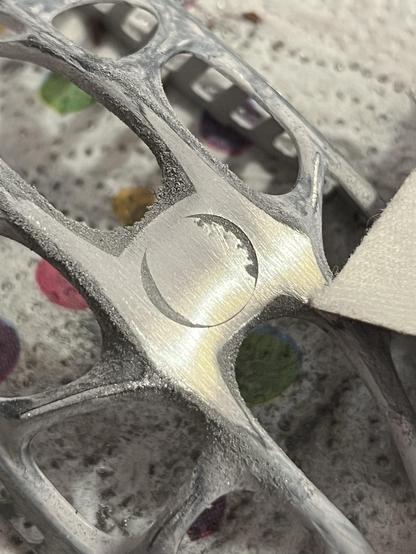
There’s just way too much naff branding on this thing though, so let’s hit it with some sandpaper…
I am very, very happy with my painting and debranding efforts and feel Gravastar could find a better middle ground between their signature wild designs and something a little cleaner. Solid black and white versions of the Mercury X – for example – would be great. There’s certainly no need for Gravastar to be written on the mouse in multiple places, or anywhere at all really. I’ve complained before about Soundcore’s portable speakers lacking the confidence to keep their branding subtle, and Gravastar have very much the same problem. A Gravastar product should be obvious from its unique design, it doesn’t need to be spelled out.
If you want to grab a Mercury X you can get it directly from Gravastar for $109.95. You should look at the Mercury K1 while you’re there, too. They’d make a fantastic pair if you’re into the alien, organic design.
